Change the Computer Name of the Primary Server on the Primary Server
The following procedure helps ensure that the primary server and member servers in an Arcserve domain can communicate after you change the computer name of the primary server.
You must change the computer name of the primary server before you complete these steps.
Note: You can use this procedure when you change the computer name of a stand-alone server.
If you are using only Microsoft SQL Server 2019 Express for Arcserve Backup without any other SQL instance installed, you may also need to:
- Install Microsoft SQL Server Management Studio Express (SSMSE) onto this machine, if it is not already installed. SSMSE is a graphical tool for managing SQL Server 2019 Express Edition, and for managing instances of the SQL Server Database Engine created by any edition of SQL Server. For more information, see Microsoft SQL Server Management Studio Express on the Microsoft Download Center website.
- Be familiar with the sqlcmd utility, which is used to enter Transact-SQL statements, system procedures, and script files at the command prompt. For more information, see sqlcmd Utility on the Microsoft Developer Network website.
For more information about renaming systems hosting Microsoft SQL Server databases, see the following topics on the Microsoft Developer Network website:
- Installing SQL Server
- Renaming a Server
Follow these steps:
- Restart the target system to complete the Windows computer name change process.
- Log into the primary server.
- Note: Do not open the Manager Console or log into Arcserve Backup.
- Open the Windows Command Line and change the directory to the following directory:
- Execute the following command, to stop all Arcserve services:
- All Arcserve services stop.
- Note: Do not close the Windows Command Line.
- Using a text editing application, such as Notepad, open the discovery.cfg configuration file located in the following directory on the primary server:
- In the PRIMARY field, change the name of the primary server as required for your environment.
- Close the file and save your changes.
- For more information, see Discovery.cfg Configuration File.
- From the Windows Command Line that you opened earlier, execute the following command to start all Arcserve services:
- All Arcserve services start.
- Note: Do not close the Windows Command Line.
- From the Windows Start menu, select All Programs, Arcserve, Arcserve Backup, and click Server Configuration Wizard.
- The Server Configuration Wizard opens and the Select Options dialog appears.
- From the Select Options dialog, click the Select Database option, and click Next.
- The Check caroot dialog opens.
- Click Next.
- The System Account dialog opens.
- Complete the following fields on the System Account dialog and click Next.
- User Name--Specify the Windows user name required to log into the primary server.
- Domain--Specify the Windows domain name or host name of the new primary server.
- Password--Specify the password for the Windows user name required to log into the primary server.
- From the Select Database Options dialog, complete the fields and follow the prompts, as required, for your current database installation and click Next.
- The subsequent dialogs that open will vary, based on whether you are running Microsoft SQL Server or Microsoft SQL Server 2019 Express in your current environment.
-
Note: For the Select Database option, if the server is a Central Primary Server in a Global Dashboard domain, and the new selected database is Microsoft SQL Server Express (which are not supported by a Global Dashboard Central Primary Server), consider exporting and retaining the Global Dashboard information prior changing the database. After the Select Database operation is completed, the Global Dashboard information will be lost because the server will no longer function as a Central Primary Server. If you want to retain the grouping configuration and the registered branch information, you need to export this Global Dashboard information to a temporary location before performing the Select Database operation. For more information about exporting and importing Global Dashboard information, see the Dashboard User Guide.
- After the Server Configuration Wizard completes the updates, click Finish.
- From the Windows Command Line that you opened earlier, execute the following commands to stop and restart all Arcserve services:
- All Arcserve services stop and restart. The primary server functions using the new computer name.
- Note: Do not close the Windows Command Line.
- You must now create equivalence for the caroot user account.
- From the Windows Command Line, execute the ca_auth command using the following syntax:
- Note: Do not include angle brackets <> with your arguments.
- Equivalence is applied to the caroot user account.
- If your Arcserve domain consists of member servers, complete the steps in Change the Computer Name of the Primary Server on a Member Server.
- If you are running Microsoft SQL Server 2019 Express as the Arcserve Backup database, note that SQL Express is installed as a named instance. As described in Microsoft document MS143799, execute the following commands using SSMSE to link the named instance to the new computer name:
- Run the Microsoft SQL Agent Account Configuration utility to update the ODBC communication settings if any of the following conditions are met:
- The server is the primary server with a locally installed Arcserve Backup database,
- The server is a standalone server with a locally installed Arcserve Backup database,
- The server is the primary server, a standalone server, or a member server AND Arcserve Backup database or the Agent for Microsoft SQL Server is installed on the same machine.
- To start the Microsoft SQL Agent Account Configuration utility, click Start on the Windows Taskbar, choose All Programs, Arcserve, Arcserve Backupp, and Microsoft SQL Agent Account Configuration.
- After you start the utility, follow the prompts and accept all settings.
- Verify the renaming operation.
- To verify the renaming operation has successfully completed, select information from either @@servername or sys.servers. The @@servername function returns the new name, and sys.servers table shows the new name.
- Note: After a computer has been renamed, any connections that used the old computer name must connect using the new name.
- Release all Arcserve Backup licenses registered to the former primary server.
- Note: For more information, see Release Licenses from Servers.
- Update the Arcserve Backup System account. To do this, open the Arcserve Backup Manager Console and then open the Server Admin Manager.
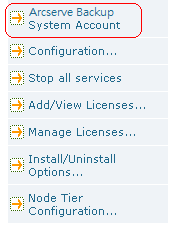
- Select the Arcserve Backup server and click Arcserve Backup System Account as illustrated by the following:
- The Arcserve Backup System Account dialog opens.
- Complete the fields that follow:
- Microsoft Windows User Account
- Password
- Microsoft Windows Domain
- Click OK.
- Open the Job Status Manager and complete the following tasks:
- Delete and re-create the Database Pruning Job.
- Modify the Database Protection Job and any other backup jobs that are set to run on the renamed server, to update the Staging and Destination locations.
- Note: For more information, see Modify or Create a Custom Database Protection Job.
Note: For more information, see Re-create the Arcserve Backup Database Pruning Job.
- Perform a full backup of the Arcserve Backup database.
%ARCSERVE_HOME%
cstop
%ARCSERVE_HOME%\config\discovery.cfg
Important! Do not modify the Arcserve Domain Name in the discovery.cfg configuration file. When you change the Arcserve Domain Name in the discovery.cfg configuration file, the password for the caroot account is deleted. Use the discovery.cfg configuration file only for the purposes of changing the host name of the primary server, a member server, and a stand-alone server.
cstart
Important! You must specify the caroot password to complete this task.
Important! The Server Configuration Wizard prompts you to overwrite the existing Arcserve_DB instance, and by default, the option is enabled. To retain your previous data, such as job history, activity logs, and so on, you must clear the checkmark from the Overwrite the existing "Arcserve_DB" instance option.
cstop
cstart
ca_auth -cahost <new primary server host name> -equiv add <user name> <new primary server host name> caroot caroot <password>
sp_dropserver <old_name\instancename>
GO
sp_addserver <new_name\instancename>,local
GO
Restart the SQL Server instance.