Upgrade Arcserve Backup from a Previous Release
You can upgrade Arcserve Backup on local or remote computers and on computers running Windows Server Core using the installation wizard. To upgrade an installation means to reinstall features or components to higher release or build number without uninstalling the older release. The upgrade process lets you retain most of your current settings and migrate the information stored in the previous Arcserve Backup database to the new database.
If you are currently using one of the following releases of Arcserve Backup, you can upgrade to this release from the following products:
- Arcserve Backup r18.0 for Windows--Includes the General Availability (GA) release and all of the latest service packs.
- Arcserve Backup r17.5 for Windows--Includes the General Availability (GA) release and all of the latest service packs.
Important! If you want to upgrade from previous releases of Arcserve Backup, you must uninstall the previous release and then install this release of Arcserve Backup. However, if you wish to retain the database information from your previous implementation, you must upgrade the previous implementation to Arcserve Backup r17.5/r17.5 SP1/r18.0 and then upgrade to the 19.0 release.
For more information about upgrading to this release, see Upgrade Considerations.
To upgrade Arcserve Backup from a previous release, follow these steps:
- Insert the Arcserve Backup installation media into your computer's optical drive.
- Note: If the Arcserve Backup installation wizard does not appear, run Setup.exe from the root directory on the installation media.
- From the right column on the product installation wizard, click Install.
- The Prerequisite Components page opens.
- To install the prerequisite components, click Install.
- Note: The Prerequisite Components page opens only if Setup does not detect the Arcserve Backup prerequisite components installed on the target computer.
- On the License Agreement dialog, accept the terms of the Licensing Agreement and complete the fields on the Customer and Information dialog.
- Follow the prompts on the subsequent pages and specify all required information.
- The following list describes page-specific information about upgrading Arcserve Backup from a previous release.
- Upgrade from a previous release to an Arcserve Primary Server on a remote system.
- Silent upgrade from a previous release to an Arcserve Primary Server on a system using a response file.
- To install a primary server, you must install the Arcserve Backup Central Management Option on the primary server.
- To install member servers, the installation wizard must be able to detect the Arcserve Backup domain name and primary server name in your network. Therefore, you should complete at least one primary server installation before you perform member server installations.
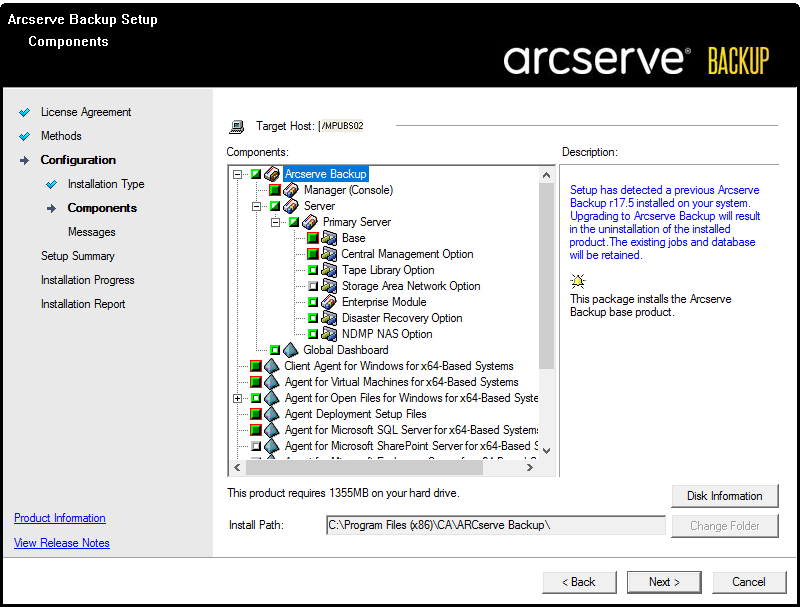
- When you click the Arcserve Backup object or the Server object on the Select Products dialog, the installation wizard specifies the default Stand-alone Server installation components, regardless of the installation type that you specified on the Select Install/Upgrade Type dialog. To ensure that you are installing the correct components, expand the Server object, expand the object for the type of Arcserve Backup server that you want to install, and check the check boxes corresponding to the components that you want to install.
- Agent Deployment is a wizard-like application that lets you install or upgrade Arcserve Backup agents on multiple remote systems, after you install Arcserve Backup. To support this capability, Setup must copy Setup source files to the Arcserve Backup server. To copy the contents of the installation media to the Arcserve Backup server, you must select Agent Deployment on the Components dialog. When you select Agent Deployment, the length of time required to install or upgrade Arcserve Backup increases significantly.
- If you are performing a remote installation or a silent installation, do not install the Arcserve Backup Client Agent for Windows into the same directory as the Arcserve Backup base product.
- Global Dashboard can be installed on primary servers, stand-alone servers, and member servers. However, you cannot configure member servers to function as Central Primary Servers and Branch Primary Servers. For more information about Central Primary Servers and Branch Primary Servers, see Dashboard User Guide.
- On computers running Windows Server Core, you can install only the following Arcserve Backup products:
- Member Server and supported options
- Agent for Open Files
- Agent for Virtual Machines
- Client Agent for Windows
- Disaster Recovery Option
- The following diagram illustrates the default installation path for the Client Agent for Windows and Agent Deployment is specified:
- When you upgrade from Arcserve Backup 18.0 to 19.0, you must upgrade the Microsoft SQL Server 2019 Express Edition instance to the new Arcserve database. The instance gets upgraded during the installation of components.
- On Windows Server 2016 or later, upgrading from 18.0/17.5/17.5 SP1 will upgrade the default database to Microsoft SQL Server 2019 Express Edition. On Windows Server 2012/Windows 2012 R2, upgrading from Arcserve Backup 18.0/17.5 SP1/17.5 does not upgrade default database to SQL Server 2019 Express Edition.
- If you protect data that contains Unicode-based characters from East Asian languages (for example, JIS2004) you must enable SQL collation to ensure that Arcserve Backup can search and sort the data. To do this, click East Asian collation and then select a language from the drop-down list.
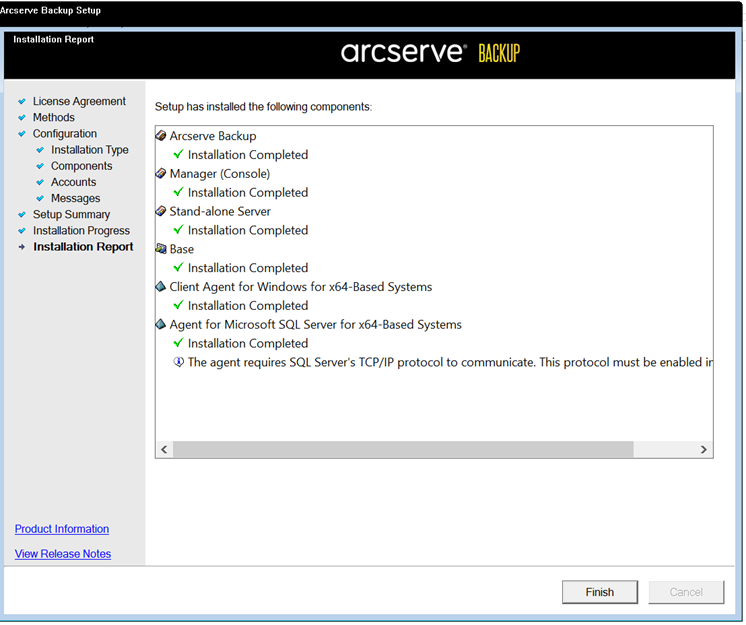
- On the Installation Report page, to complete the upgrade, click Finish.
- Arcserve Backup does not support recovering the Arcserve Backup database when the last backup was before you upgraded to this release. As a best practice, you should back up the Arcserve Backup as soon as possible after the upgrade is complete.
- You may be required to restart the server after the upgrade process is complete. This depends on whether all of the files, services, and registry settings have been updated on the operating system level.
- To ensure that all Arcserve Backup services start properly in a cluster-aware environment, you must execute the cstop and cstart scripts on the Arcserve Backup server before you open the Arcserve Backup Manager Console.
Methods page
For all other types of upgrades, select the option corresponding to the task that you want to perform.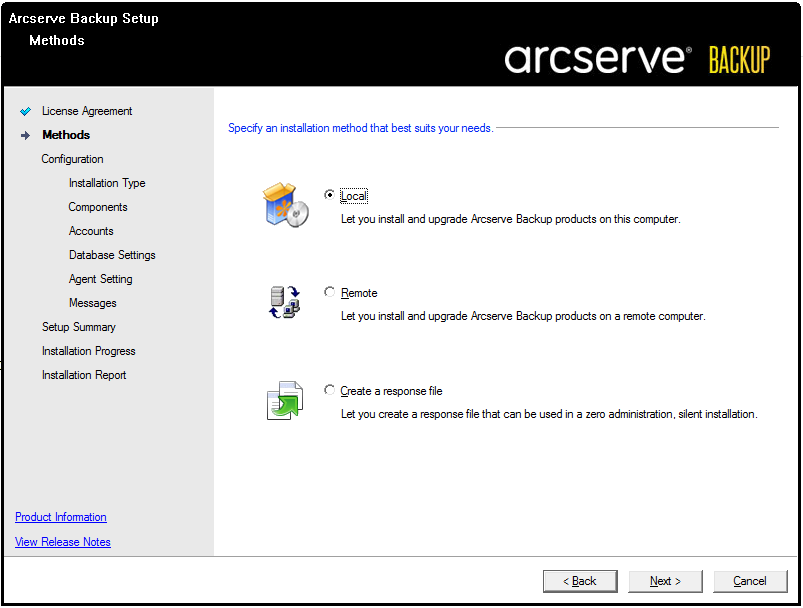
Installation Type page
Lets you specify an installation type. By default, the Arcserve Stand-alone Server option is selected and other options are disabled. Click Next to continue.
Components page
Lets you specify the Arcserve Backup components that you want to install on the target system.
Be aware of the following considerations:
Accounts page
If Setup detects a cluster-aware application running in your environment, and you want to install Arcserve Backup in the cluster-aware environment, check the Cluster Environment Installation option and specify the path where you want to install Arcserve Backup.
Note: Arcserve Backup server names and Arcserve Backup domain names cannot exceed 15 bytes. A name totaling 15 bytes equates to approximately 7 to 15 characters.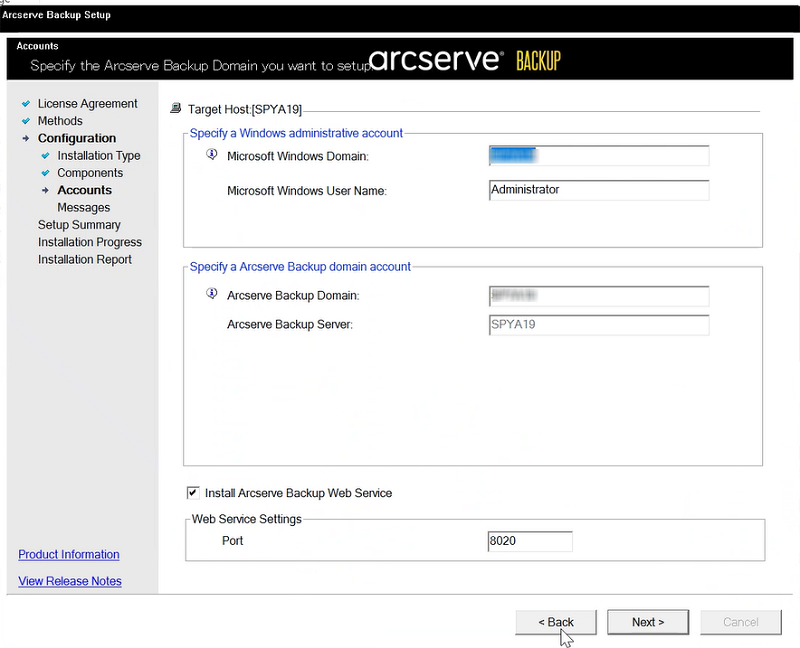
Database Settings page
Lets you configure the Arcserve Backup database.
After you specify a database application (Microsoft SQL Server or Microsoft SQL Server 2019 Express Edition) complete the required fields on this dialog.
When you click Next, the Arcserve Backup Setup dialog appears and prompts you to upgrade the Microsoft SQL Server 2019 Express Edition instance to the new Arcserve database. Click OK to upgrade and close the dialog.
Notes:

Messages page
After you review the messages in the Important Warning Messages dialog, you should attempt to resolve the problems at this time.
Setup Summary page
To modify the components that you want to install, click Back as often as necessary to return to the dialog containing the installation options that you want to change.
Installation Progress page
If any components you select require configuration, Setup displays the necessary configuration dialogs at the end of the installation. You can configure the component immediately or configure it later using Device Configuration or Enterprise Module Configuration. For example, if you are using a single-drive autoloader that requires configuration, Setup lets you start Device Configuration by double-clicking the message for it on the Install Summary page.
Be aware of the following limitations and considerations: