

|
|
|
During an interactive installation, many CA ARCserve Backup components require you to enter configuration information (for example, installation directory, user name, and password). During a silent installation, (a non-interactive installation) this information is read from a previously created response file. The default response file name is setup.icf, but can be renamed to suit your needs.
To create a silent installation response file
Browse to the \Install directory.
Double-click MasterSetup.exe to start MasterSetup, and click Next on the Welcome to CA ARCserve Backup dialog.
The following list describes dialog-specific information about creating a response file.
You must select Create a response file to create the response file.

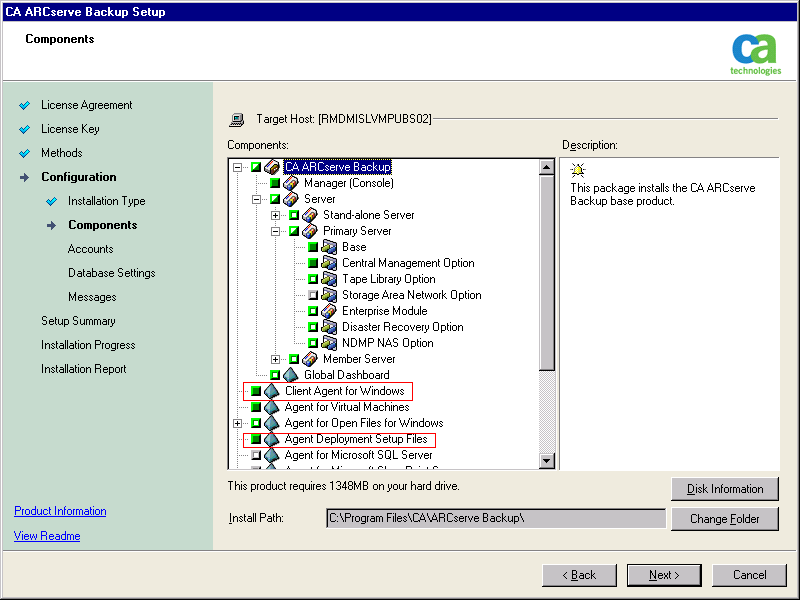
Lets you specify the CA ARCserve Backup components that you want to install on the target system.
Be aware of the following considerations:
- Member Server and supported options
- Agent for Open Files
- Agent for Virtual Machines
- Client Agent for Windows
- Disaster Recovery Option
The following diagram illustrates the default installation path for the Client Agent for Windows and Agent Deployment is specified:
CA ARCserve Backup domain names and CA ARCserve Backup server names cannot exceed 15 bytes. A name totaling 15 bytes equates to approximately 7 to 15 characters.
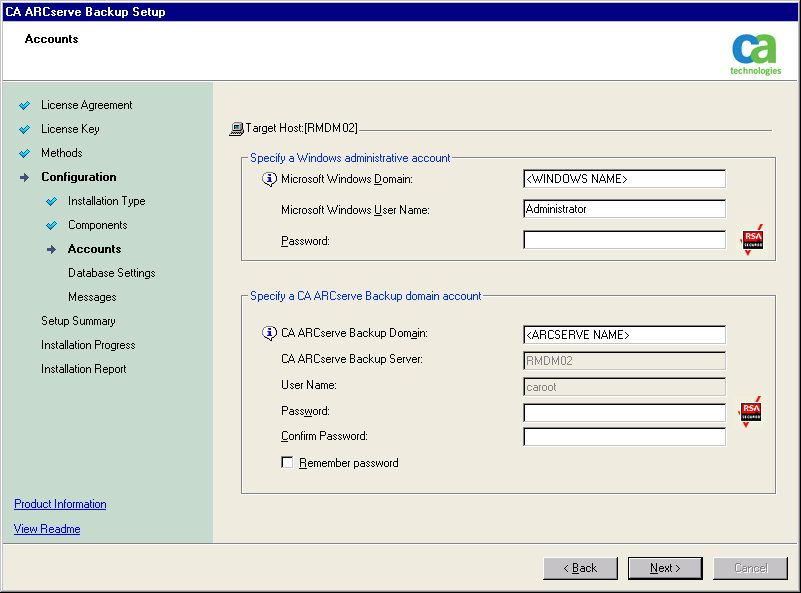
Note: If you do not retain the domain name from your previous installation, CA ARCserve Backup changes your previous caroot password to a blank password. You can change the blank password after the installation is complete.
The caroot password can consist of any combination of alphanumeric and special characters, but may not exceed 15 bytes. A password totaling 15 bytes equates to approximately 7 to 15 characters.
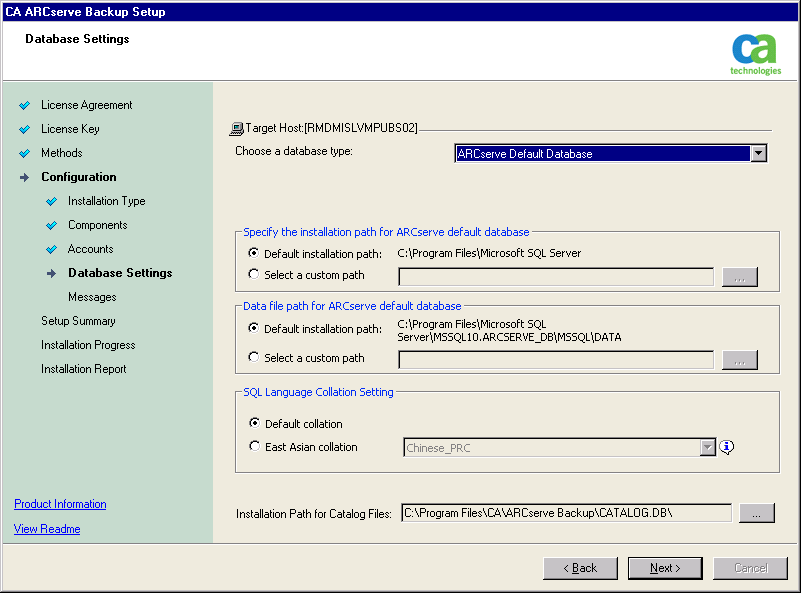
If you protect data that contains Unicode-based characters from East Asian languages (for example, JIS2004) you must enable SQL collation to ensure that you can search and sort the data. To do this, click Language Support Options on the SQL Server Express Instance dialog and follow the on-screen instructions to complete the configuration. (If you are hosting the CA ARCserve Backup database with Microsoft SQL Server, you click Language Support Options on the Select Database Installation Path dialog.)
To modify the components that you want to install, click Back as often as necessary to return to the dialog containing the installation options that you want to change.
To enter license keys, locate the components, agents, and options that you are installing, select the Use License Key option, and enter the license key for the component.
By default, CA ARCserve Backup saves the response file in the directory that follows.
C:\My Documents\Setup.icf
You can specify a different location by clicking the ellipsis button on the Setup Summary dialog.
To view full details about the required parameters, open the Windows Command Line and execute the following command:
mastersetup /?
Example: Execute a Response File
The following example describes the syntax for executing a response file. The response file is labeled setup.icf and is located in c:\temp.
mastersetup.exe /I:”c:\temp\setup.icf”
You can edit the setup.icf file to change the InstallScanEng setting from 1 to 0 to indicate that the Scan Engine should not be installed.
Note: You may have to restart the target system after the installation completes. To determine if you have to restart your machine, check the ProdWiz.log for a restart message.
For more information about using a response file to install CA ARCserve Backup, see Upgrade CA ARCserve Backup Agents Silently to the Current Release.
| Copyright © 2011 CA. All rights reserved. | Tell Technical Publications how we can improve this information |