How to Add a UNC path
This section provides information on how to add a UNC path in the Arcserve® Cloud Console.
Follow these steps:
- On the Sources screen, navigate to Add Source(s), and then click Add a UNC or NFS Path.
- The Add a UNC or NFS Path page appears.
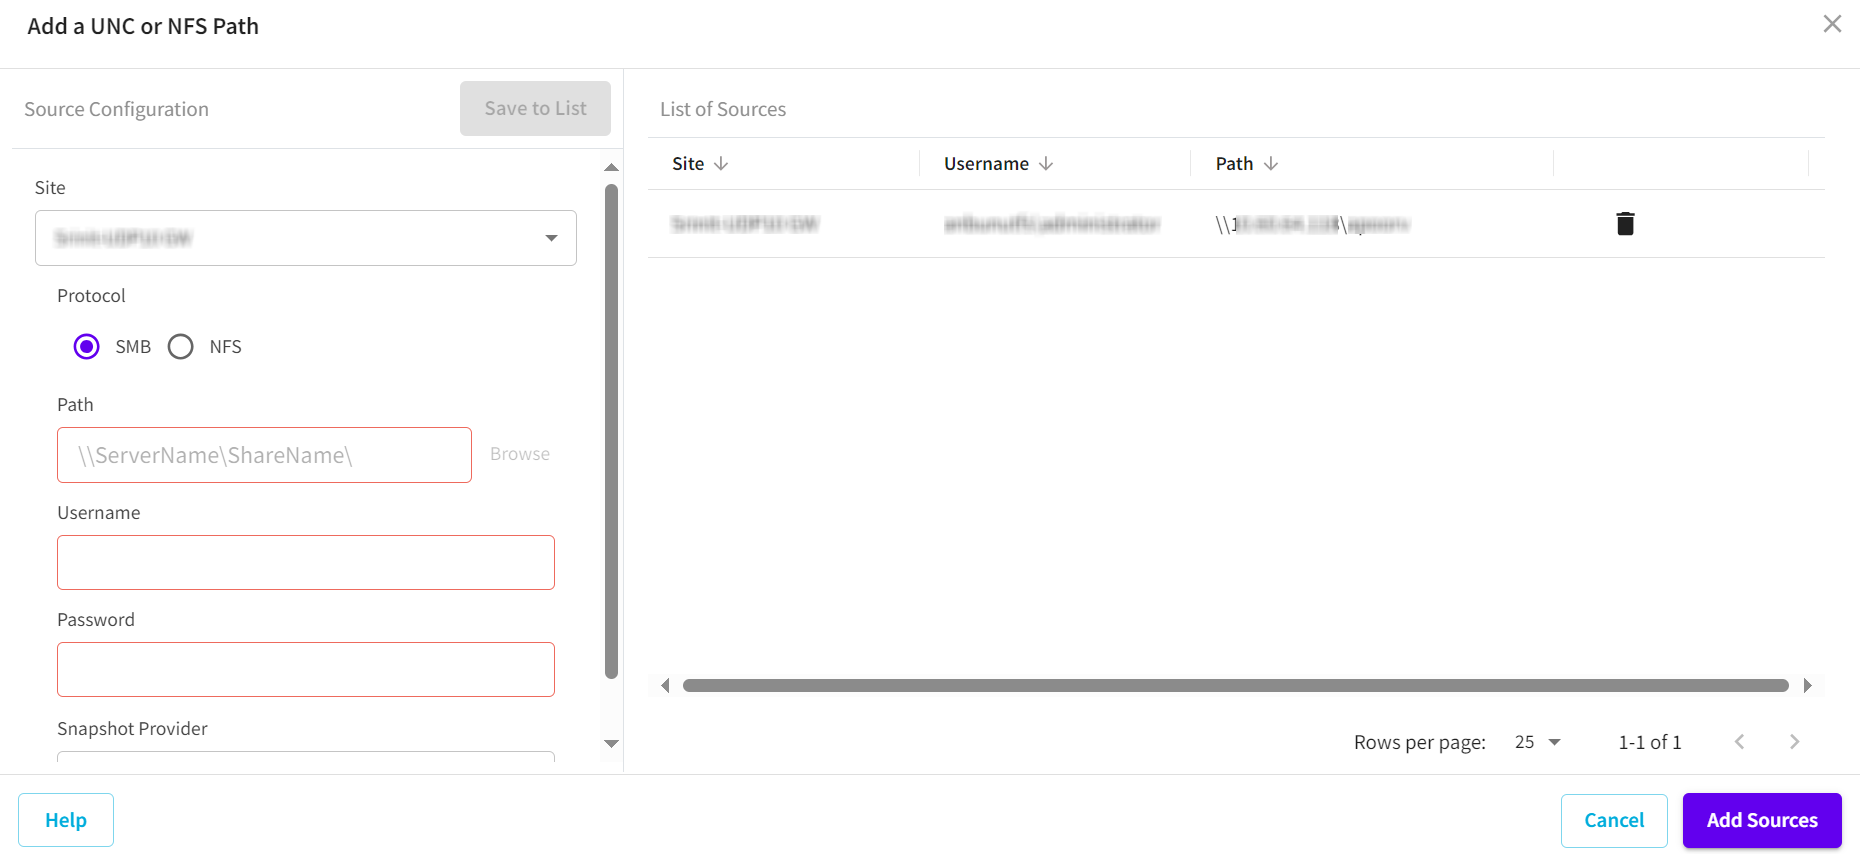
- From the Site drop-down list, select the required site.
- Select SMB as a protocol.
- From the Snapshot Provider drop-down list, select Nutanix Files.
- For Path, do one of the following:
- Enter the UNC path in the following format:
- \\servername\share
- Do the following:
- Type the server name in the following format:
- \\servername
- If the server name is valid, the Browse option gets enabled.
- Click Browse.
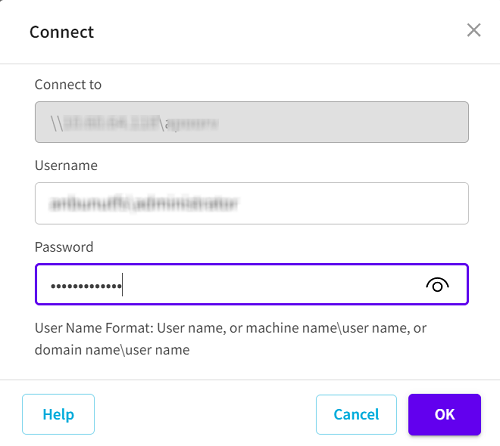
- The Connect dialog appears.
- Type the username and password as needed, and then click OK.
-
- On the Browse dialog, navigate to a shared directory where the files are saved and need to be backed-up, select the share, and then click Select.
- Notes:
- Arcserve Cloud Console does not support the backup of Nutanix Files UNC Share with a long directory path having multiple levels of folders.
- While providing Nutanix File share as a source for backup with Nutanix files as a snapshot provider, backups can be performed only at share level but not at sub-folder level.
- To get the UNC path, do the following:
- Log into the Nutanix Prism Central Console.
- Navigate to Files > File Servers.
- Click the file server name from the center pane.
- On the File Server dashboard, click the Shares & Exports tab.
- Under the Share/Export Path column, copy the UNC share path for the newly created share.
- For Backup Proxy, do one of the following:
- If backup proxy is already added, select the backup proxy from the Backup Proxy drop-down list.
- If the backup proxy is not added, perform the following steps:
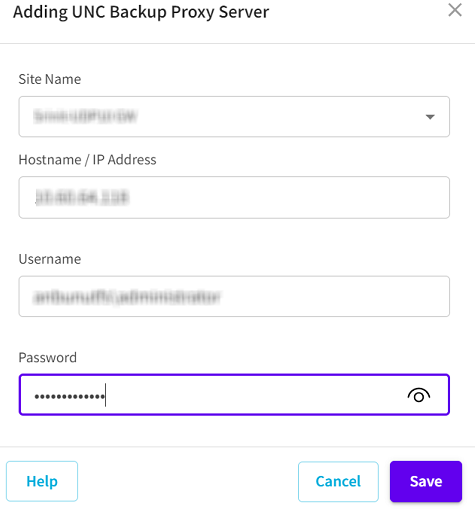
- Click Add next to the Backup Proxy field.
- The Adding UNC Backup Proxy Server dialog appears.
- From the Site Name drop-down list, select the site name as needed.
- For Hostname/IP Address, type the hostname or the IP address.
- Type the username and password as needed.
- Click Save.
-
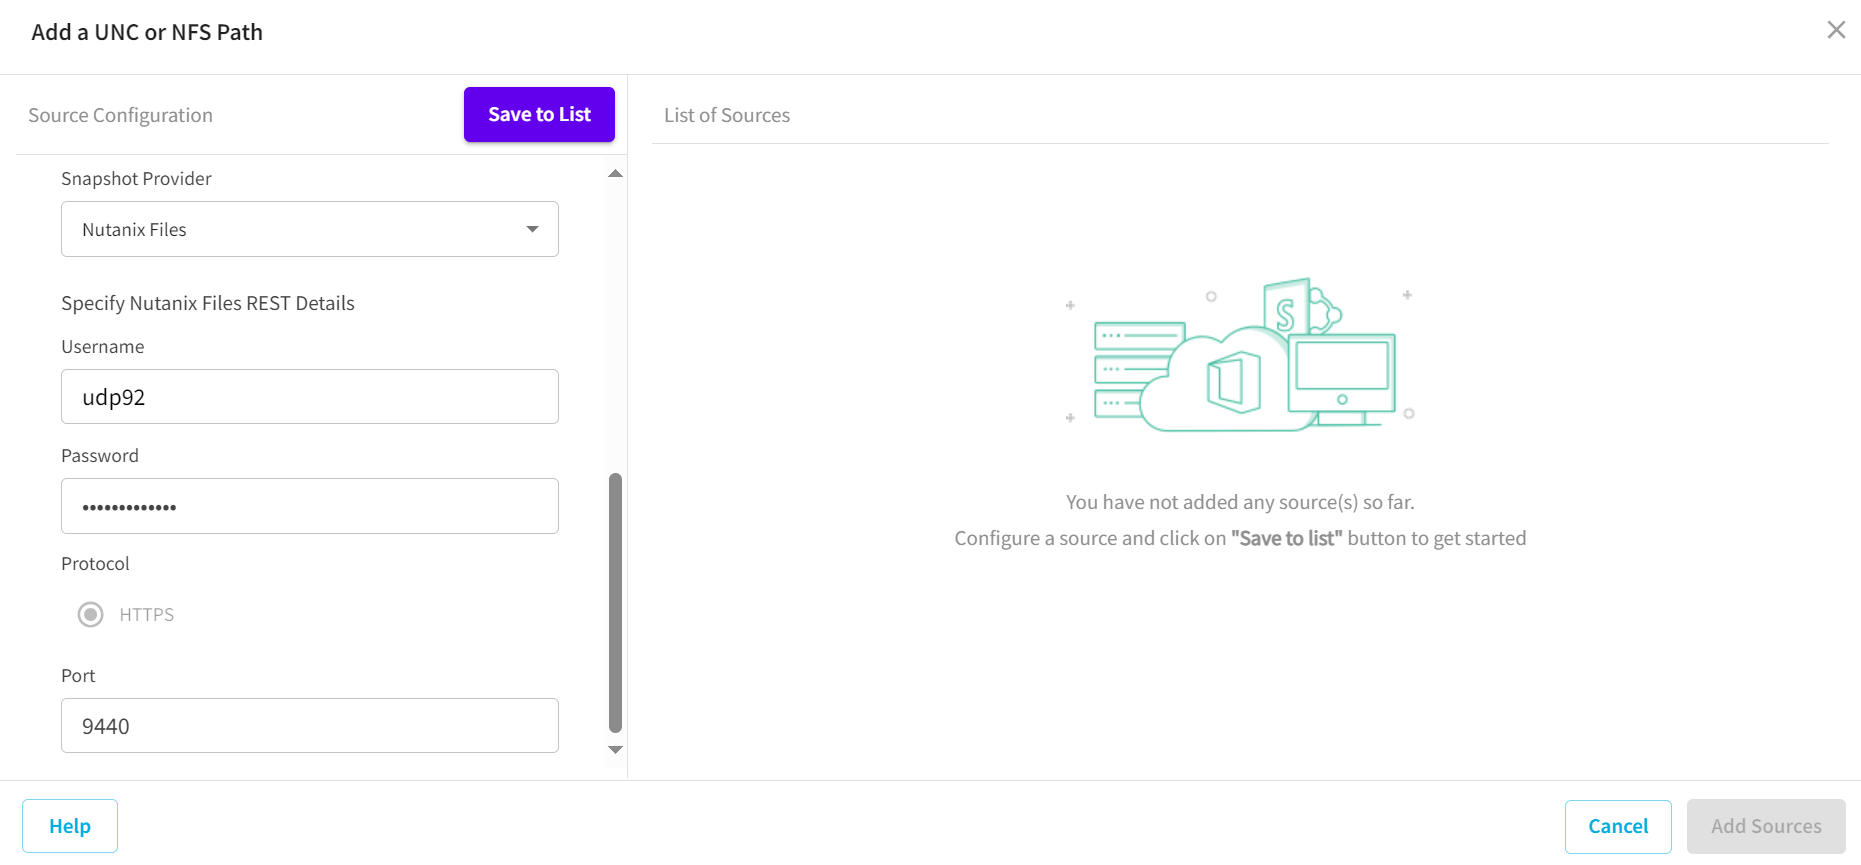
- For the Specify Nutanix Files REST Details box, specify the following credentials, and then click Save:
- Username
- Specifies the username created by the REST API user using the Nutanix prism.
- Password
- Specifies the password for the username.
- Protocol
- Specifies the protocol that you want to use to communicate with the destination server. By default, the HTTPS protocol is selected.
- Port
- Specifies the port number. The default port value is 9440 to access the REST API calls and Prism.
- On the top of the panel, next to Source Configuration, click Save to List.
-
- The List of Sources section refreshes and displays the saved sources.
- Click Add Sources.
-
- Note: If the connection to the Nutanix File Server fails, the Error dialog or a notification window displays.
- The UNC path is added successfully.
You can also modify configuration of an existing source. For more information, see Modify a Source.