Restoring Files and Folders of Linux Machines
This section provides information about restoring the files and folders of Linux machine.
Follow these steps:
- Navigate to Protect > Sources > Machines.
- From the list of available machines, click the Action drop-down list of a machine that you want to recover, and then click Start Recovery.
- The Restore wizard appears.
- On the Restore wizard, select RPS.
- The Restore wizard refreshes and displays the available recovery options.
- Select Recover Files and Folders.
- The Recover Files and Folders wizard appears.
- From the drop-down list, select the Linux backup server where you want to run the recovery job, and then click Next.
-
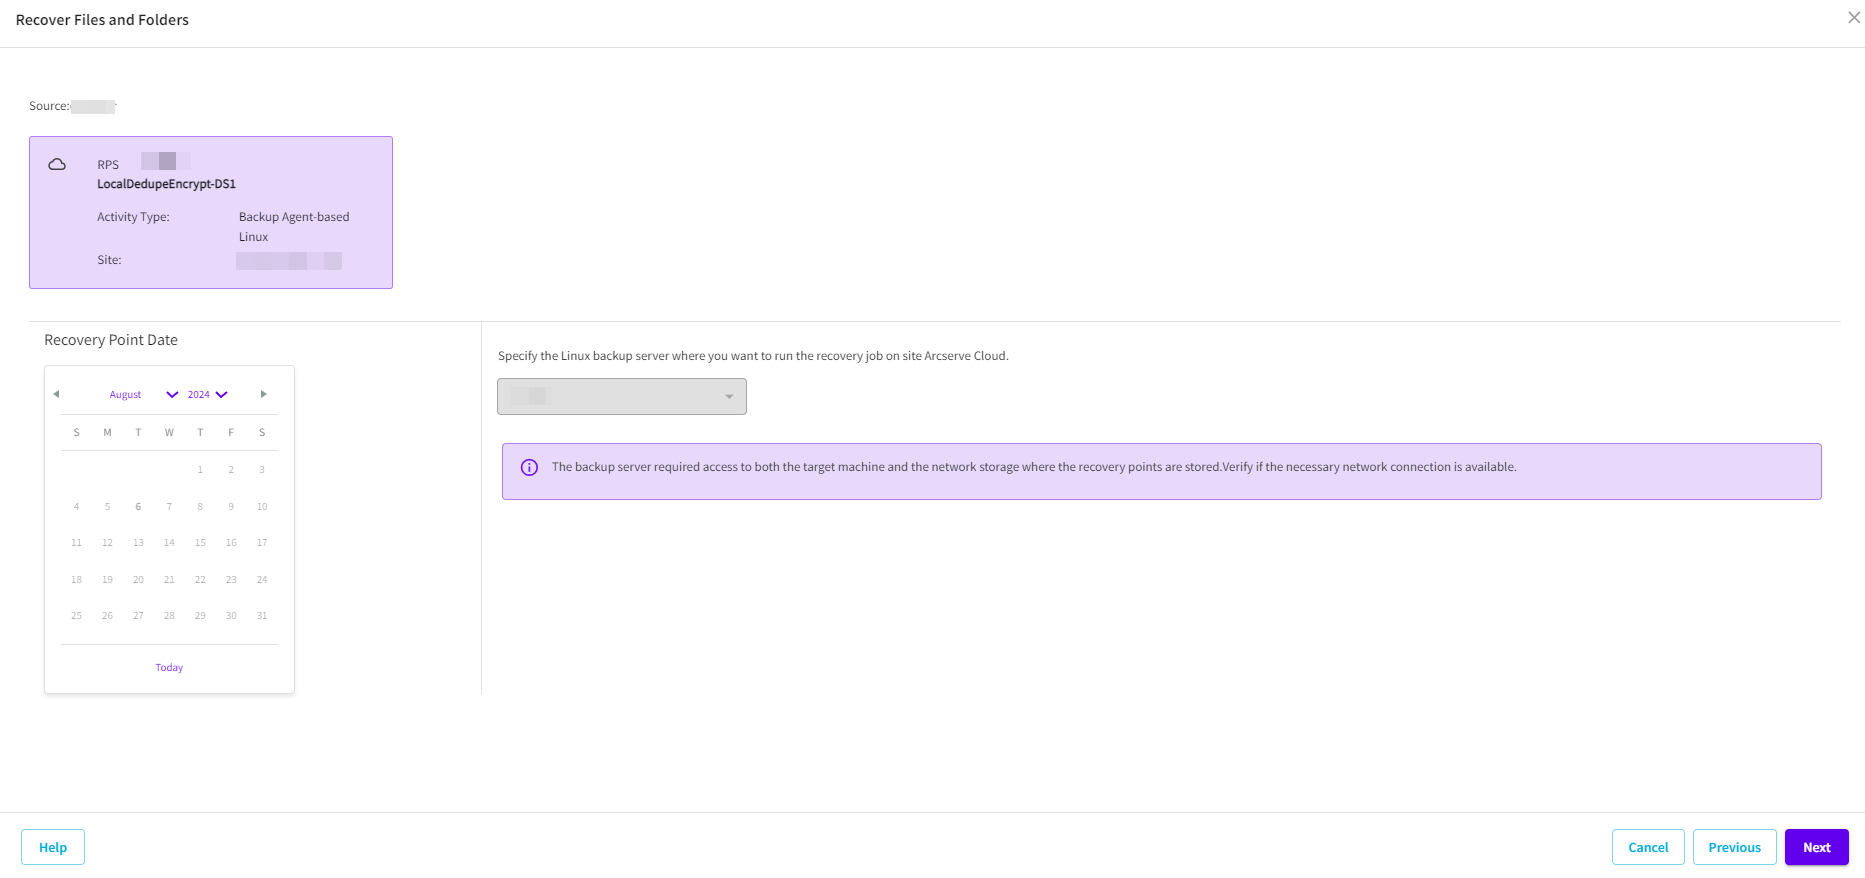
- From the Recovery Point Date section, select a date.
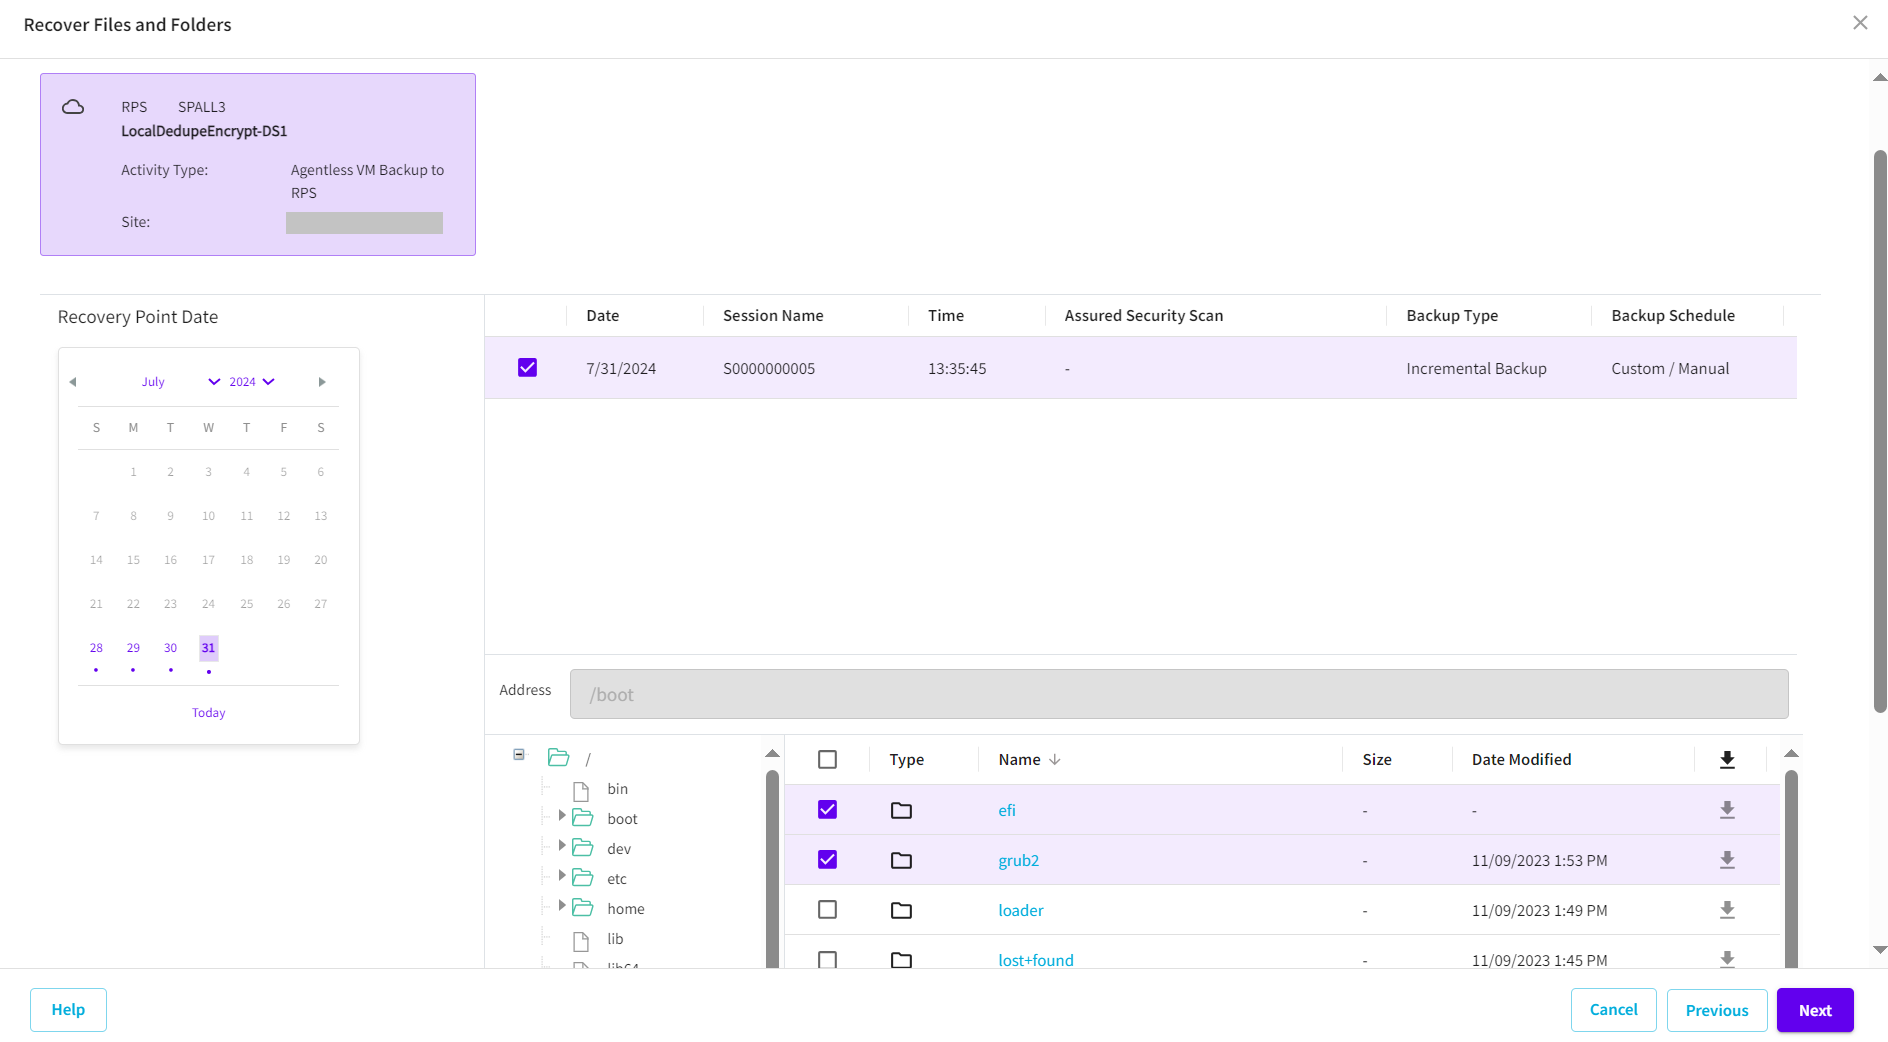
- The corresponding recovery points for that date are displayed, with the date of the backup performed with time, session name, Assured Security Scan, backup type and backup schedule.
- Select a recovery point to restore.
- Note: If the recovery point you are attempting to restore is encrypted, the Encryption/Session Password dialog opens and prompts you to enter the encryption or session password.
- The screen refreshes and displays the folders available in the source VM that you want to recover.
- Expand the folder, select the files or folders to recover as needed, and then click Next.
-
- Select the restore destination.
-
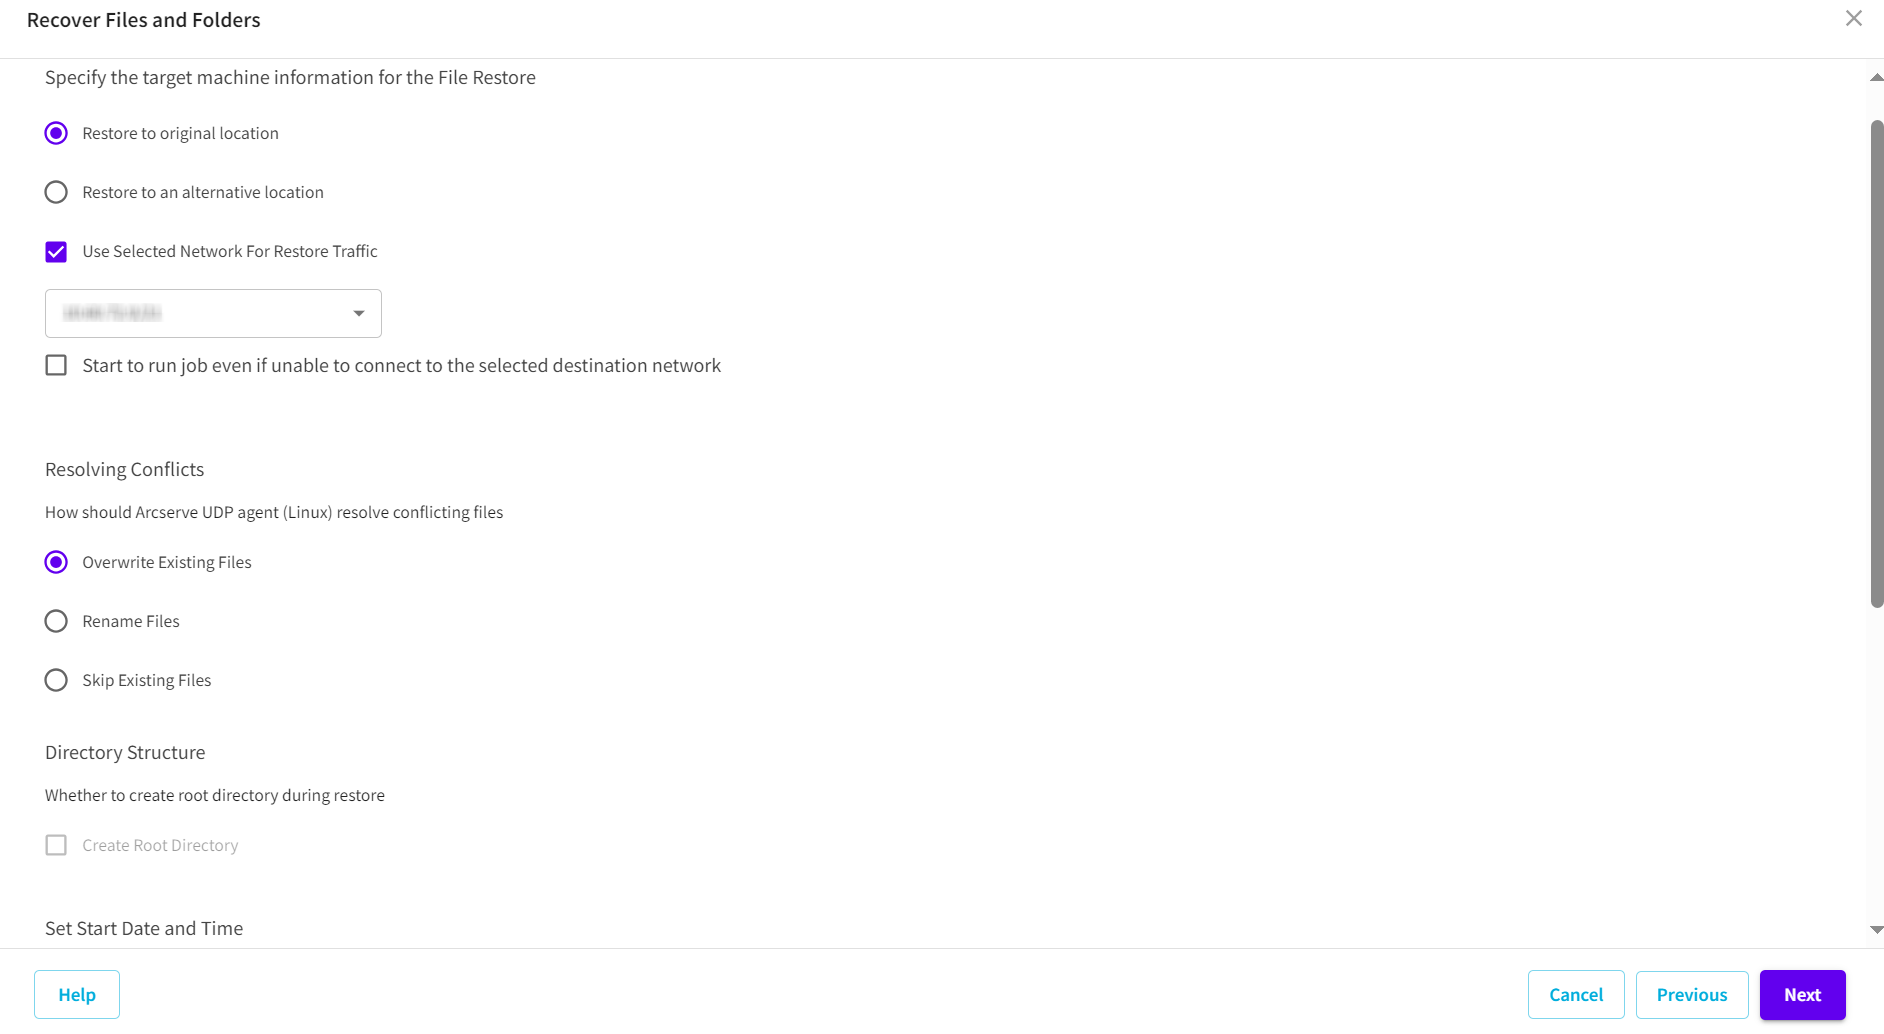
- The available destination options are:
- To restore to the original location from where the backup image was captured, select the Restore to original location option.
- Note: If you performed the recovery point backup using host-based agentless backup, restoring to original location is to restore the file back in to the virtual machine.
- From the Hostname / IP Address drop-down list, select the destination host as needed.
- Note: If you have not already added the destination host, do the following:
- Click Add next to the Hostname / IP Address drop-down list.
- The Add Destination Host dialog appears.
- For Hostname / IP, type the hostname or the IP address.
- Type the username and password as needed.
- Click Save.
- The destination host gets added to the Hostname / IP Address drop-down list.
- Do the following:
- To restore data to the specified location, select the Restore to alternative location option.
- From the Destination Host drop-down list, select the destination host as needed.
- Note: If you have not already added the destination host, do the following:
- Click Add next to the Destination Host drop-down list.
- The Add Destination Host dialog appears.
- For Hostname / IP Address, type the hostname or the IP address.
- Type the username and password as needed.
- Click Save.
- The destination host gets added to the Hostname / IP Address drop-down list.
- Specify the path where the data is restored, or click Browse to select the folder where the data is restored, and then click Select.
- (Optional) Select the Use Selected Network For Restore Traffic check box, and then select the network from the drop-down list as needed.
- Note: If you want to continue to run job even when the selected network is unavailable, select the Start to run job even if unable to connect to the selected destination network check box.
- Specify the Resolving Conflicts option that Arcserve Cloud Console performs if conflicts are encountered during the restore process.
- The available options are:
- (Optional) Select the Create Root Directory check box.
- Selecting this option specifies that if a root directory structure exists in the captured backup image. Arcserve Cloud Console recreates that same root directory structure on the restore destination path.
- With this option not selected, the file or folder is restored directly to the destination folder.
- For Set Start Date and Time, select one of the following:
- (Optional) Select Estimate file size.
- Selecting this option estimates the file size before performing the restore job.
- (Optional) For Pre/Post-scripts Settings, do one of the following:
- Before job started: Lets you run a script before the restore job starts.
- After job completed: Lets you run a script after the restore job is completed.
- Note: The Pre/Post Script Settings fields are populated only if you already created a script file and placed it at the following location:
- /opt/Arcserve/d2dserver/usr/prepost
- Click Next.
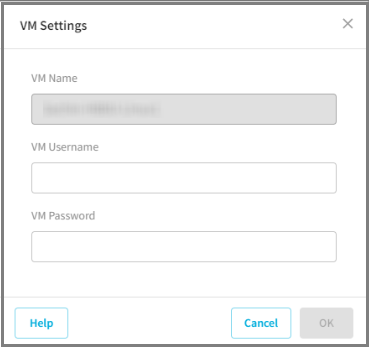
- Note: If you have selected the Restore to original location option as the restore destination for the Agentless source, the VM Settings dialog appears.
- Specify the credentials for accessing the virtual machine, and then click OK.
Overwrite Existing Files
Overwrites (replaces) any existing files, which are at the restore destination. All objects are restored from the backup files regardless of their current presence on your computer.
Rename Files
Creates a new file if the file name already exists. Selecting this option copies the source file to the destination with the same file name but a different extension. Data is then restored to the new file.
Skip Existing Files
Skips over and not overwrite (replace) any existing files that are located at the restore destination. Only objects that are not currently existing on your machine are restored from the backup files.
Run Now
Starts the file-level restore job as soon as you submit the job.
Set Starting Date and Time
Starts the file-level restore job at the specified date and time after submitting the job.
VM Username
Specifies the user name of the virtual machine that you are restoring.
VM Password
Specifies the corresponding password for the Username.
The restore process for files or folders is started successfully.