Recover Virtual Machine
Arcserve Cloud Console lets you use the Recover Virtual Machine option to restore a virtual machine (VM) that you previously backed up using the Host-Based Agentless backup. This method helps you restore the entire virtual machine to the original or to an alternate ESX or Hyper-V location. You can browse the available virtual machine recovery points from a calendar view and select which recovery point you want to restore.
This section provides information about restoring the virtual machine.
Follow these steps:
- Navigate to Protect > Sources > Agentless VMs.
- From the list of available machines, click the Action drop-down list of a machine that you want to recover, and then click Start Recovery.
- The Restore wizard appears.
- On the Restore wizard, select RPS.
- The Restore wizard refreshes and displays the available recovery options.
- Select Recover Virtual Machine.
- The Recover Virtual Machine wizard appears.
-
- Note: If the recovery point you are attempting to restore is encrypted, the Encryption/Session Password dialog opens and prompts you to enter the encryption or session password.
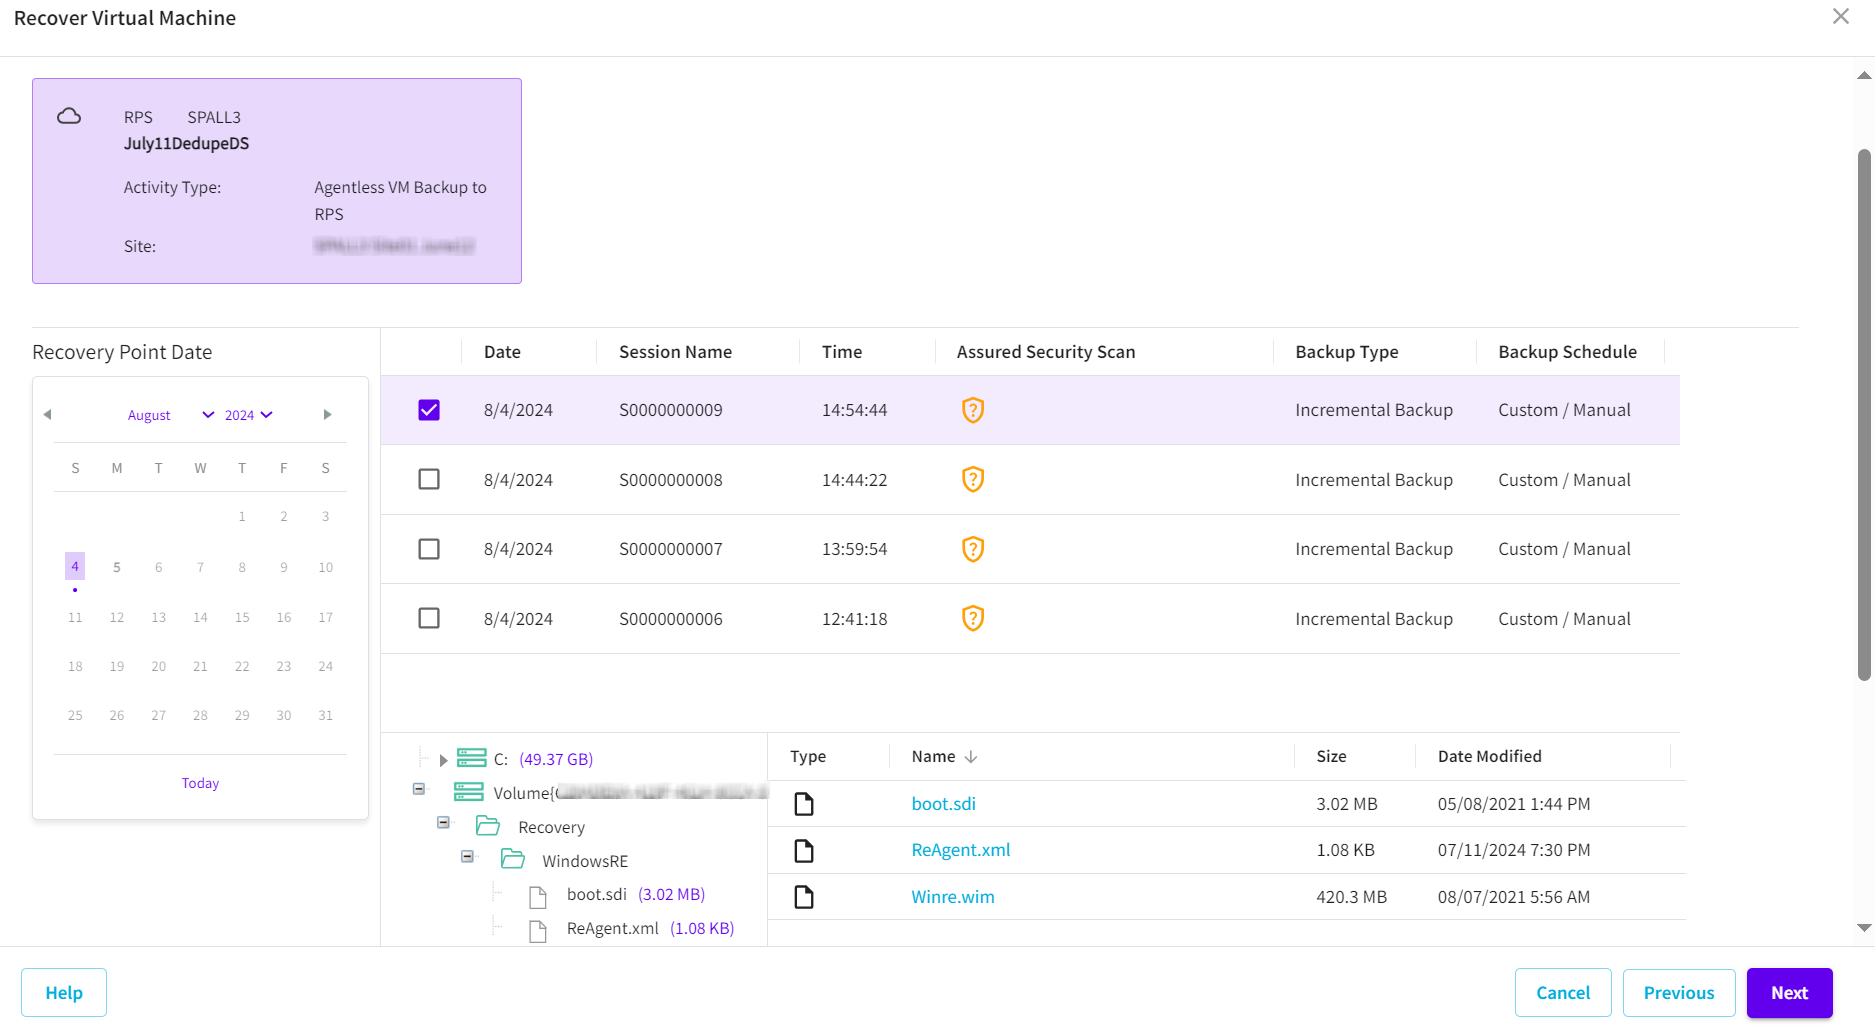
- From the Recovery Point Date section, select a date.
- The corresponding recovery points for that date are displayed, with the name of the backup, size of the file or folder, and the date of the backup performed with time.
- Select a recovery point to restore, and then click Next.
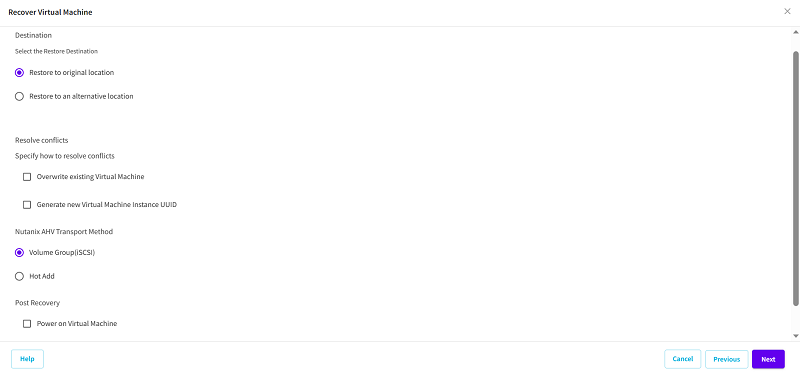
- Select the restore destination.
-
- The available destination options are:
- (Optional) Select the Use Selected RPS Server Network For Restore Traffic check box, and then do the following:
- To enable the communication between the Proxy server and Recovery Point Server, select the CIDR network from the drop-down list.
- (Optional) Select the Use Selected Network For Restore Traffic check box, and then select the network from the drop-down list as needed.
- Note: If you want to continue to run job even when the selected network is unavailable, select the Start to run job even if unable to connect to the selected destination network check box.
- (Optional) Select the Use Selected Proxy Server Network For Restore Traffic check box, and then do the following:
- To enable the communication between the Proxy server and Hypervisor, select the CIDR network from the drop-down list.
- Note: To enable the use of the specified network for backup traffic, both backup proxy and the Nutanix Cluster ISCSI Data Service must be in the same network.
- (Optional) Select the Use Selected Network For Restore Traffic check box, and then select the network from the drop-down list as needed.
- Note: If you want to continue to run job even when the selected network is unavailable, select the Start to run job even if unable to connect to the selected destination network check box.
- Specify the Resolving conflicts options that Arcserve Cloud Console performs if conflicts are encountered during the restore process
- Overwrite existing Virtual Machine
- This option is to specify whether to overwrite the existing virtual machine. By default, this overwrite option is not selected.
- Note: For the Overwrite existing Virtual Machine option, an "existing virtual machine" is defined as a VM that has the same VM name and resides in the same ESXi host (for VMware VM), or a VM that has the same VM name and instance UUID and resides in the same Hyper-V host (for Hyper-V VM). For VMware VM, if there is a VM which has the same VM name but resides in a different ESXi host (which is under the same vCenter), the overwrite option does not work. In this case, VM recovery GUI detects that VM and displays an error message and blocks you from proceeding so that a VM is not overwritten by mistake. As a workaround, you need to rename the existing VM or use the "Restore to alternative location" option, and then specify a different VM name.
- If you select this option, the restore process overwrites (replaces) any existing images of this virtual machine that are at the specified restore destination. The virtual machine image is restored from the backup files regardless of its current presence on your restore destination.
- If you do not select this option, VM recovery GUI displays an error message and blocks you from proceeding if the original VM still exists on the original location. As a workaround, you need to rename the existing VM or use the "Restore to alternative location" option, and then specify a different VM name.
- Generate new Virtual Machine Instance UUID
- This option is to specify whether to generate a new instance UUID for the restored VM or keep the original instance UUID.
- Note: If you do not select this option, the original instance UUID is set to the restored VM. However, in case the destination vCenter/ESX or Hyper-V host already has a VM with the same instance UUID, new UUID is used instead, and a warning message is displayed in the activity log of VM recovery job.
- Specify the VMware Transport Method.
- Let VMware select the best available method
- Set method priorities for this recovery
- Notes:
- This option is available only for VMware VM.
- The Encryption Password for file copy destination is loaded automatically. If you select an alternate destination for the restore, enter the password manually.
- Specify the Post Recovery option.
- Power on Virtual Machine
- When an agentless source is added through vCenter.
- When you select the vCenter server while restoring VM to an alternative location.
- Click Next.
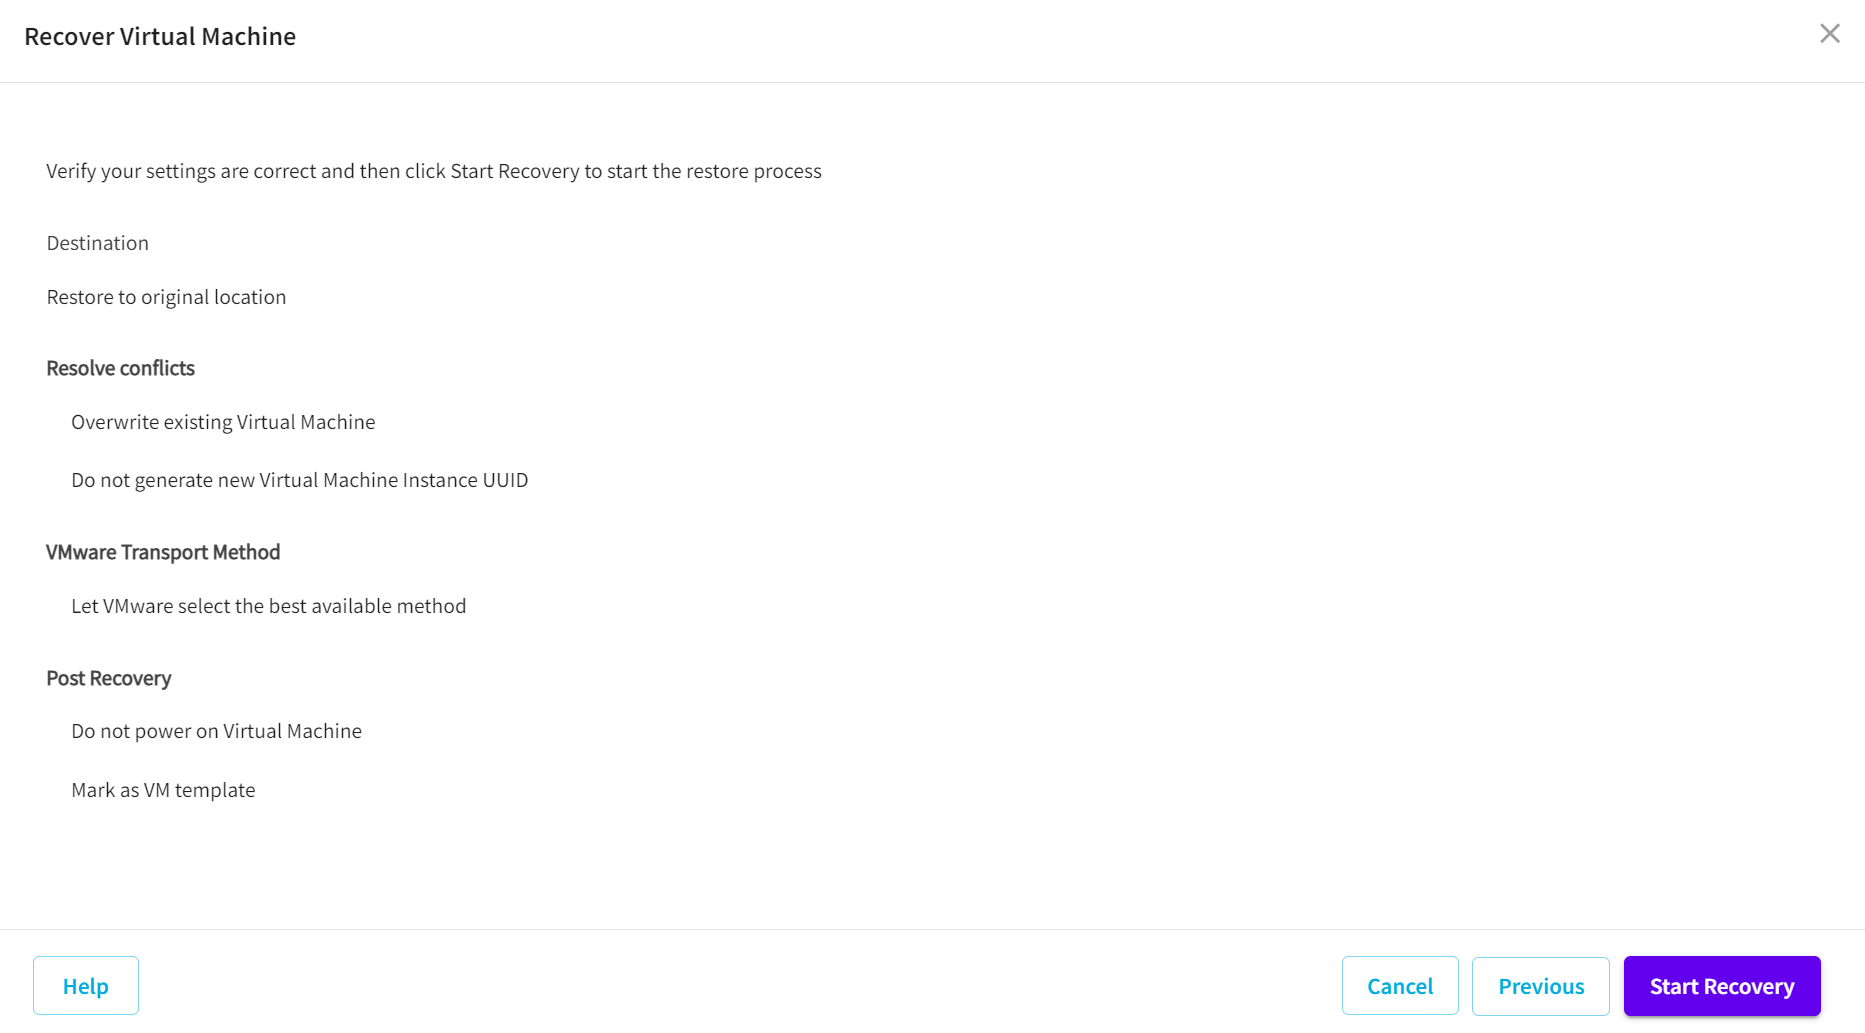
- The restore virtual machine summary page appears.
- Review the displayed information to verify that all the restore options and settings are correct, and then do one of the following:
- If the summary information is incorrect, click Previous and go back to the applicable dialog to change the incorrect setting.
- If the summary information is correct, click Start Recovery to launch the restore process.
Restore to original location
Restores the virtual machine to the original location from where the backup image was captured. By default, this option is selected.
Restore to an alternative location
Restores the virtual machine to a different location from where the backup image was captured.
For more information, see Restore to an Alternative Location.
Select this option if you want the VMware to select the best available transport method.
Select this option to set the transport methods (HotAdd, SAN, NBD, and NBDSSL) priorities for the recovery. Select and drag the transport method to set as a priority as needed.
Select whether power is applied to the virtual machine at the end of the restore process. By default, this option is not selected.
Mark as VM template (available only for VMware VM)
Select whether to convert the restored VM to template. If an agentless VM is added through vCenter, then this option is not selected by default.
Note: The Mark as VM template option is available only during the following conditions:
The restore of virtual machine is started successfully.