Recover Volume
This section provides information about recovering a volume.
Follow these steps:
- Navigate to Protect > Sources.
- From the list of available sources, click the Action drop-down list of a source that you want to recover, and then click Start Recovery.
- The Restore wizard appears.
- On the Restore wizard, select RPS.
- The Restore wizard refreshes and displays the available recovery options.
- Select Recover Volume.
- The Recover Volume wizard appears.
- From the Recovery Point Date section, select a date.
- The corresponding recovery points for that date are displayed, with the name of the backup, size of the file or folder, and the date of the backup performed with time.
- Note: If the recovery point you are attempting to restore is encrypted, the Encryption/Session Password dialog opens and prompts you to enter the encryption or session password.
-

- Select a volume to restore, and then click Next.
- Note: You cannot restore full volume for system or boot volume. Run BMR instead.
- Select the restore destination.
-
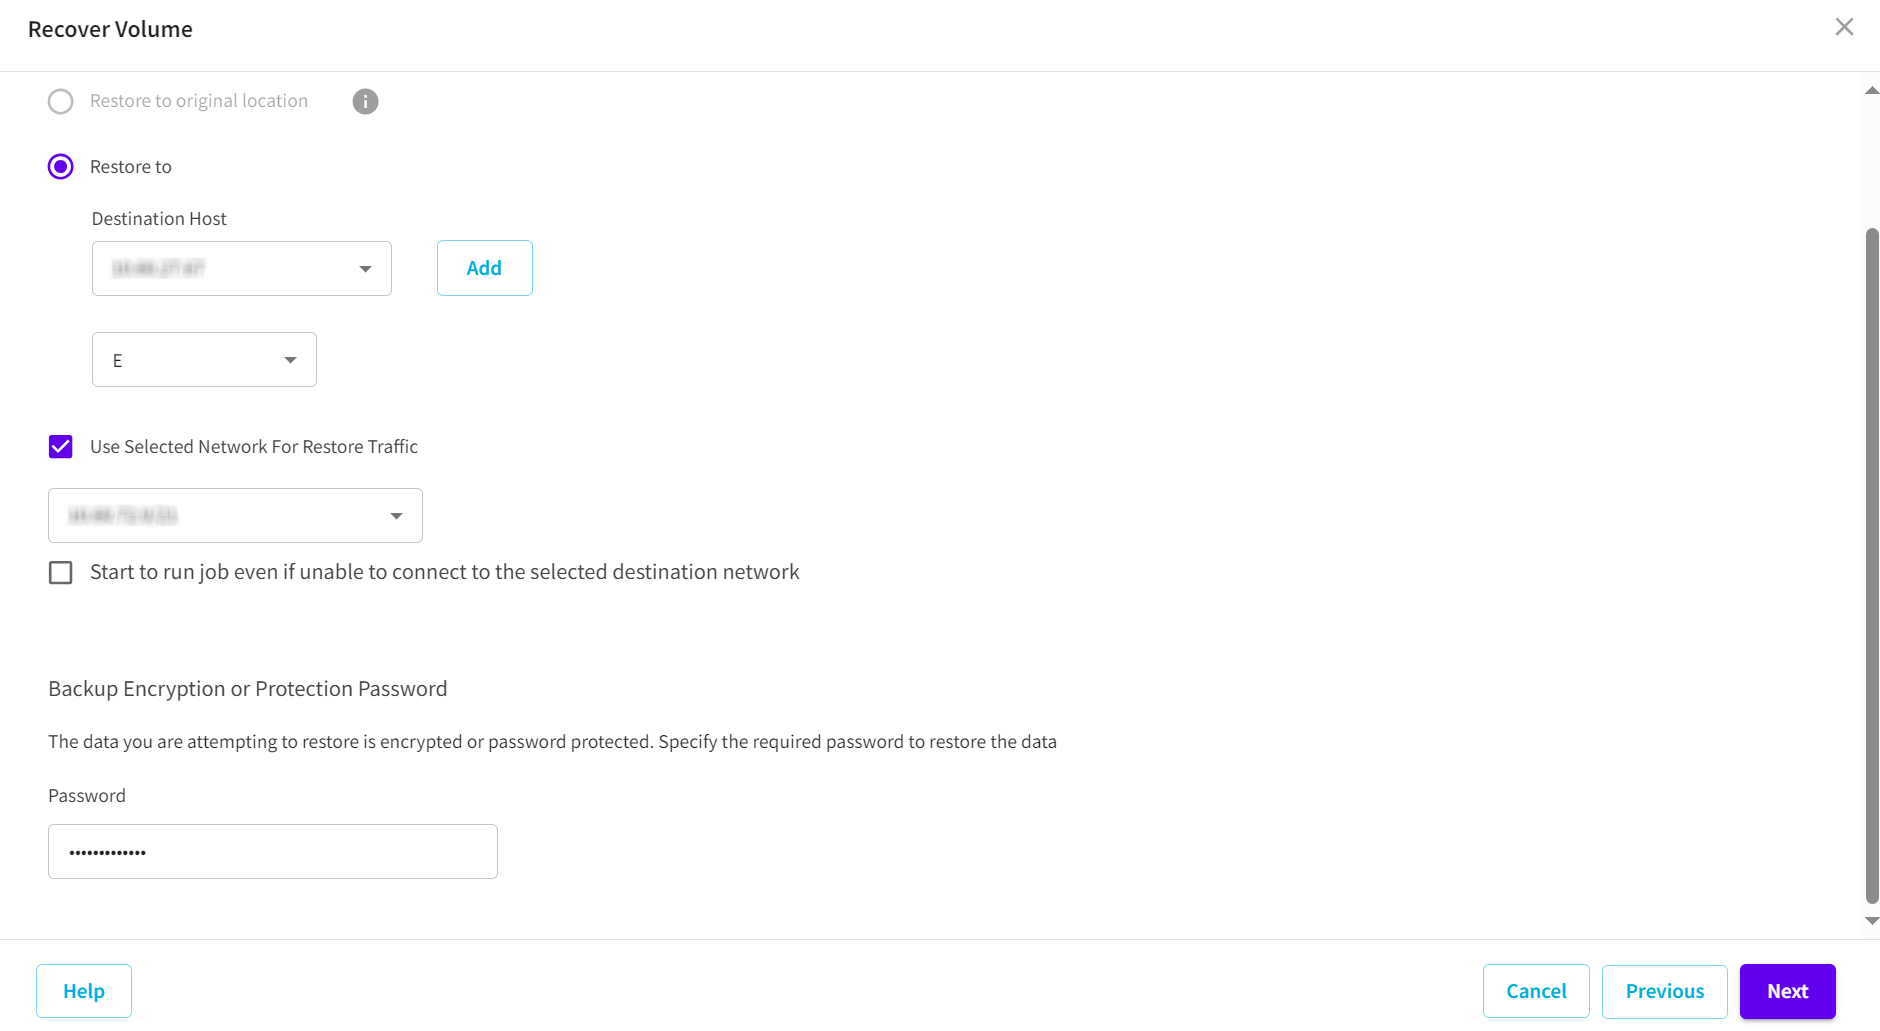
- The available destination options are:
- Restore to original location
- Restore to
- From the Destination Host drop-down list, select the destination host as needed.
- Note: If you have not already added the destination host, do the following:
- Click Add next to the Destination Host drop-down list.
- The Add Destination Host dialog appears.
- From the Site Name drop-down list, select the site name as needed.
- For Hostname / IP, type the hostname or the IP address.
- Type the username and password as needed.
- Click Save.
- The destination host gets added to the Destination Host drop-down list.
- The Select field gets enabled.
- From the Select drop-down list, select the volume as needed.
- Note: If the destination host that you have selected does not include any volume, the select field is disabled.
- (Optional) Select the Use Selected RPS Server Network For Restore Traffic check box, and then do the following:
- To enable the communication between the Proxy server and Recovery Point Server, select the CIDR network from the drop-down list.
- (Optional) Select the Use Selected Network For Restore Traffic check box, and then select the network from the drop-down list as needed.
- Note: If you want to continue to run job even when the selected network is unavailable, select the Start to run job even if unable to connect to the selected destination network check box.
- Click Next.
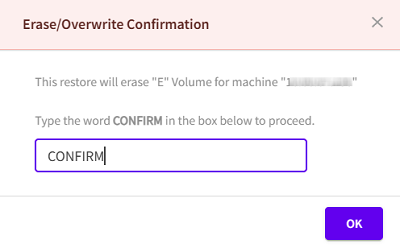
- The Erase/Overwrite Confirmation dialog appears.
- If you want to erase or overwrite the selected volume, type CONFIRM in the empty field, and then click OK.
- Note: The CONFIRM is case sensitive.
-
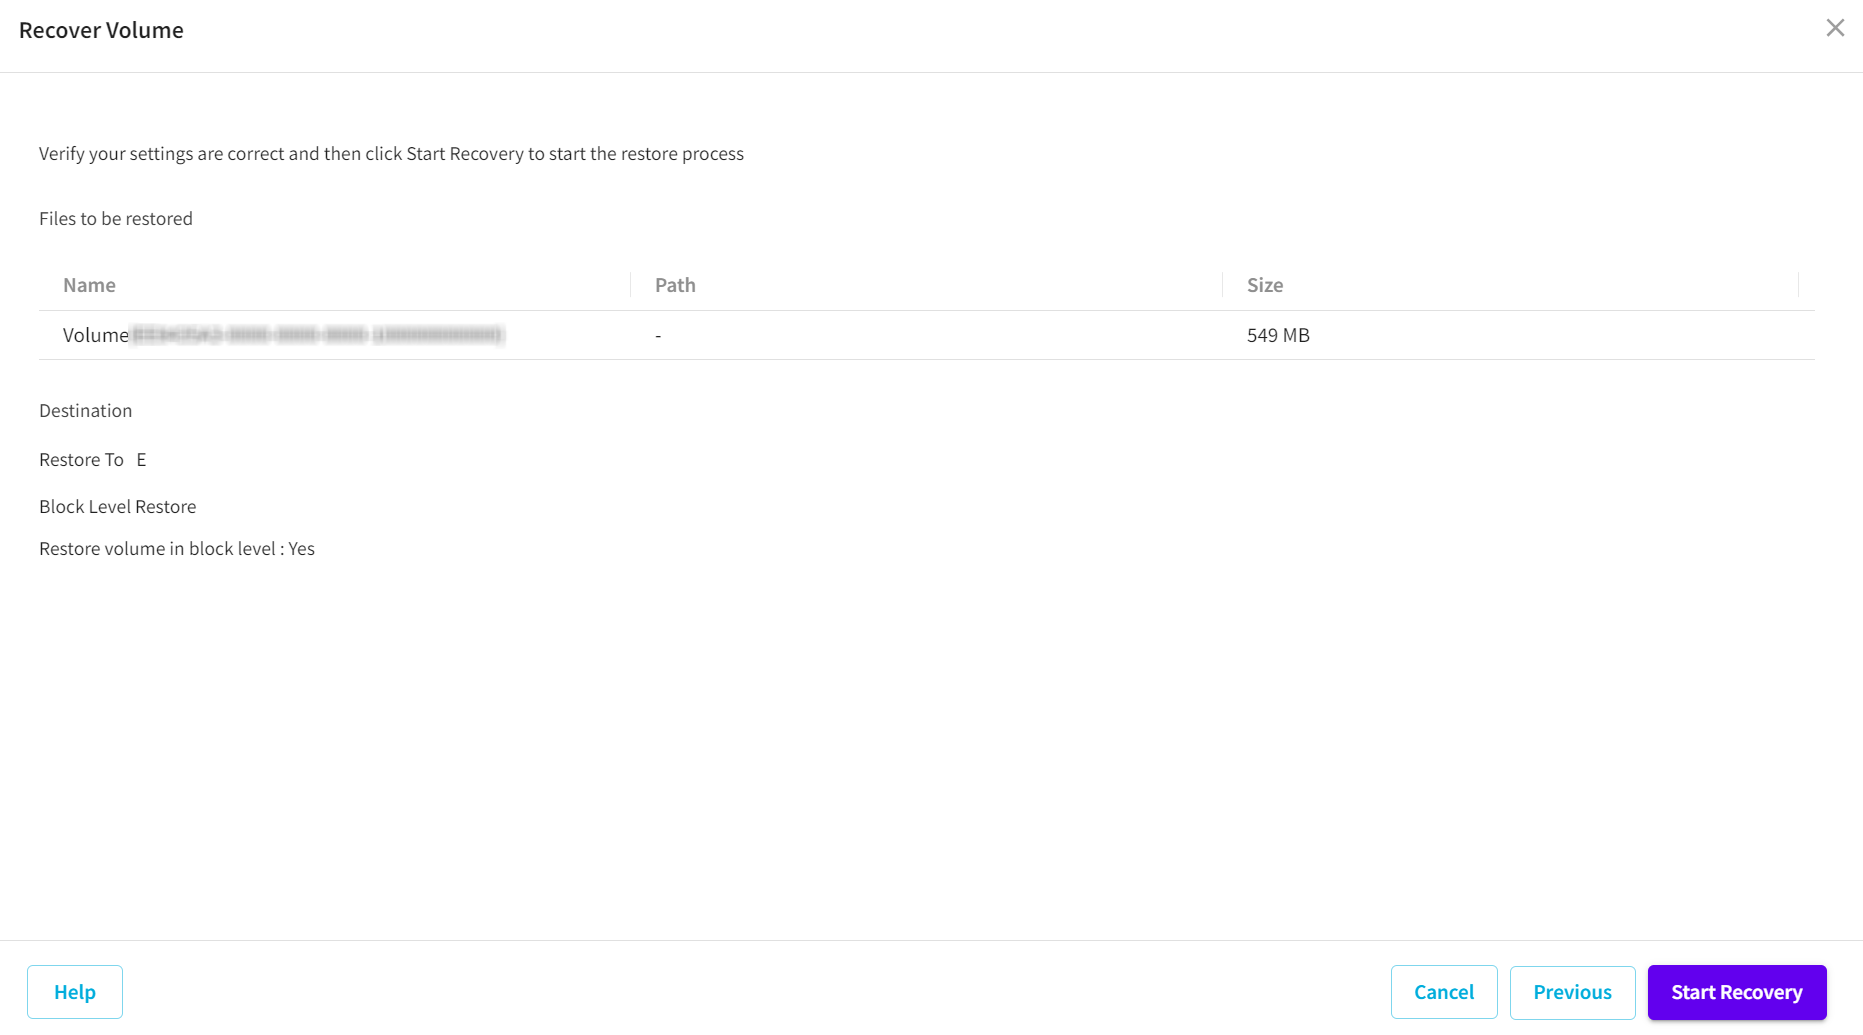
- The summary page appears.
- Review the displayed information to verify that all the restore options and settings are correct, and then do one of the following:
- If the summary information is incorrect, click Previous and go back to the applicable dialog to change the incorrect setting.
- If the summary information is correct, click Start Recovery to launch the restore process.
Restores to the original location from where the backup image was captured.
Note: The Restore to original location option is disabled for agentless machine restore.
Restores to the specified location.
To restore data to the specified location, do the following:
The restore of selected volume is started successfully.