How to Create a VSB Cloud Proxy on Google Cloud
This section provides information about how to create a VSB cloud proxy on Google Cloud.
Follow these steps:
- Log into Google Cloud Console as an admin.
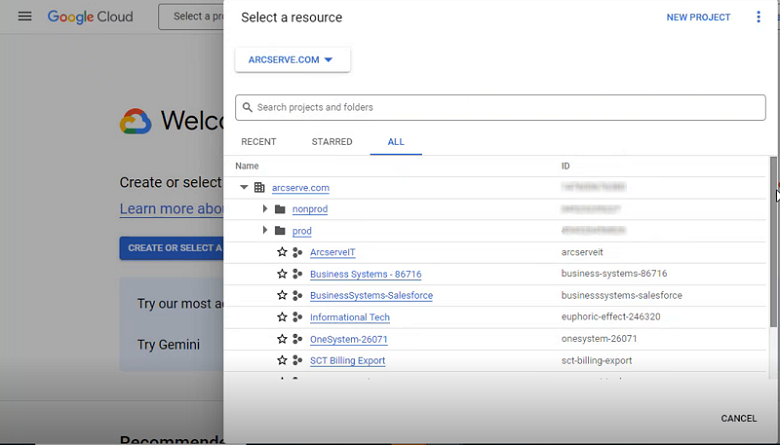
- Click the Select a project drop-down next to Google Cloud.
- On the Select a resource screen, select a project where you want to create a virtual machine instance.
-
- The dashboard of the project selected is displayed.
- Go to Navigation menu > Compute Engine > VM instances.
-
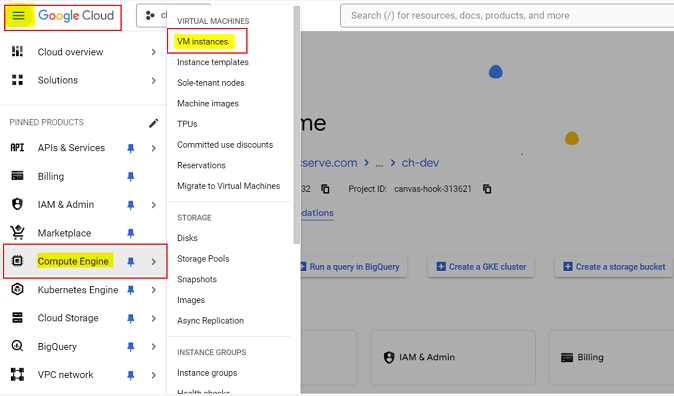
- On the VM instances page, click CREATE INSTANCE.
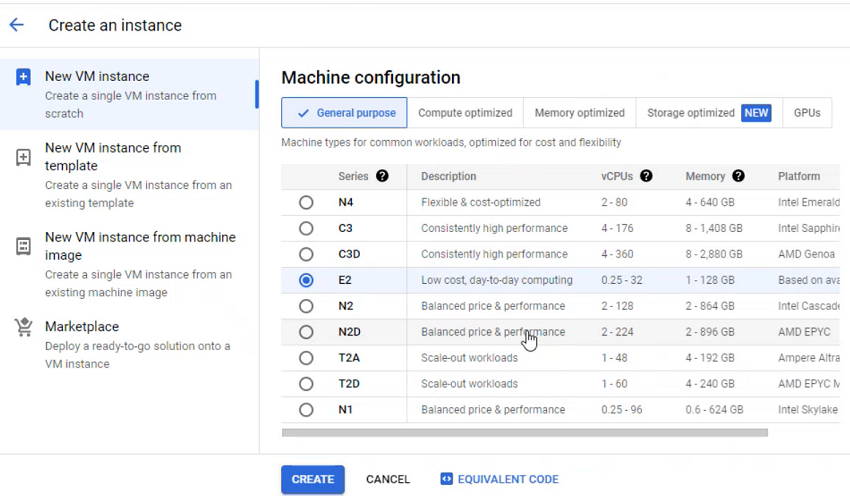
- The Create an instance page opens.
- Specify a Name for your VM. For more information, see Resource Naming Conventions.
- Select a Region for your VM.
- Select the Zone for your VM.
- Under Machine configuration, select a machine type which has at least 4 GB of memory and 2 vCPUs as per the system requirement consideration on the Virtual Standby proxy.
- Notes:
- By default, E2 is selected. You can change the machine type as per your requirement.
- You can select the instance sizes (vCPUs and memory) from the drop-down list under the PRESET tab.
-
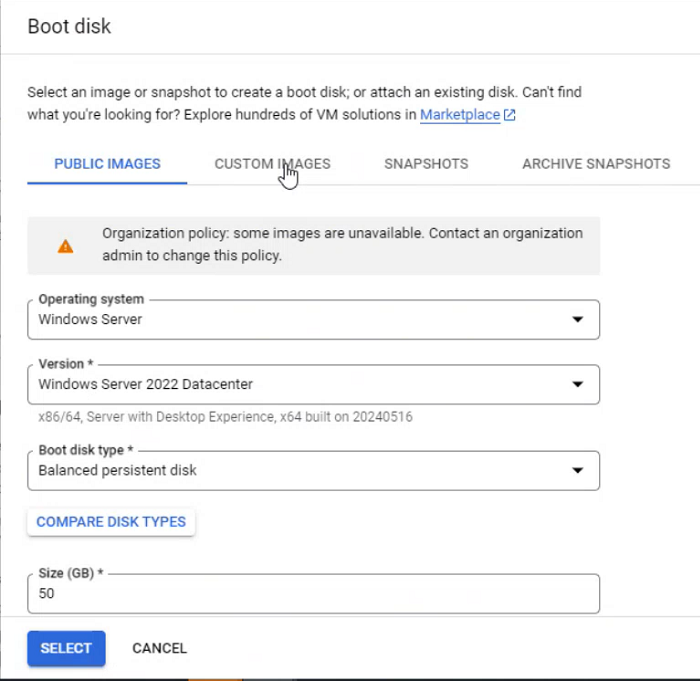
- Under Boot disk, to select the boot disk image, click Change, and then do the following:
- If you want to create a VM from a public image, under the PUBLIC IMAGES tab, specify the following details:
- Operating system: From the drop-down list, select Windows Server.
- Version: From the drop-down list, select a boot image, which is Windows Server 2016 or above.
- Boot disk type: From the drop-down list, select the disk type as needed.
- Size (GB): Type the boot size between 50 and 65536 GB. Arcserve recommends you to type 50 GB.
- Under the SHOW ADVANCED CONFIGURATION drop-down, select the Use a custom device name check box and retain rest as default.
- To confirm your boot disk settings, click SELECT.
-
- Under Identity and API access, from the Service account drop-down list, select the service account (for which the JSON key is created) to be used in UDP and provide permissions to it as needed.
- Note: By default, the Compute Engine default service account option is selected as a service account.
-
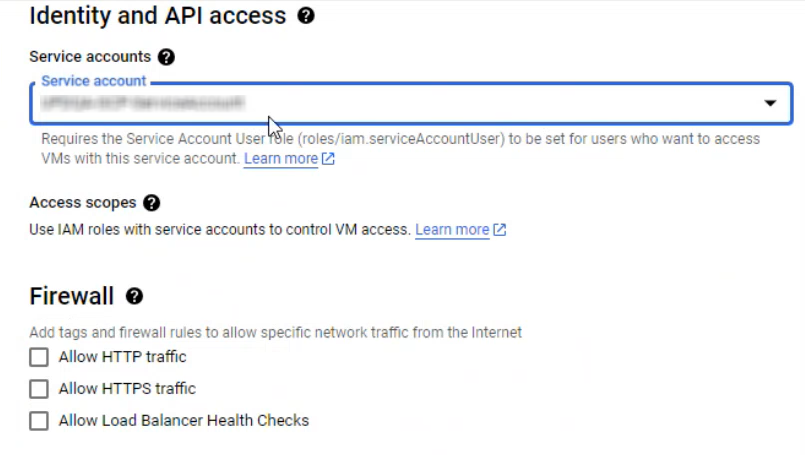
- Under Firewall, select Allow HTTPS traffic.
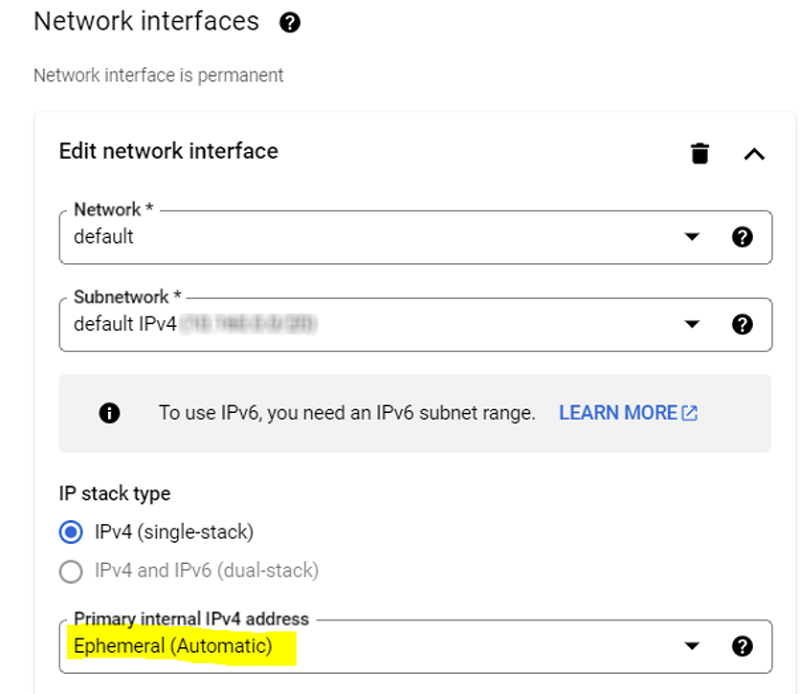
- Expand Advanced options, under Networking, specify the following details for Network interfaces:
- Network: From the drop-down list, select the VPC network where the firewall ports 8014 and 4091 are open.
- Subnetwork: From the drop-down list, select the VM to use.
- IP stack type: Select IPv4 as the IP stack type based on the subnet you selected.
-
- Note: If no network is present in a project, create a new VPC network where firewall rules can be specified to open required ports before creating an instance. For more information, see How to Create a VPC Network with Firewall on Google Cloud.
- After configuring the above details, click CREATE.
- Wait for the instance to get created.
- After the instance gets created, click the instance name on the VM instances page.
- From the RDP drop-down list under the Connect column, select Set Windows Password.
-
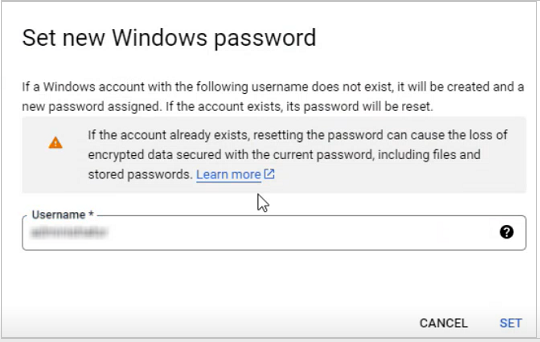
- The Set new Windows password dialog appears.
- Type the username that needs to be created in the instance through which RDP can be done, and then click SET.
- The New Windows password dialog appears and displays a randomly generated password for the given username.
- Copy the generated password, save it in a safe location, and then close the dialog.
-

- Connect to the instance using an External IP through RDP, and check if date, time, and time zone settings of the cloud proxy are correct and in consistent with the Region/Zone selected for this instance. Check if time is in-sync with the NTP server or with internet. If not, set the time manually.
- Download the Arcserve UDP 10.0 installation package, and then install UDP agent on the instance.