Restoring Files and Folders via Virtual Drive for Windows Machine
This section provides information about restoring files and folders via virtual drive for Windows machine.
Follow these steps:
- Navigate to Protect > Sources > Machines.
- From the list of available machines, click the Action drop-down list of a machine that you want to recover, and then click Start Recovery.
- The Restore wizard appears.
- On the Restore wizard, select RPS as needed.
- The Restore wizard refreshes and displays the available recovery options.
- Select the Recover via Virtual Drive option.
- The Restore wizard refreshes and displays the recovery point options.
-
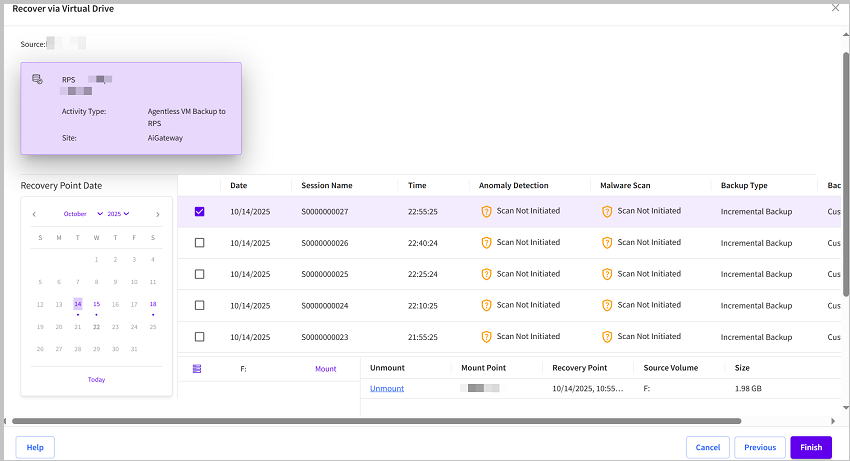
- On the left panel of the wizard, select the Recovery Point Date as needed.
- The available recovery points appear at the bottom of the left panel.
- Note: If the recovery point you are attempting to restore is encrypted, the Encryption/Session Password dialog opens and prompts you to enter the encryption or session password.
- Select the recovery point as needed.
- The list of available drives appears at the middle of the wizard with a clickable Mount option.
- To mount a recovery point, from the list of available drives, click Mount.
- The Mount Recovery Point dialog appears.
- On the Mount Recovery Point dialog, do the following, and then click Save:
- From the Agent Machines drop-down list, select the available agent machine as needed.
- To mount recovery point to a volume, click Mount to the following volume, and then from the drop-down list, select the available volume.
- To mount recovery point to a path, click Mount to the following path (path must be an empty NTFS or ReFs folder), and then click browse to select the folder.
- The mounted volume or path displays in the agent machine for recovery, and a list of available mounted volumes appear in the right panel of the wizard.
- To dismount a recovery point, from the list of available mounted volumes, click Unmount.
- A confirmation dialog appears.
- Click OK to confirm.