Point-In-Time Restore for SQL Databases
This section provides information about how to perform Point-In-Time recovery for Microsoft SQL databases.
Follow these steps:
- On the Arcserve Cloud Console, perform a backup of SQL database.
- The N recovery point is created.
- Verify that the following files are generated under the Catalog folder:
- If the SQL Server Instance name is MSSQLSERVER (default Instance Name):
- _<DatabaseName>.idx.pit
- Contains fixed size of time point summary.
- _<DatabaseName>.cat.pit
- Contains variable size of time point details.
- _<DatabaseName>.map.pit
- Contains mapping between the internal string and internal string identity.
- If the SQL Server Instance name is other than MSSQLSERVER (not the default Instance Name):
- <SQLInstanceName>_<DatabaseName>.idx.pit
- Contains fixed size of time point summary.
- <SQLInstanceName>_<DatabaseName>.cat.pit
- Contains variable size of time point details.
- <SQLInstanceName>_<DatabaseName>.map.pit
- Contains mapping between the internal string and the internal string identity.
- On the Arcserve Cloud Console, perform another backup of SQL database.
- The N+1 recovery point is created.
- Navigate to Protect > Sources.
- From the list of available sources, click the Action drop-down list of a source that you want to recover, and then click Start Recovery.
- The Restore wizard appears.
- On the Restore wizard, select RPS.
- The Restore wizard refreshes and displays the available recovery options.
- Select Recover SQL Databases.
- The Recover SQL Databases wizard appears.
- To perform the Point-in-time restore, select the date for recovery from Recovery Point Date, select the Microsoft SQL Server database to be restored, and then click Next.
- Notes:
- If the recovery point you are attempting to restore is encrypted, the Encryption/Session Password dialog opens and prompts you to enter the encryption or session password.
- You can enable the PIT option only when the N and N+1 backup sessions have PIT enabled.
-
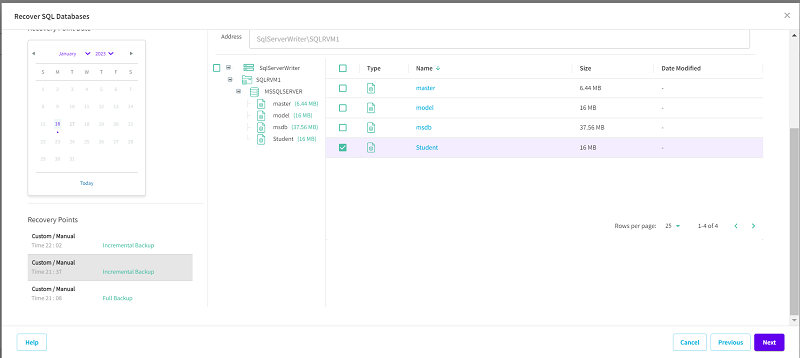
- Select the Restore to original location option as the restore destination, and then click Next.
-
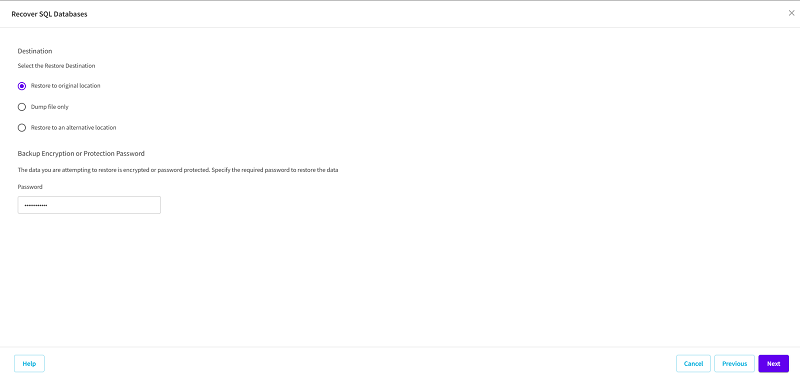
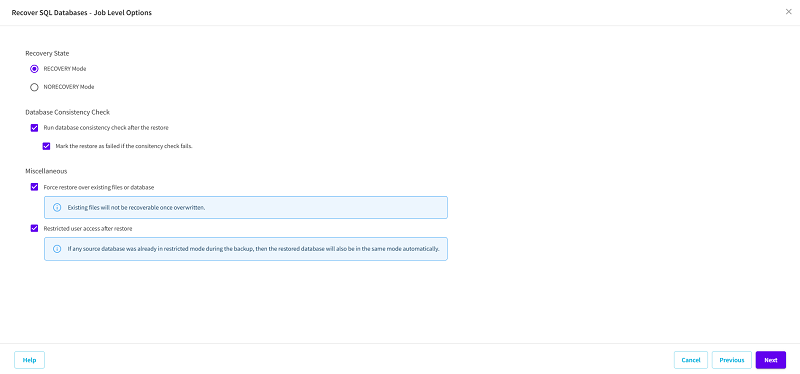
- The Recover SQL Databases - Job Level Options page appears.
- Select the Job level options for restore, and then click Next:
- Recovery State
- RECOVERY Mode: By default, this option is enabled. It makes the SQL database online to allow data recovery and provides you permission to access the restored database.
- NORECOVERY Mode: The database transitions to a ‘RESTORING’ state to prevent users from accessing the database. To restore the last backup and bring the database online for usage, use the RECOVERY Mode option.
- Database Consistency Check
- To make sure that the database is consistent after a restore, select the Run database consistency check after the restore check box. This option checks the physical and logical integrity of objects in an SQL Server database. If you want to mark the restore job as failed when the consistency check fails for the selected database, select the Mark the restore as failed if the consistency check fails check box.
- Miscellaneous
- Force restore over existing files or database: This option overwrites the existing database files located at the restore destination. Not selecting this option for an existing database file can make the restore incomplete. You can skip this option when the database file is new.
- Restricted user access after restore: This option restricts access to the database file for a specific group of users such as sysadmin, dbcreator, and/or db_owner. These users have permissions to modify the database.
- Note: If the source database was already in the restricted mode during the backup, the restored database automatically stays in the same mode.
-
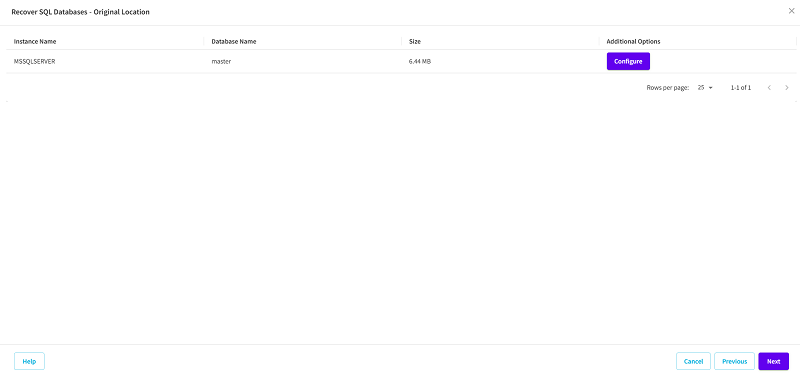
- The Restore Options - Original Location page appears.
- To configure or change the configuration at a database level, click the Configure button.
-
- The Additional Database Options dialog appears.
- To perform PIT restore, under Miscellaneous, select the Log point-in-time restore check box, set the time point, and then click OK.
-
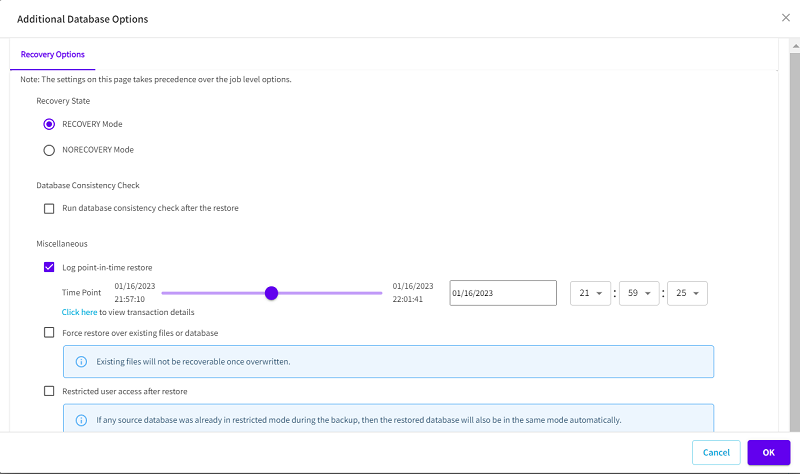
- Note: To view transaction details, click the Click here hyperlink.
- The Transaction Details dialog appears and displays the list of transactions based on the date time selected on the Additional Database dialog.
- On the Transaction Details dialog, do the following:
- To configure the transactions listed at a database level, click the Select this event button.
-

- Note: To view the transactions performed between N and (N+1) recovery points, use the Previous and Next buttons.
- The Additional Database Options dialog appears.
- Select the Log point-in-time restore check box, set the time point, and then click OK to return to the Restore Options- Original Location page.
- Click Next.
- The Recover SQL Databases - Summary page appears.
- Review the displayed information to verify that all the restore options and settings are correct, and then do one of the following:
- If the summary information is incorrect, click Previous and go back to the applicable dialog to change the incorrect setting.
- If the summary information is correct, click Start Recovery to launch the restore process.
- Notes:
- After the restore finishes, view the restore status along with the rename of the database in the Logs page.
- The change in the database name reflects in the SQL Management Studio.
The Point-In-Time restore is performed successfully.