Office365 Account Configuration
These are the steps to register ImageManager in the Azure portal (Microsoft Entra ID) and configure it for email functionality (notifications) using Microsoft Graph (Mail.Send).
Follow these steps carefully to ensure your Client ID, Tenant ID (if applicable), and Client Secret are secure.
- Sign into the Azure Portal with your Outlook (Microsoft) or organizational account user name and password.
-
- Type App registrations in the top search bar, then click App registrations in the search results.
-
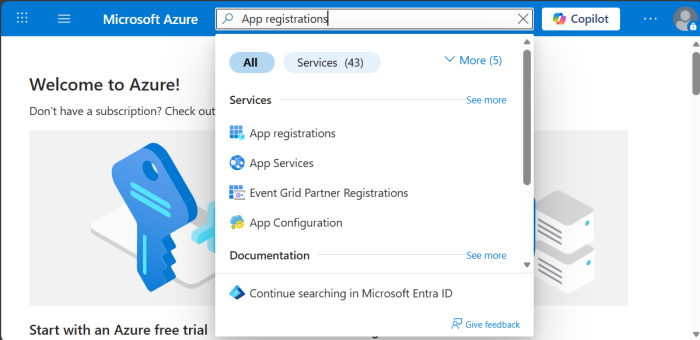
- This takes you to the App Registrations dashboard
-

- Click the New Registration button to register a new application.
- This displays the Register an application page.
-

- Complete the Registration form then click Register to continue.
-
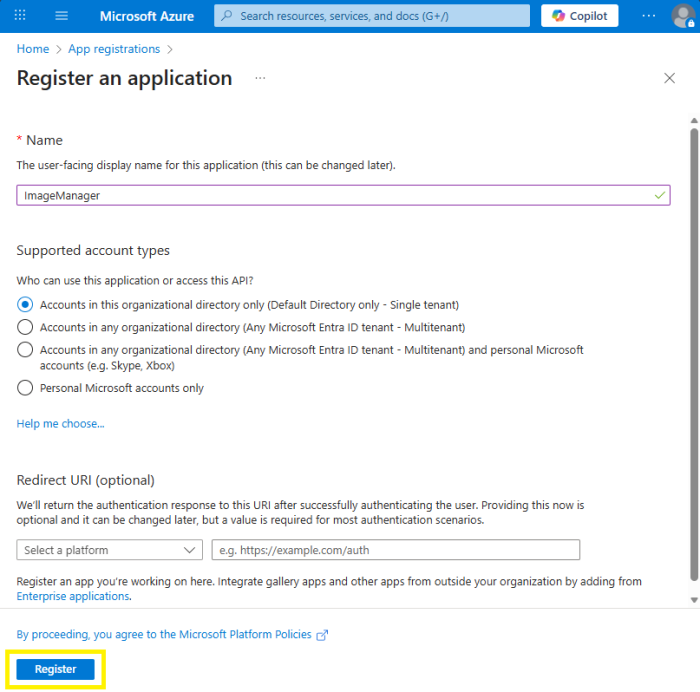
- Form details.
- Name: Enter any name, for example ImageManager.
- Supported account types:
- Choose one of the following according to your needs:
- Accounts in this organizational directory only (Default Directory only - Single tenant):
- Requirement for authentication: Both Client ID & Tenant ID.
- Description: Restricted to users within a single Microsoft Entra ID tenant (your organization).
- Use case: Internal applications.
- Security: This is the most secure because it limits exposure by ensuring only users from your organization can authenticate.
- Accounts in any organizational directory (Any Microsoft Entra ID tenant - Multitenant):
- Requirement for authentication: Client ID (Tenant ID optional).
- Description: Accessible by users from any Microsoft Entra ID tenant (any organization using Microsoft 365 or Azure).
- Use case: SaaS applications intended for multiple organizations.
- Security: Broader access scope; ensure proper tenant validation and access controls.
- Accounts in any organizational directory (Any Microsoft Entra ID tenant - Multitenant) and personal Microsoft accounts (e.g. Skype, Xbox):
- Requirement for authentication: Only Client ID (Tenant ID is not required and MUST BE left blank).
- Description: Supports both organizational accounts (from any Microsoft Entra ID tenant) and personal Microsoft accounts (e.g., Outlook.com), Xbox, Skype).
- Use case: Applications for business and consumers.
- Security: Requires careful handling of identity types and permissions due to mixed account sources.
- Personal Microsoft accounts only is NOT supported.
- After registration, you'll be redirected to the Overview screen.
-
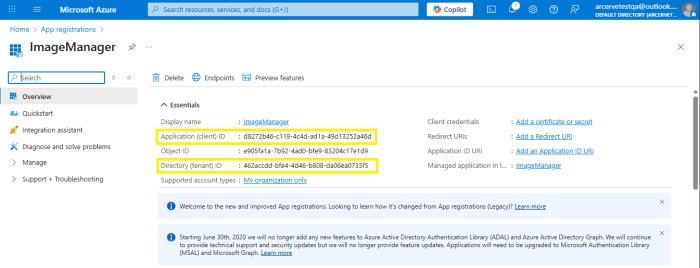
- Collect (copy) the application identifiers.
- Application Identifiers
- Client ID (Application ID).
- Tenant ID (required for "Single tenant" configuration).
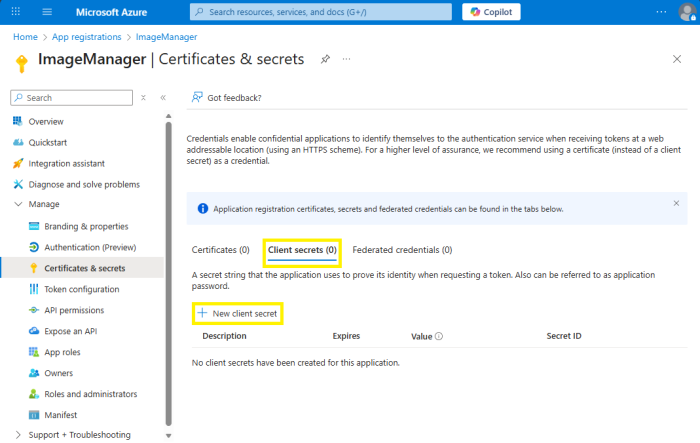
- Add a Client Secret.
- For Client credentials, click Add a certificate or secret.
-

- Under Client secrets, click New client secret.
-
- A pop-up window will open up at the right side of the window.
-
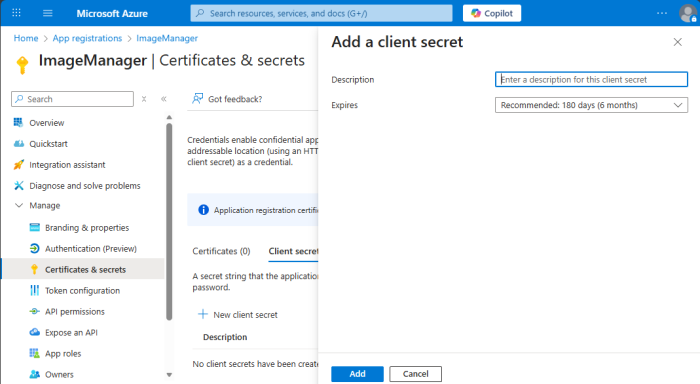
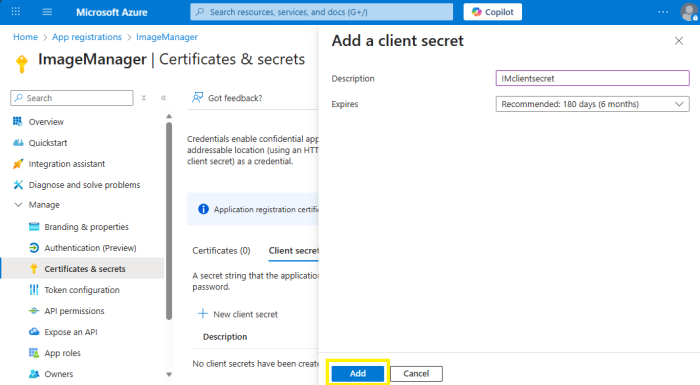
- Enter a description and select the option for the Expires dropdown.
- Click Add.
-
- Important: Copy and save the secret value immediately — it won't be shown again.
-
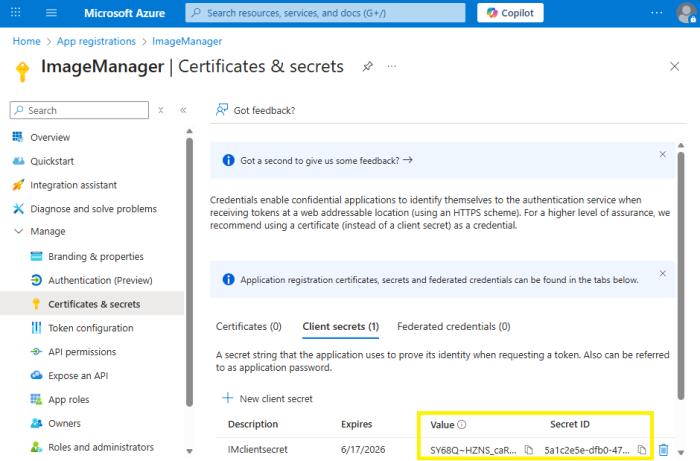
- Security: Keep your client secret safe. Never share it in public codebases or on the client side.
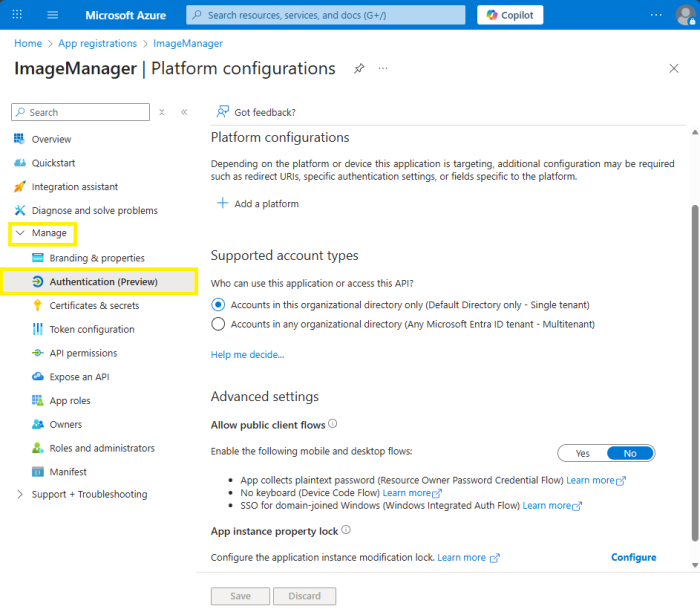
- From the left sidebar, expand the Manage drop down and click Authentication.
- The Authentication configuration page will open.
-
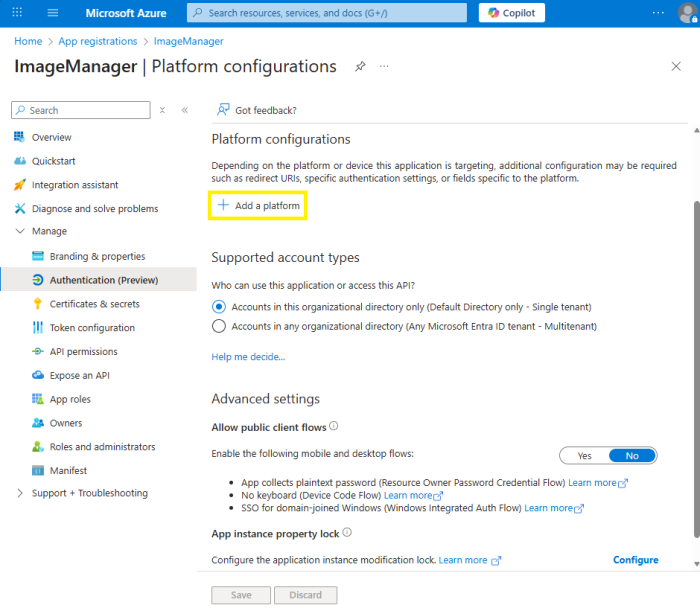
- Set up the Application Platform.
- Under Platform configurations, click Add a platform.
-
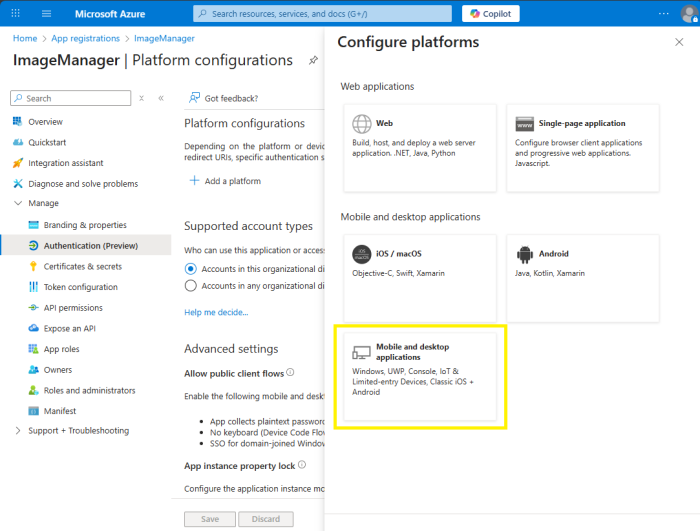
- Select Mobile and Desktop application.
-
- A new pop-up window will open on the right side of the window to Configure Desktop + devices.
-
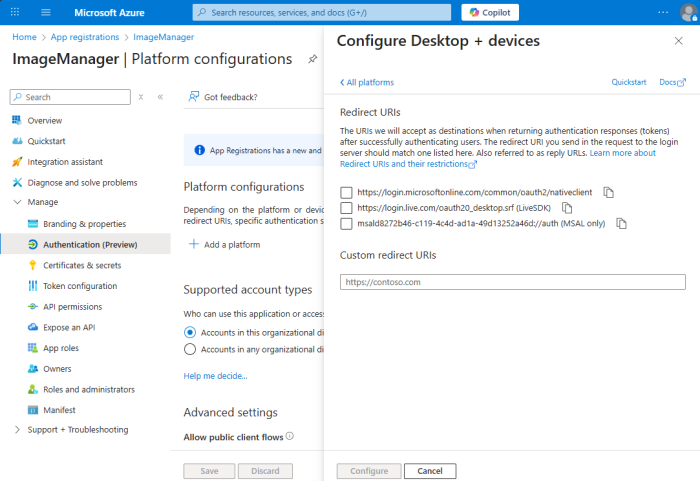
- Under Custom redirect URIs, enter http://localhost (or http://localhost:PORT if using a custom port).
-
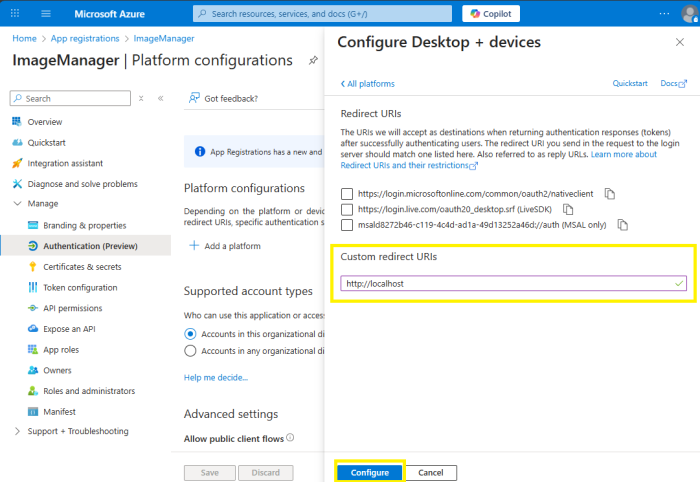
- Click Configure.
- Enable Public Client Flows
- Under Authentication, scroll to Advanced settings.
-
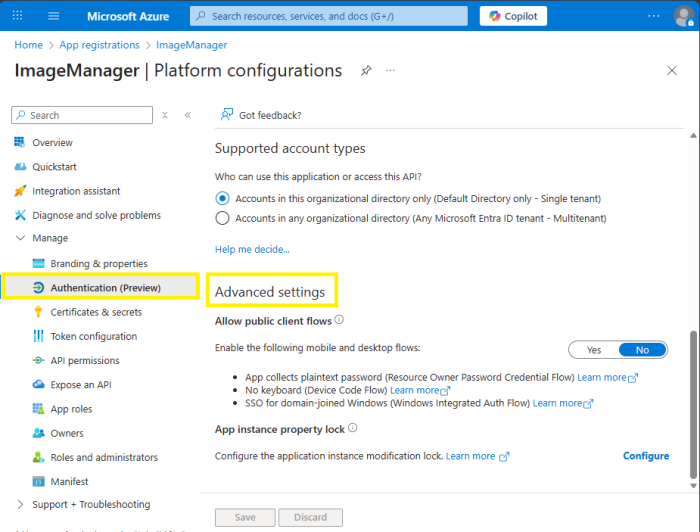
- For the Allow public client flows, click Yes to enable the mobile and desktop flows.
-
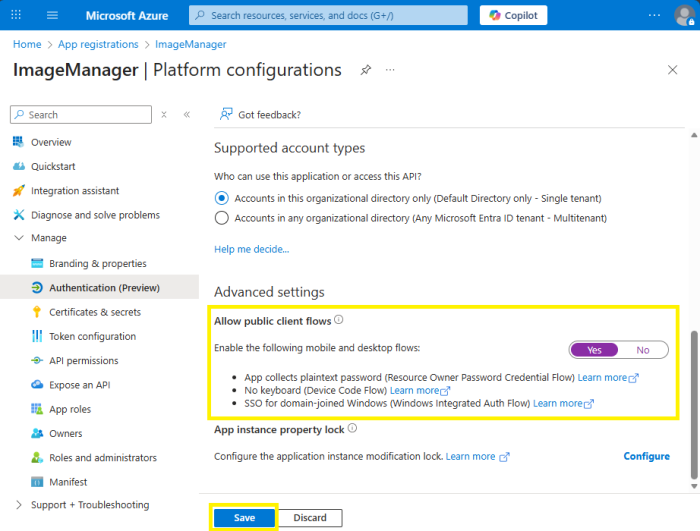
- Click Save.
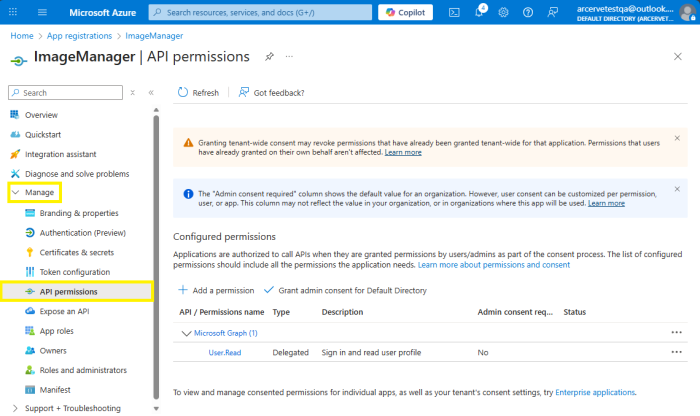
- Grant Microsoft Graph API Permissions
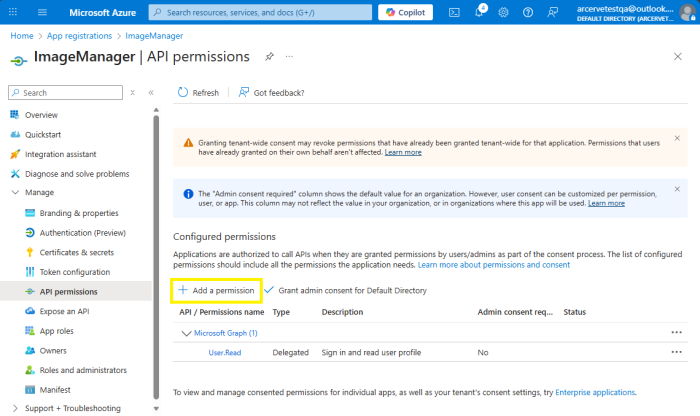
- In the left sidebar, under Manage, click API permissions.
-
- Click Add a permission.
-
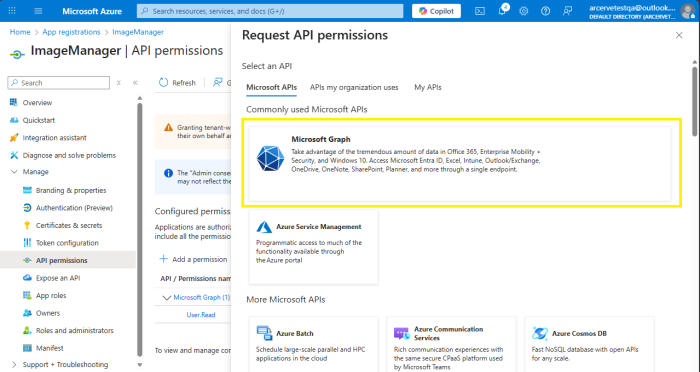
- A pop-up window will open on the right side. Under Microsoft APIs, click Microsoft Graph.
-
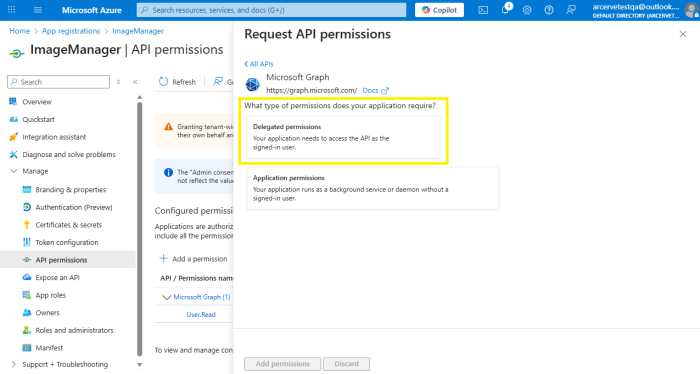
- A new pop-up window will open on the right side. For the type of permission your application requires, click Delegated permissions.
-
- Scroll down to the Select permissions section.
-
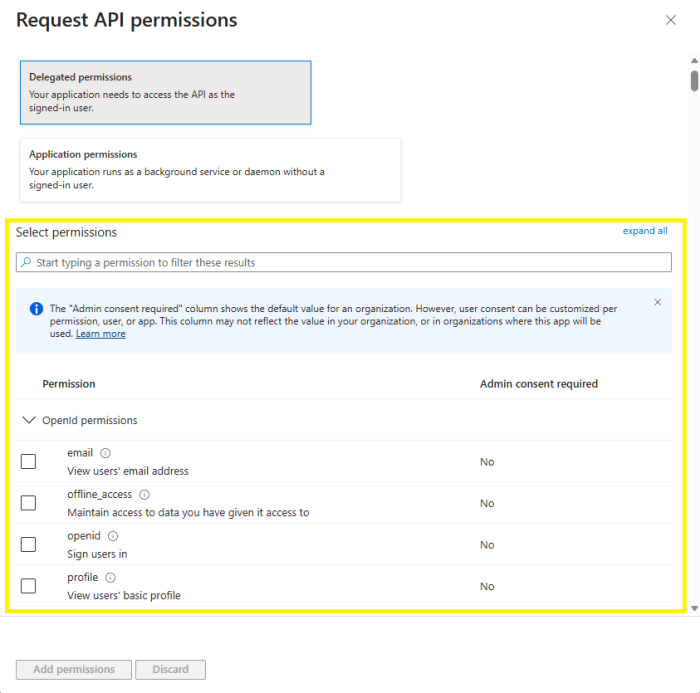
- Type Mail.Send in the search bar of the Select permissions section.
-
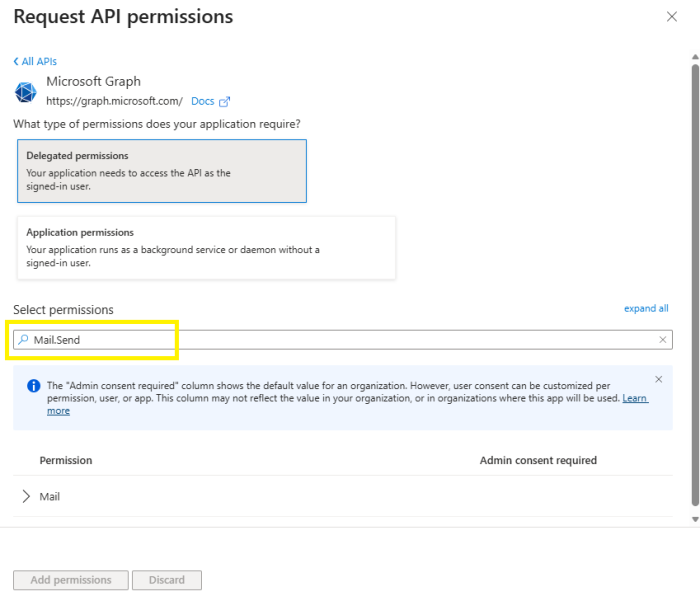
- Under the Permission section, expand the Mail section.
-
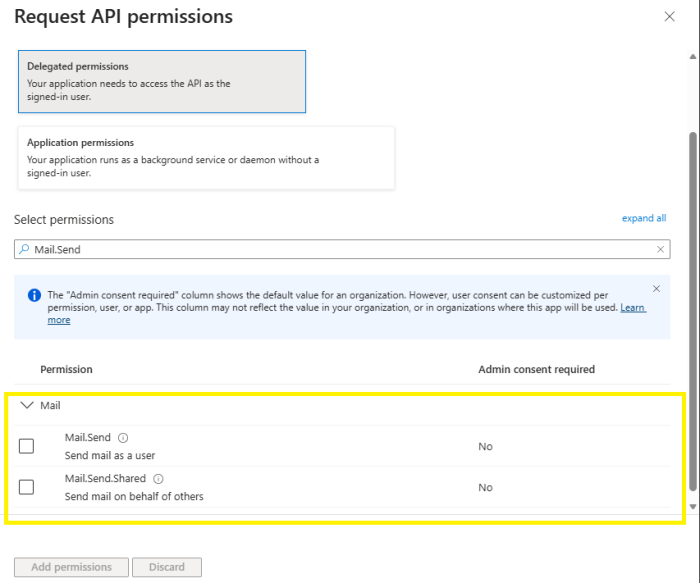
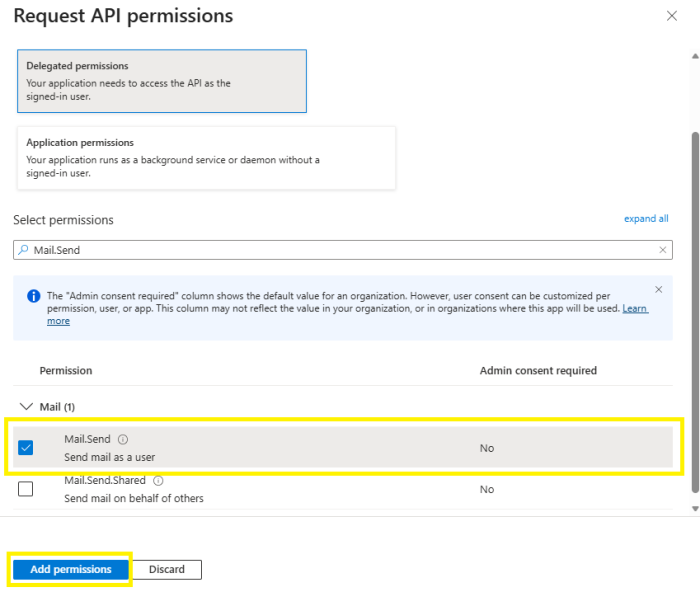
- Check the box to select Mail.Send (send mail as a user) then click Add permissions to apply the selections.
-
- This will display permissions that were added in the Configured permissions section.
-
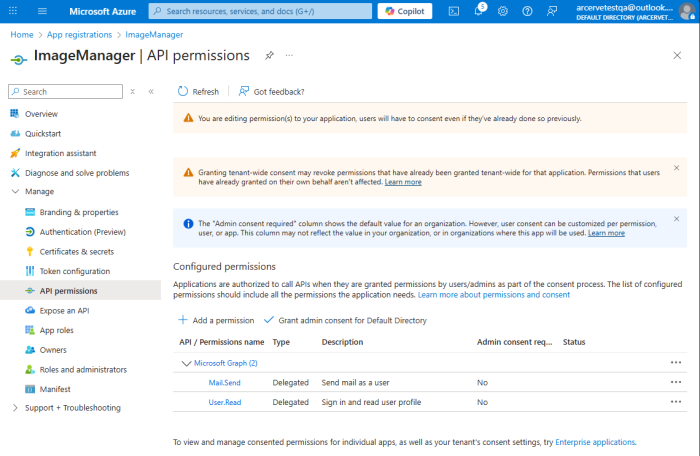
- Admin Consent Note: If you selected multitenant or broader configurations, organization admins may need to grant consent for Mail.Send in their tenant. See Azure Admin Consent Documentation.