How Do I Configure OneXafe Networking?
OneXafe 3.1 and newer networking configuration options allow multiple network profiles, and multiple virtual IP addresses can be assigned to a OneXafe cluster. Depending on the OneXafe model, there will be either 2 or 3 pairs of NICs and either 10GbE or 1GbE link speeds. Consequently, admins will be able to configure port group 0 (PG0), port group 1 (PG1), and (possibly) port group 2 (PG2) with specific networking settings. When configuring network profiles, each one must be on a different subnet. OneXafe now supports up to 25 different network profiles and up to 25 virtual IP (VIP) addresses for a OneXafe cluster.
StorageCraft recommends that admins create one (there can be only one) VIP for each network profile. This provides configuration flexibility when adding nodes to a cluster (or if starting with a multi-node cluster) and eliminates reconfiguring the networking settings in the future. See the How To video: Configure Port Groups and VLAN Tagging with OneXafe 3.1 for additional information.
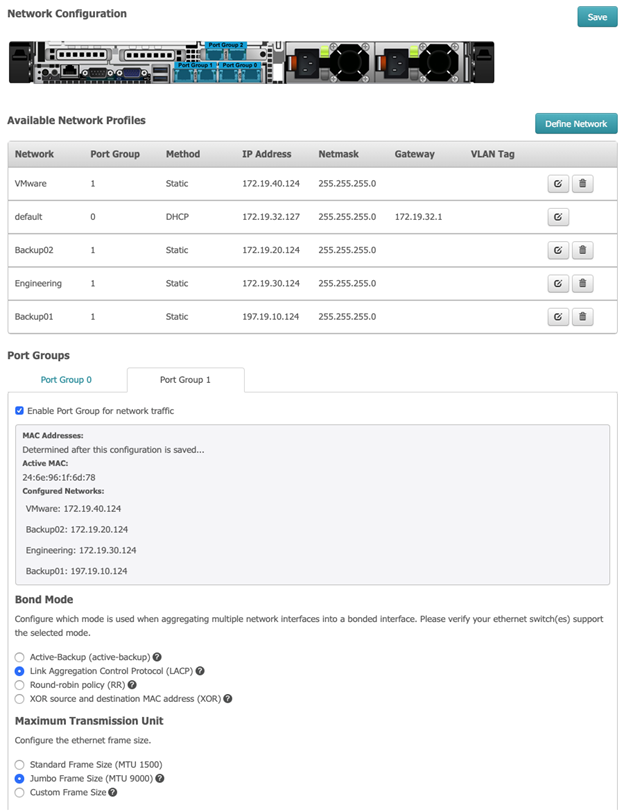
Nearly all of the network configuration work can be done through the web console (with the exception of xmithash policies). The example below (for OneXafe 50001) shows 5 network profiles and two enabled port groups for a OneXafe 5210 cluster.
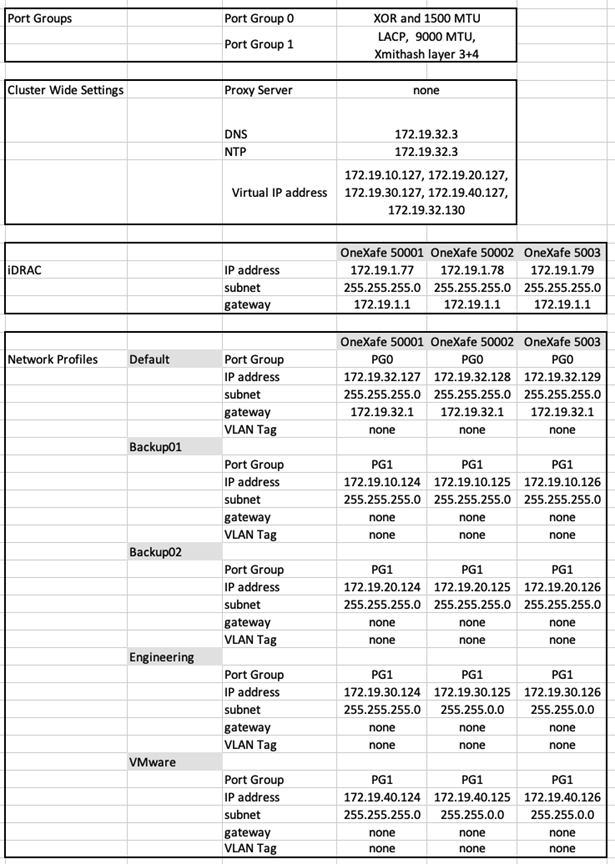
The Excel screenshot is an example for the entire network configuration including port groups, cluster-wide DNS/NTP, IP addresses, and VIPs.
StorageCraft recommends using the OneXafe web console to configure all network settings. If needed, you can use the exconsole command line operations for OneXafe network configuration. The exconsole can be accessed via monitor/keyboard or via IPMI/iDRAC. See the IPMI/iDRAC section in Console Commands and Utilizing IPMi or iDRAC network access for exconsole information.