How do I set SMB Share Level Quotas?
OneXafe now supports share level quotas configured through Windows permissions. After authenticating the OneXafe cluster with Active directory, creating the SMB share through OneSystem, and logging into Windows with the appropriate permissions, an admin may now set the quota.
To set SMB share level quotas
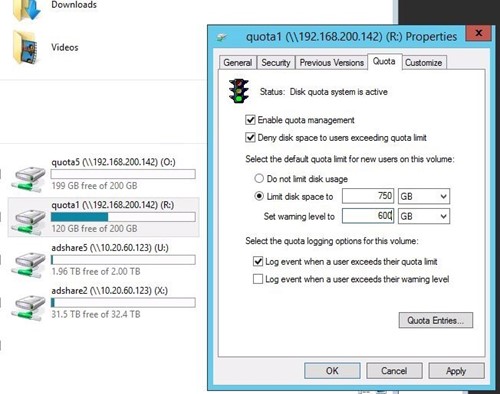
Simply right mouse —> ’properties’ —> ’quota’.
- Mount the desired SMB share to the Windows server or PC and log in with the appropriate AD user credentials.
- Check quota management.
- Check ‘Deny disk space...’ (If this isn’t checked, it will be a soft quota enforcement)
- Set the appropriate capacity limit on the share.
- Click Apply. The following figure shows setting hard quotas in Windows 2012 R2l
After this is complete, administrators and end users will only see the share level quota capacity.
They will no longer see the entire OneXafe cluster capacity. OneSystem administrators may view the OneXafe cluster capacity at any time in OneSystem.