Creating a New Data Replication or Full System High Availability Scenario for Microsoft Azure
You can create a Data Replication or a Full System High Availability scenario where the specified Azure instances are allowed in the Scenario Creation Wizard to be used as Replica servers. This procedure launches a Wizard that guides you through the steps required for the scenario creation. However, properties can also be configured outside of the wizard.
This section provides instructions on how to create full system scenario for Microsoft Azure. Before you begin, make sure to register and create an account in Azure.
Follow these steps:
- Open the Arcserve RHA Manager, navigate to Scenario > New or click the New Scenario button to launch the wizard.
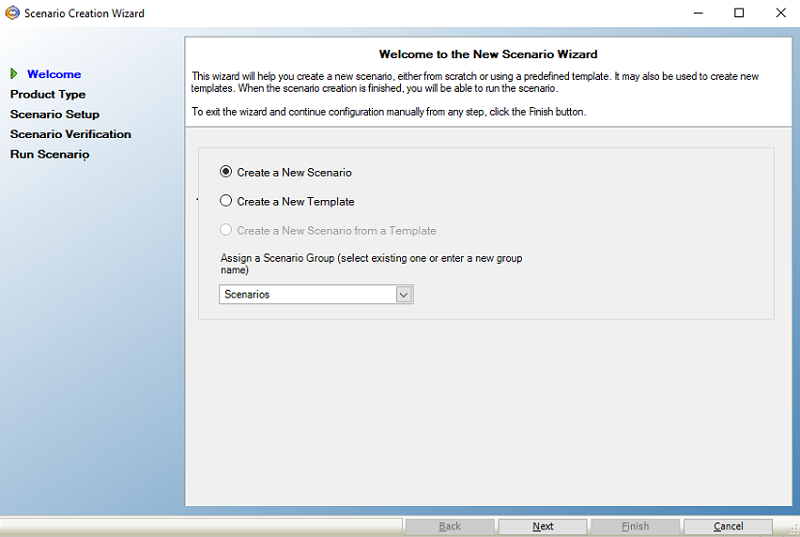
- On the Welcome to the New Scenario Wizard screen, do the following:
- Select Create a New Scenario.
- From the Assign a Scenario Group drop-down list, select a Scenario Group.
- Click Next.
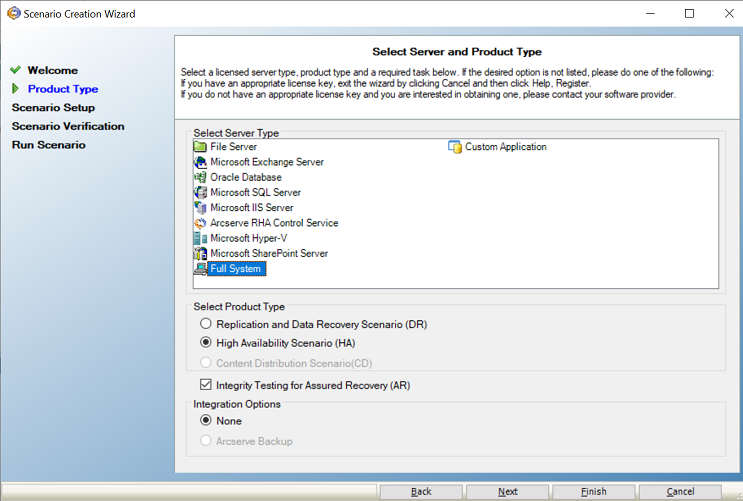
- On the Select Server and Product Type screen, select Full System, High Availability Scenario (HA), and then click Next.
- To perform replication and data recovery, select the Replication and Data Recovery Scenario (DR) option.
- Microsoft Hyper-V is not currently supported for cloud-based data replication.
- To perform Assured Recovery testing, select the Integrity Testing for Assured Recover (AR) check box.
-
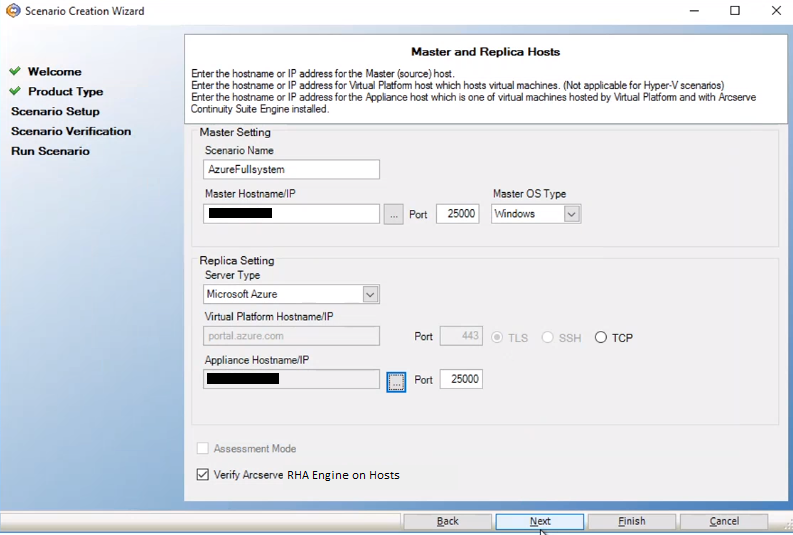
- On the Master and Replica Hosts screen, do the following, and then click Next:
- Scenario Name- Enter a Scenario Name. The default value is the scenario type, for example, Full System.
- Master Hostname/IP - Enter the IP address of a physical machine you want to protect.
- Master OS Type - Select Windows as the Master OS Type.
- Server Type - Select Microsoft Azure as the Replica server.
- Appliance Hostname/IP and Port - Browse the Appliance Hostname/IP to select the Replica server.
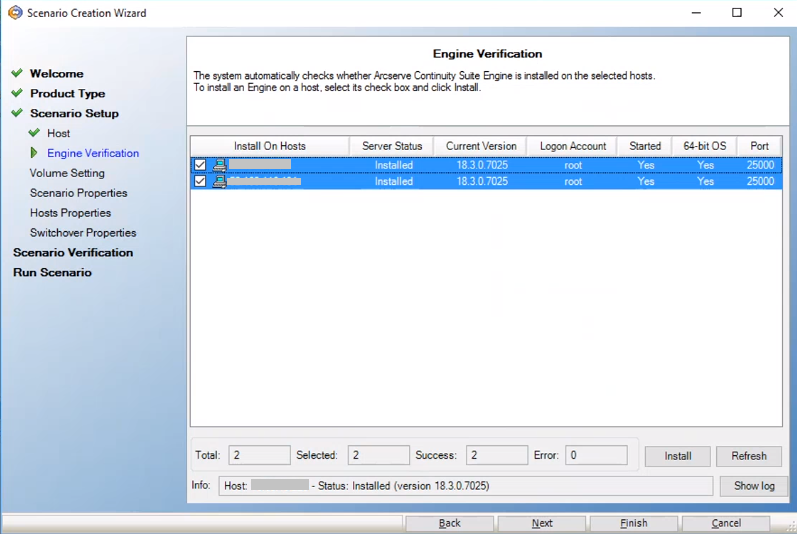
- Select the Verify Arcserve RHA Engine on Hosts check box to verify the connectivity between Master and Replica. It verifies that the engines are installed on the Master. To skip verification, clear the check box.
-
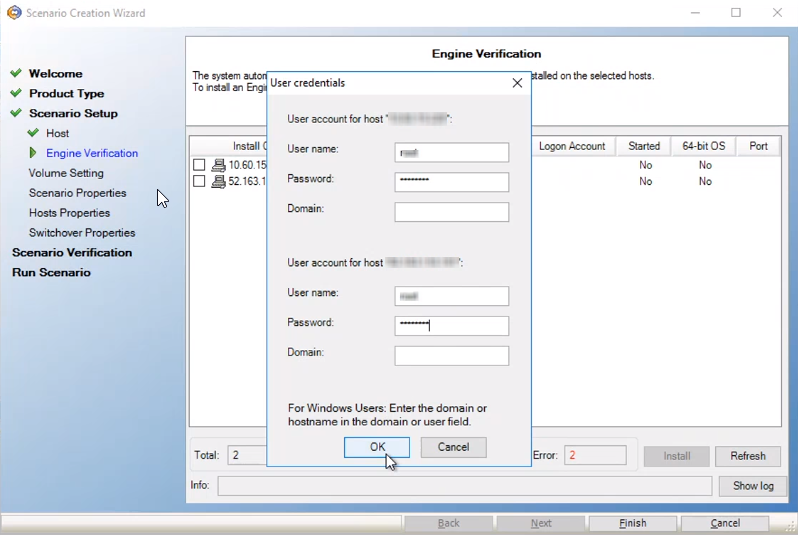
- On the Engine Verification screen, the User credentials screen appears. Enter the user name and password, and then click OK.
-
- Wait for Engine verification to complete, and then click Next.
-
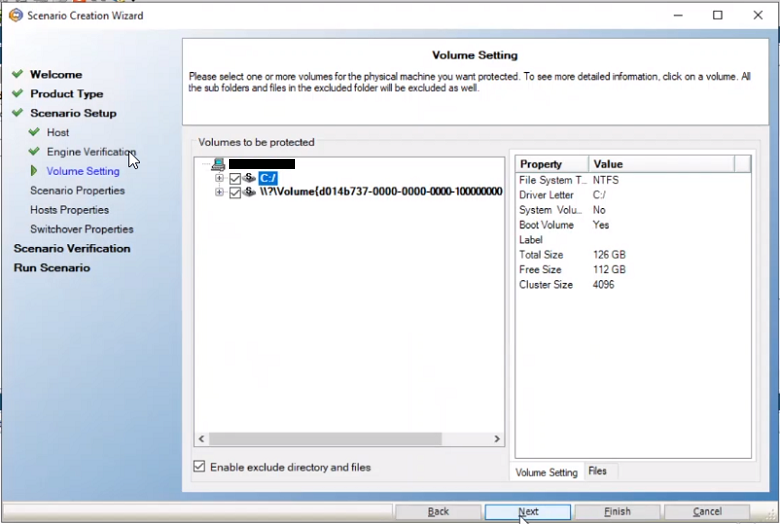
- On the Volume Setting screen, select one or more volumes for the physical machine you want to protect, and then click Next.
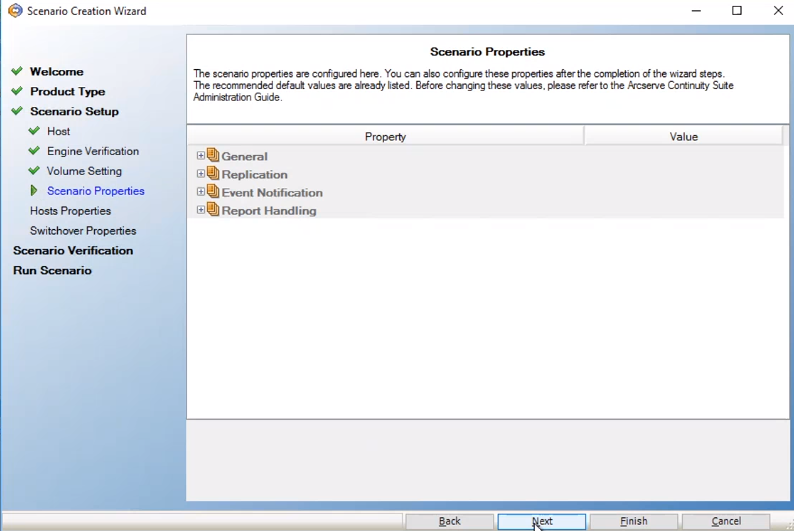
- On the Scenario Properties screen, click Next.
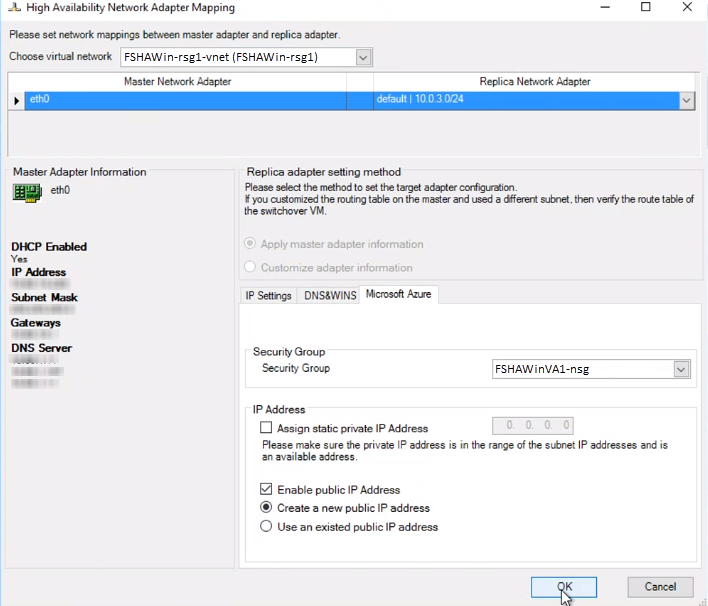
- On the High Availability Network Adapter Mapping dialog, enter the following details, and then click OK:
- Choose virtual network - Select virtual network from the drop-down list.
- Replica Network Adapter - Select the Replica network adapter from the drop-down list.
- Microsoft Azure - Do the following:
- Security Group - Select the required security group from the drop-down list.
- IP Address - Select one of the following:
- Assign static private IP Address
- Enable public IP address
- If you want to create a new public IP address, enable the Create a new public IP address option.
- If you want to connect to the virtual machine from outside your network, enable the Use an existed public IP address option.
-
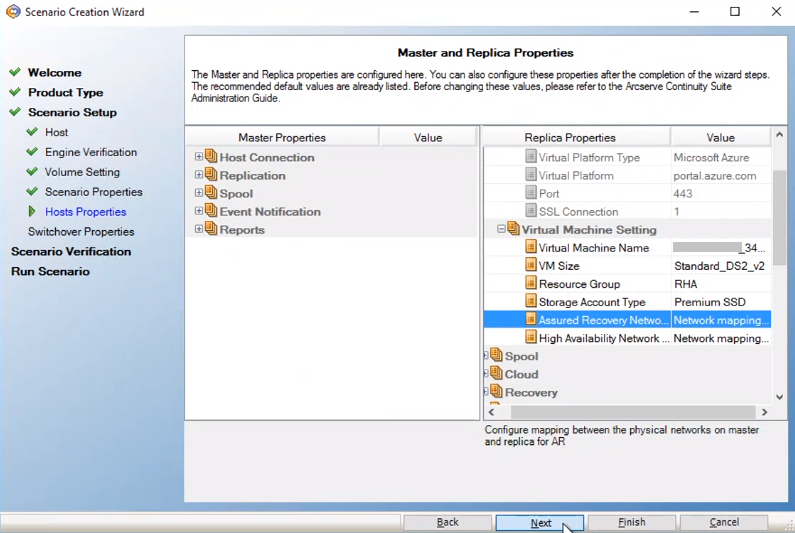
- On the Master and Replica Properties screen, navigate to Virtual Machine -> Virtual Machine Setting, select Assured Recovery Network, and then click Next.
- Note: The Assured Recovery Network option displays only If you have enabled the Integrity Testing for Assured Recovery (AR) option on the Select Server and Product Type screen.
-
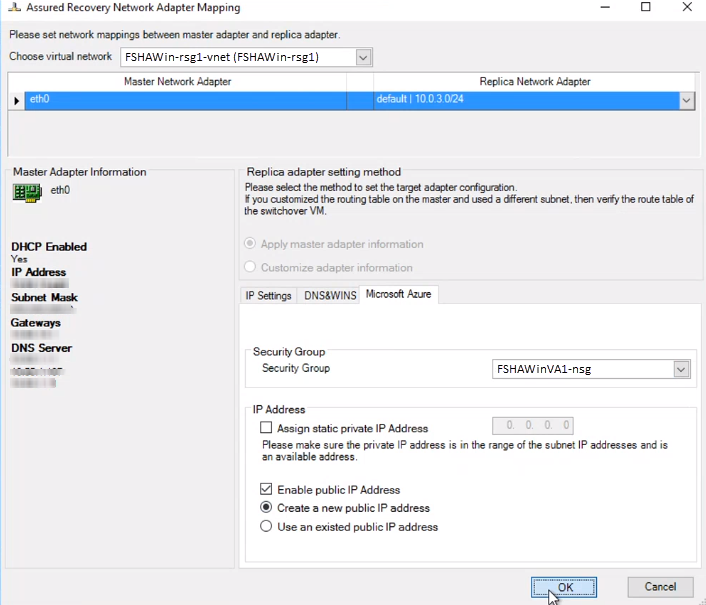
- On the Assured Recovery Network Adapter Mapping dialog, enter the following details, and then click OK:
- Choose virtual network - Select virtual network from the drop-down list.
- Replica Network Adapter - Select the Replica network adapter from the drop-down list.
- Microsoft Azure - Do the following:
- Security Group - Select the required security group from the drop-down list.
- IP Address - Select one of the following:
- Assign static private IP Address
- Enable public IP address
- If you want to create a new public IP address, enable the Create a new public IP address option.
- If you want to connect to the virtual machine from outside your network, enable the Use an existed public IP address option.
-
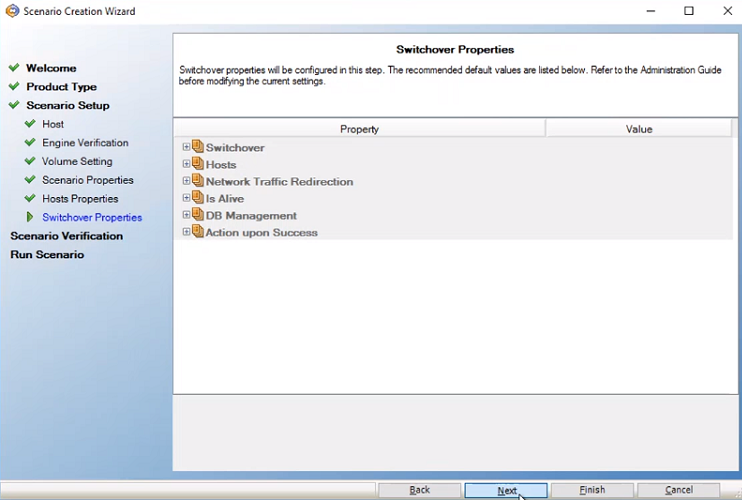
- On the Switchover Properties screen, accept the default values or modify the values, and then click Next.
-
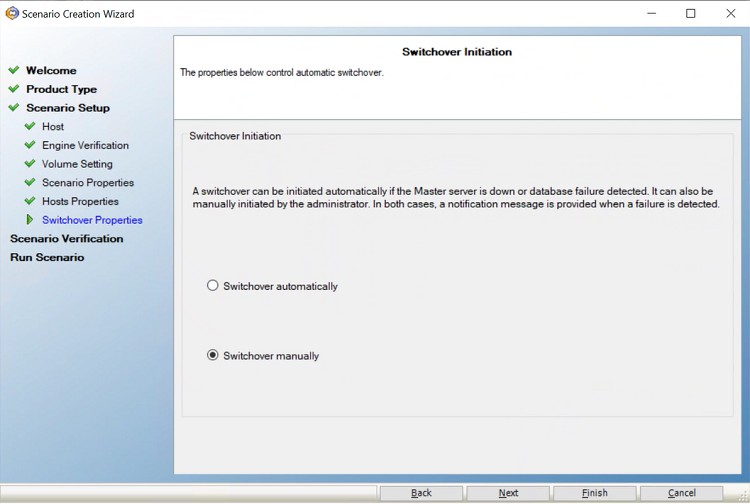
- On the Switchover Initiation screen, specify if you want the switchover to start automatically (Switchover automatically) or manually (Switchover manually), and then click Next. For more information, see Performing Switchover for a Full System EC2 High Availability Scenario.
-
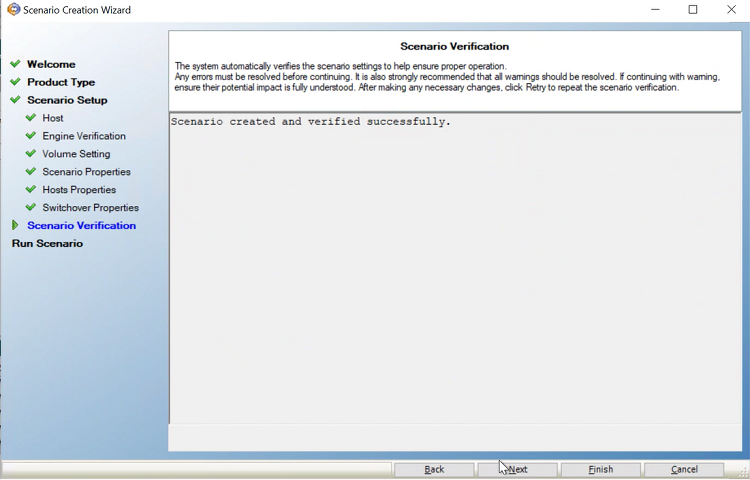
- On the Scenario Verification screen, click Next.
-
- Note: If the Master and Replica servers fail to ping each other, configure the Windows firewall and NAT settings. For more information, see Configure the Windows Firewall and NAT Settings.
- On the Scenario Run screen, to start synchronization immediately and activate the scenario, click Run Now. To save and run the scenario later, click Finish. For more information, see Run and Synchronize a Full System Azure High Availability or Data Replication Scenario.
-
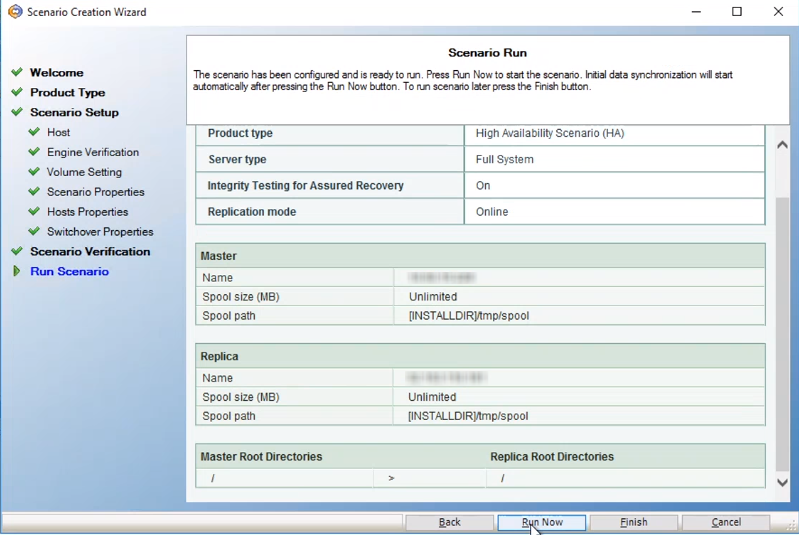
- The synchronization between Master and Replica servers starts. Wait for synchronization to complete.
-
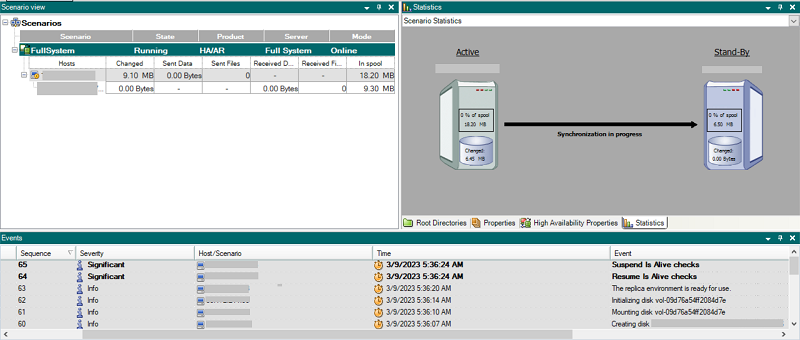
- After the synchronization finishes, the replication process starts.
Notes:
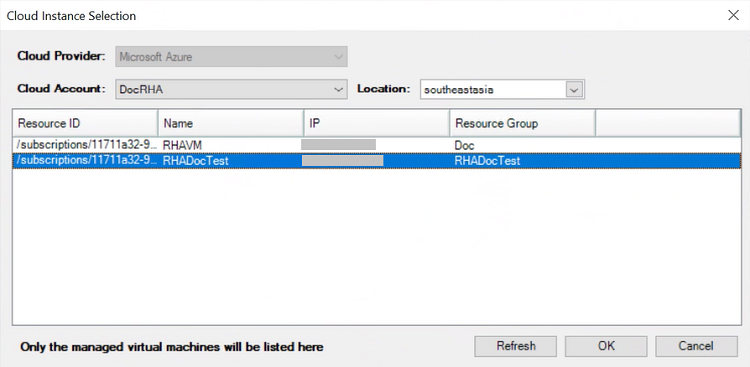
On the Cloud Instance Selection dialog, from the Location drop-down list, select the location where you created the Azure cloud account. The list refreshes to display the relevant Azure instances. From the list, select the Azure instance that you had created, and then click OK.