Running PowerShell script for Entra ID app registration
You need to complete the steps on the Add Permissions to the App Registration page before starting the steps on this page.
Important: After downloading the script you need to rename the file extension to .ps1 before you run it.
Download and use the PowerShell script to Generate a certificate for your Entra ID app registration for SaaS Backup.
Supported Formats:
- The certificate can have the following formats: CRT, CER, PEM.
- The private key must be in the KEY format.
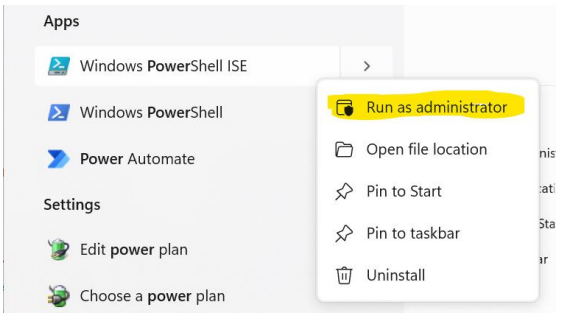
- Open PowerShell on your PC as an Administrator.
-
- Enable execution of PowerShell scripts on your PC with the following command:
- Set-ExecutionPolicy -Scope Process -ExecutionPolicy Bypass
-

- Note: If you exit PowerShell, you will have to run this command again to run scripts
- If you haven't done it already, download and save the PowerShell script to a preferred location to Generate a certificate for your Entra ID app registration then navigate to that location.
- For example: C:\Users\(Your username)\Documents\Multiapp and then change directories to that location by typing:
- cd C:\Users\(Your user name)\Documents\Multiapp
-

- Rename the file extension to .ps1 and run the following command:
- ./generate-self-signed-cert.ps1
-

- Enter the PubKeyFileName with a .key at the end (see image below) and click Enter.
- Note: You will need this name in the next steps:
-

- Enter the PriveKeyFileName with a .key at the end then click Enter.
-

- Enter the Certificate file name with an .cer extension.
-

- Enter the following information as prompted:
- Country Name (2 letter code) [AU]:
- State or province name (full name) [Your-State]:
- Locality Name (eg, city):
- Organization Name (eg, company) [Internet Widgits Pty Ltd]:
- Organization Unit Name (eg, section) [Engineering]:
- Common Name (e.g. server FQDN or YOUR name) [foo.org]:
- Email address [foo@bar.baz]:
- Note: The example email address [foo@bar.baz] represents the email address dedicated to your tenant. This can include a service account.
-
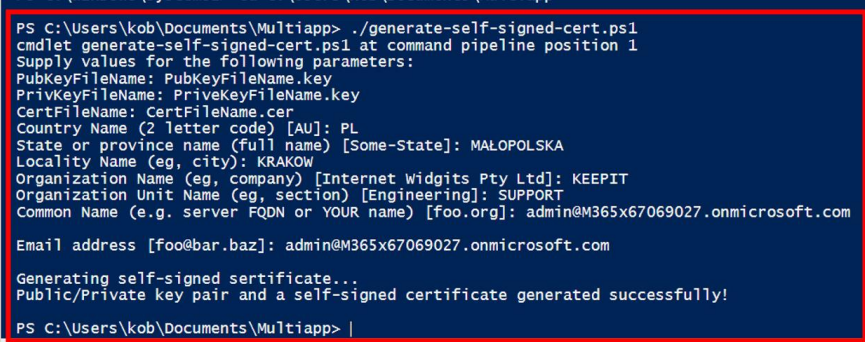
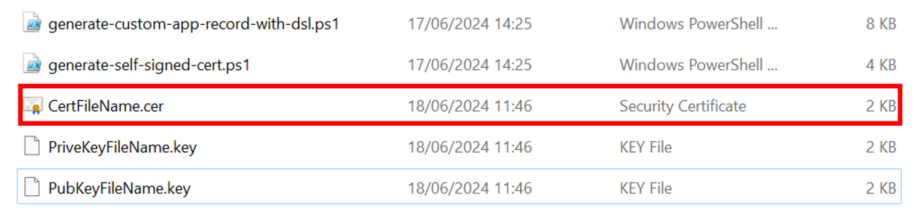
- When all the information is entered, the certificate will be generated and saved in the location where the script was saved.
-
Go to the Using Your Own Certificate page and complete the steps on that page as applicable.