Monitoring Backup Jobs
ShadowProtect SPX introduces the Backup Job Timeline—a dynamic chart of a selected backup job showing the status of each backup event.
To use the timeline, follow these steps:
- Click the Logout icon
 to display the Sessions dialog.
 -

- Select:
- Local Session to monitor backup jobs on the local system.
- An existing remote connection in the dropdown list to monitor a remote system running SPX.
- Click New Remote Session to create a connection to a remote server running SPX.
- Click Connect. SPX displays the backup job(s) defined for the selected system.
- Note: SPX also displays the IP address for the monitored SPX service at the top of the Dashboard. This allows the user to identify which system's jobs SPX currently displays details on.
- Select a job in the Backup Job list.
The dashboard then shows details for that backup job in the Job Summary, Job Timeline, and Event Details panes:
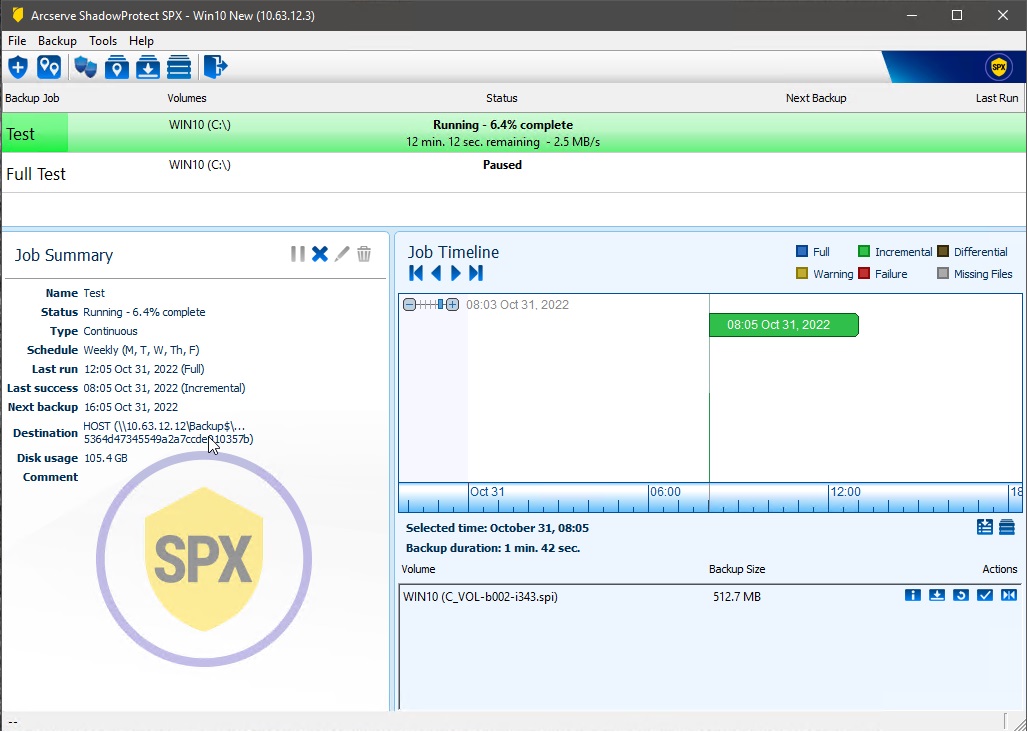
- Color—The event's color indicates:
- Height—Indicates the size of the backup file. An unusually tall bar (compared to past backup files) may indicate an issue with that backup.
- Width—Indicates the length of time required to execute the backup. Again, a variation from the norm may indicate a need for further investigation.
Blue
Successful Full backup.
Green
Successful Incremental backup.
Brown
Successful Differential created.
Yellow
Warning--Indicates that SPX performed the backup but with possible error messages. For example, if a script failed and the option to halt the backup on script failure was not selected.
Red
Failure--Indicates that SPX did not perform the backup. Review the log for this backup to diagnose the issue.
Grey
Missing backup--A previously existing backup file no longer appears in the destination folder. This can result from a Retention policy deleting older backups, a manual deletion, or files that ImageManager consolidated.