To use ImageReady
Follow these steps:
- Run ImageReady from the ShadowProtect folder. The ImageReady main dialog displays:
-
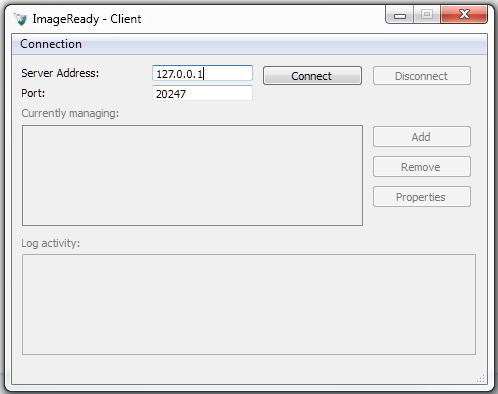
- Click Connect to connect to the server.
- Click Add. ImageReady opens the Properties dialog:
-
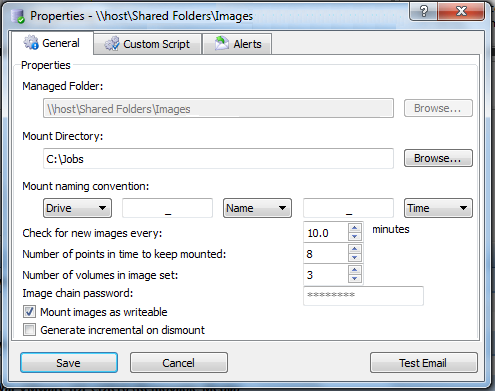
- On the General dialog, click Browse to select a folder that has or will have one or more backup image files.
- Click Browse.
- Select a directory to use for mounting images.
- Enter a unique name for the mounted image(s).
- ImageReady defaults to using:
- The drive letter of the source image file
- The source file's filename
- The time of the mount
- To create a unique name for each mounted volume. ImageReady seperates these elements in the name with dashes but you can delete the dashes and customize the name as needed.
- Select how often ImageReady checks the folder for new files to test.
- The range is from every 6 seconds to every 1440 minutes (ie: 24 hours or once a day) in 1/2 minute intervals.
- Select the number of simultaneous mounted volumes ImageReady maintains--up to 96.
- This number of simultaneously mounted volumes is hardware- and hypervisor-dependent. ImageReady refers to these mounted volumes as "points in time" rather than "volumes" to reflect that a single server, such as Exchange, may require two or three volumes mounted simultanously in order to peform the required tests.
- Note: These settings cannot be changed once saved. Recreate the job if necessary to alter these settings.
- If the selected image files are backups from a multi-volume set (such as with Microsoft Exchange), select the number of volumes to include.
- Enter the password for encrypted backup image files in the Image Chain Password field.
- Determine if the tests you want to perform need ImageReady to write to the mounted volumes. If so, check Mount images as writeable.
- Determine if you want to preserve the results of any test which writes to a mounted volume. If so, check Generate Incremental on dismount.
- Click Save.
- Click Custom Script tab to enter the commands or script for ImageReady to run.
- This script can be of arbitrary length or as simple as c:\Windows\System32\chkdsk $MOUNTPATH1.
- Specify a timeout in minutes or leave the default at 0 for unlimited.
- A timeout prevents a test from running an infinite loop.
- Specify the number of concurrent tasks for ImageReady to execute.
- Note: ImageReady attempts to perform multiple mounts and tests concurrently. This number of simultaneously running tasks is hardware- and hypervisor-dependent. Should tests impact system performance, reduce the number of concurrent tasks.
- By default, ImageReady only runs scripts on new image files in the managed folder. (That is, those files made after creating the ImageReady job.) Check Apply to existing images to have ImageReady run a script against all existing image files in the managed folder and not just new image files.
- Check Dismount on completion to reduce ImageReady's demands on system resources.
- Otherwise, ImageReady will keep the volume mounted until:
- A new image file appears and
- It exceeds the number of points in time to keep mounted.
- Select Alerts if you want the results of each test sent to an email address. Specify the details then click Test Email to confirm the configuration is correct.
- If you do not select to have the email alerts, information on the results will also appear in the Log Activity window of the main dialog.
- Note: Modifying alert settings for one job modifies the settings for all jobs.
- Click Save.
- Repeat these steps to add more folders or additional tests to run.
- To edit an existing test, highlight the managed folder in the list and click Properties.