Hyper-V Deploy Process Overview
See the Setup Details section for additional information.
To Deploy:
Follow these steps:
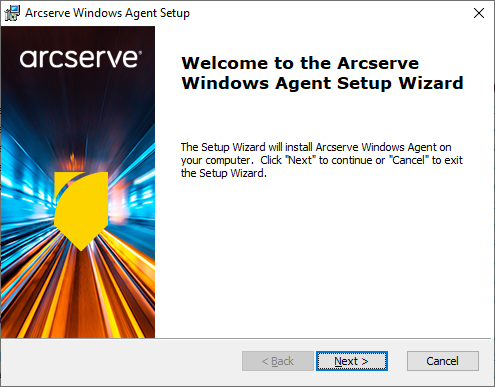
- Download the Agent MSI (Windows Agent Setup Wizard) and run it. Click Next to continue.
-
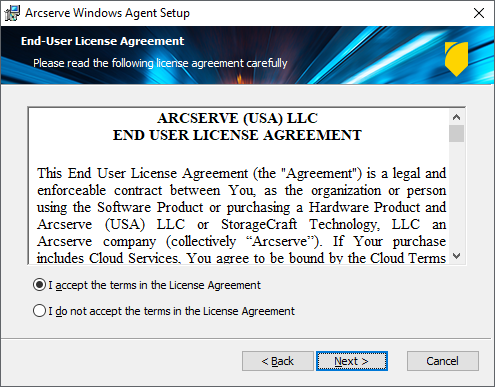
- Accept the License agreement and click Next to continue.
-
- Select Cloud (Public OneSystem) or Private (Self-hosted) OneSystem then click Next to continue.
-
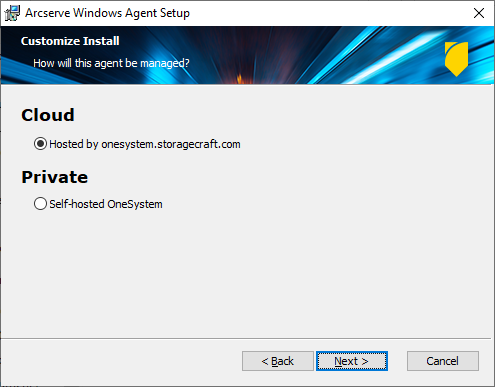
- Note: If you select Cloud - Hosted by onesystem.storagecraft.com (also known as Public OneSystem), the Private OneSystem Management option will not be listed as an option in the next installation window.
- Select the capability you want to install then click Next to continue.
-
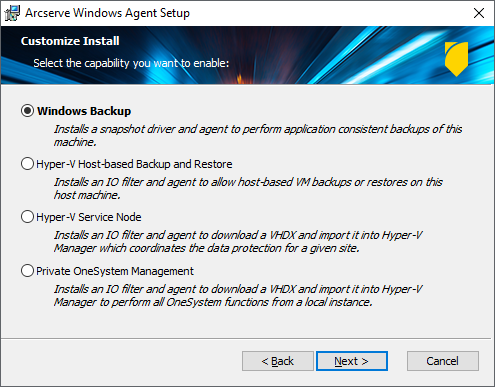
- Windows Backup - Installs a snapshot driver and agent to perform application consistent backups of the machine on which it is installed.
- Hyper-V Host-based Backup and Restore - Installs an IO filter and agent to allow host-based VM backups or restores on the host machine where it is installed.
- Hyper-V Service Node - Installs an IO filter and agent to download a VHDX and import it into Hyper-V Manager, which coordinates the data protection for a given site.
- Private OneSystem Management - Installs an IO filter and agent to download a VHDX and import it into Hyper-V Manager to perform all OneSystem functions from a local instance. If you selected Cloud (Public OneSystem) this option will not be displayed.
- Click Next then enter/confirm any additional information requested until the installation is complete.
- The additional information includes the Appliance Admin credentials and Installation folder.
Custom Install Options (same information as in the image above for improved readability):
These options are described in Hyper-V Deploy Process Capability Details.
Note: If you install on a system that is not Hyper-V capable, the installation will default to Windows Backup (agent) and will skip over the options listed above.