Hyper-V Restore to new VM
Follow these steps:
- Click Target Machine to display the Target Machine screen.
-
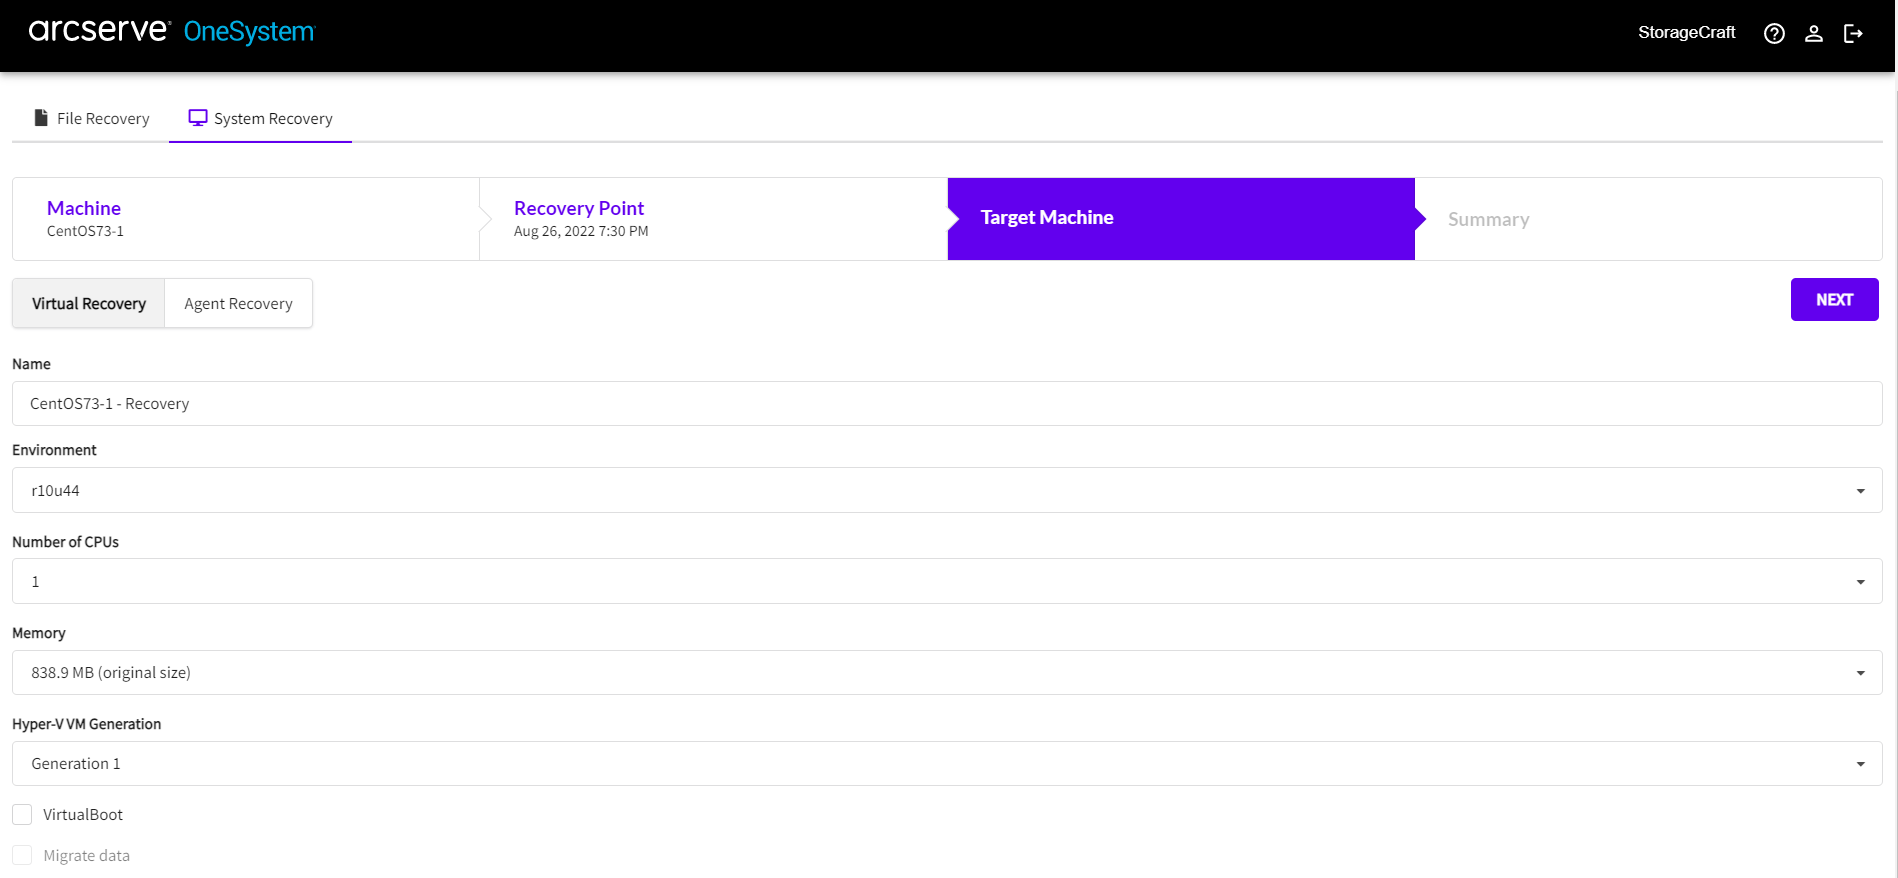
- Click Virtual Recovery, or Agent Recovery depending on which Target type you want.
- Enter the Name of the target machine.
- Select the Environment from the dropdown list.
- Select the number of CPUs from the dropdown list.
- Select the Memory from the dropdown list.
- Select the virtual machine generation (1 or 2).
-
Important! The generation field is auto-populated based on the VM being restored. Overwriting it can cause your recovered VM to not boot if it is restored as an incompatible generation.
- Check VirtualBoot if you want to use VirtualBoot.
- Note: The VirtualBoot option is only available when you select a valid VirtualBoot target.
- If you want to create a permanent VM, check the box to "Migrate data"
- If you want the VM to start automatically after the restore, check the box to "Power on new VM after restore".
- Click Next.
- Verify the details on the Summary screen.
- Click Start Recovery.