How to Mount SQL Databases
This section provides information about mounting the Microsoft SQL databases.
Follow these steps:
- Open the Arcserve UDP Agent UI that is hosted on the Database Server.
- From the Tasks pane, click Mount SQL Database.
-
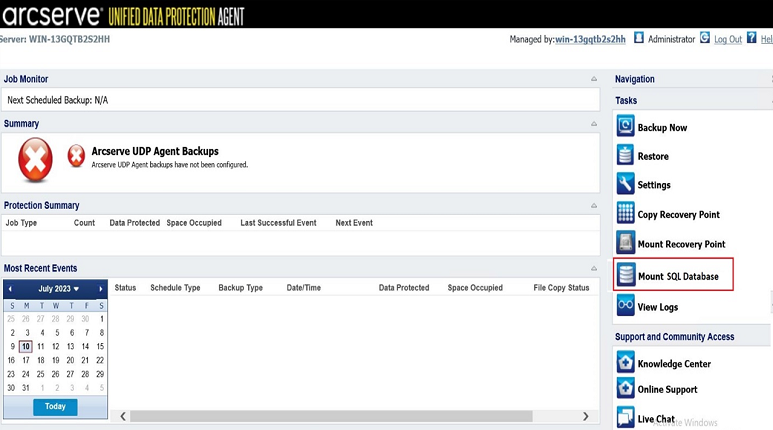
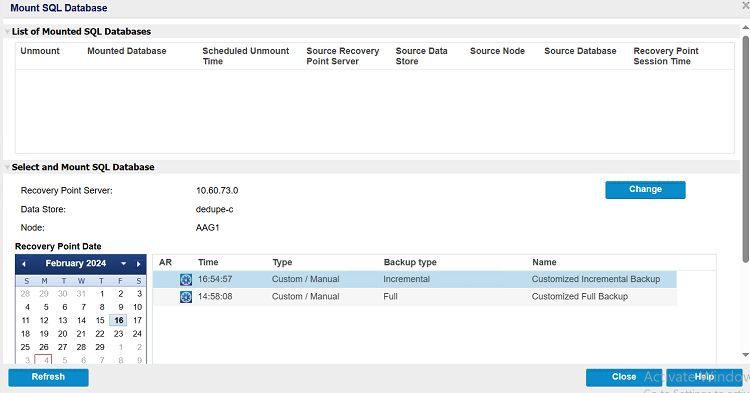
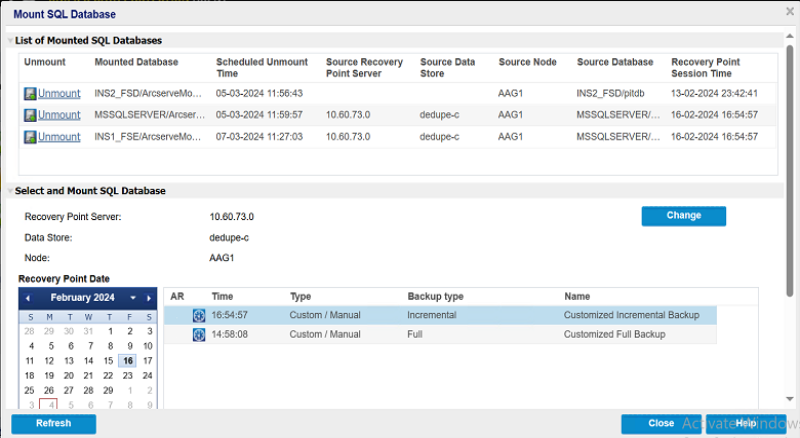
- The Mount SQL Database dialog appears and displays the list of mounted databases.
- To update the backup destination and Recovery Point Server, click Change.
-
- The Source dialog appears.
- On the Source dialog, select one of the following backup locations, and then click OK:
-
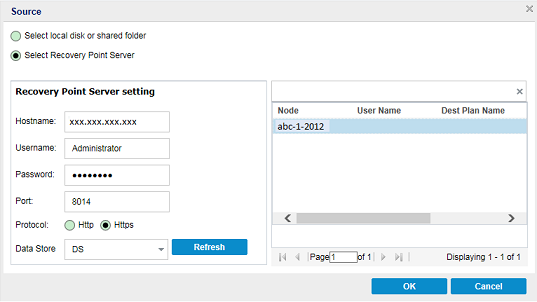
- Select local disk or shared folder
- Specify or browse to the location where you stored the backup images, and then select the appropriate backup source.
- To verify the connection to the specified location, click the green arrow button. If required, enter the Username and Password to access to that source location.
- The Select backup location dialog opens.
- Select the folder in which you stored the recovery points, and then click OK.
- The Select backup location dialog closes and you can see the backup location in the Source dialog.
- The recovery points are listed in the Browse Recovery Points dialog.
- Select Recovery Point Server
- Specify the Recovery Point Server setting details, and then click Refresh.
- All the agents are listed in the Data Protection Agent column in the Source dialog.
- Select the agent from the displayed list.
- The recovery points are listed in the Browse Recovery Points dialog.
- Note: If the recovery point you are attempting to mount is encrypted, Arcserve UDP Agent dialog opens and prompts you to enter the session password.
- To provide the session password, do the following:
- On the Arcserve UDP Agent dialog, click the Import button.
-
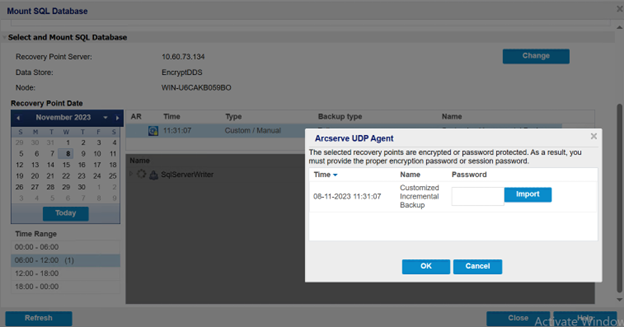
- The Import session password dialog appears.
- Specify or browse to the location where the session passwords file is located, enter the encryption key if needed, and then click OK.
-
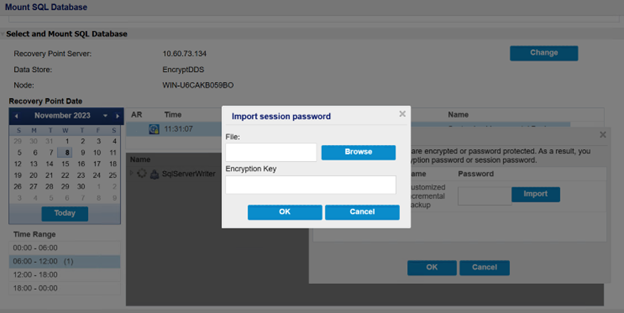
- On successful import, the session password gets auto filled in the Password field.
- Note: If a clock icon appears with a lock symbol, it indicates that the recovery point contains encrypted information and may require a password for restore.
- From the Recovery Point Date section, select a date.
- The corresponding recovery points for that date are displayed, with the time of backup, the type of backup that was performed (Full, Incremental, or Verify), and the name of backup.
- Expand SqlServerWriter, <destination host>, <database instance>, and then click Mount next to the database that you want to mount.
- Notes:
- If the recovery point that you have selected is SQLServerWriter backed up, then you can navigate to instances and databases.
- The Mount option appears only for the user databases.
-
- The Mount SQL Database dialog appears.
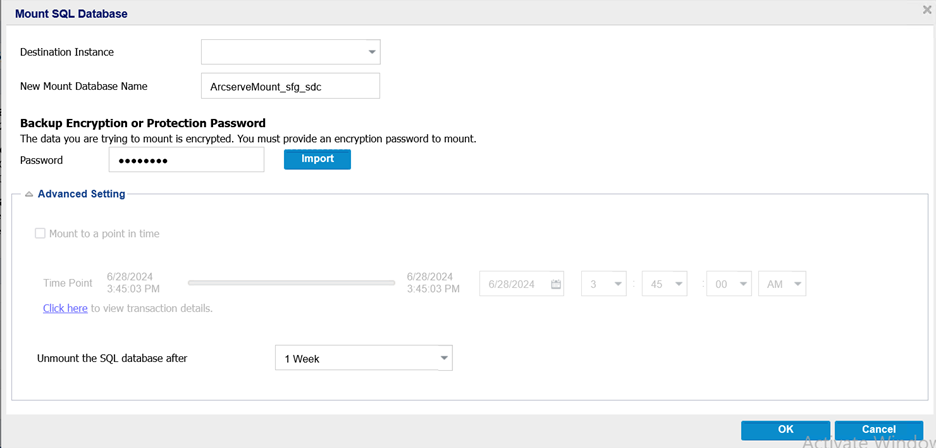
- On the Mount SQL Database dialog, do the following, and then click OK:
- From the Mount Database to Destination Instance drop-down list, select the destination instance as needed.
- Note: If a database is FileStream enabled, the Mount Database to Destination Instance drop-down lists only the FileStream enabled instances. However, if the database is not FileStream enabled, the Mount Database to Destination Instance drop-down displays both the FileStream enabled and disabled instances.
- For New Mount Database Name, specify a unique name for the new database. By default, the database name is ArcserveMount_<selected db name>. You can append a name to the default prefix (ArcserveMount_) or give a completely new name.
- Note: The new database name must be unique and can be a maximum of 128 characters.
- To perform the Point-In-Time (PIT) restore, do the following:
- Under Advanced Setting, select the Mount to a point in time check box, set the time point using the slider or manually set the desired time.
- Notes:
- You can enable the Point-In-Time (PIT) option only when the N and N+1 backup sessions have PIT enabled.
- The Mount to a point in time check box gets enabled only when the destination instance is same as source instance.
- (Optional) To view transaction details, click the Click here hyperlink.
- The Transaction Details dialog appears and displays the list of transactions based on the date and time selected.
- To configure the transactions listed at a database level, click the Select this event button.
-
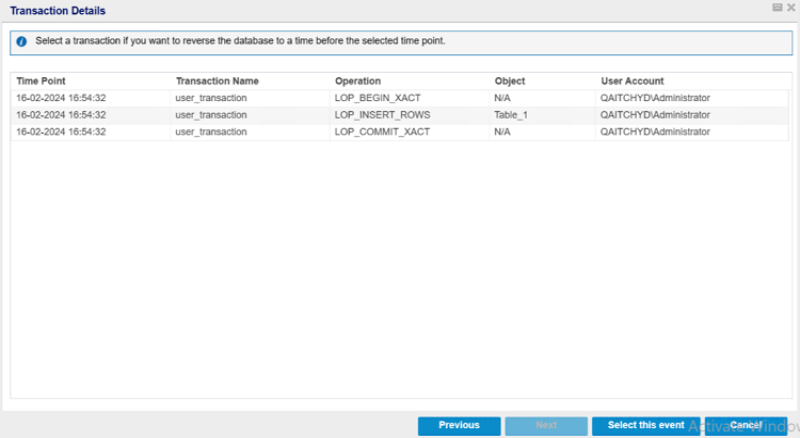
- Note: To view the transactions performed between N and (N+1) recovery points, use the Previous and Next buttons.
- To unmount the SQL database after a specified time, from the Unmount the SQL Database After drop-down list, select the unmount time as needed. The available options are 4 Hours, 10 Hours, 24 Hours, and 1 Week.
- The SQL database gets automatically unmounted after a specified time.
-
- After successful mounting, the database gets listed under the List of Mounted Database table with an Unmount option.
- To unmount the mounted SQL database manually, click the Unmount option corresponding to the SQL database that you want to unmount.
-
- Note: When you delete the mounted database from the SQL Server Management Studio, it will get unmounted from the Agent UI after you refresh the page.
- Click Close.
- The Microsoft SQL database is mounted successfully.
Note: For limitations of mounting the Microsoft SQL database, see Microsoft SQL Server Related.