Create and Associate Service Account Using Google Console
The crucial step is to create a service account at the project level, create a custom role and associate it to the service account. A role contains a set of permissions that allows API’s to perform specific actions on Google Cloud resources. The service account and custom role must be created under the project where Arcserve UDP agent is planned to be installed on the VSB Cloud proxy.
Follow these steps:
- On a web browser, login to Google cloud console as an administrator (the account which has admin privilege to create and manage users/projects/resources) using the following link:
- https://console.cloud.google.com/
- From the drop-down list at the top left of the page, select the project in which you want to set up the VSB cloud proxy.
- If you do not have a project already, click New Project to create a new project.
- Enter the values for project name, organization and location and click CREATE.
- After creating the project, select the project on the resource selection wizard menu mentioned in step 2.
- Verify that the desired project dashboard is shown after the project is selected.
- From the left navigation menu, select IAM and Admin followed by Roles.
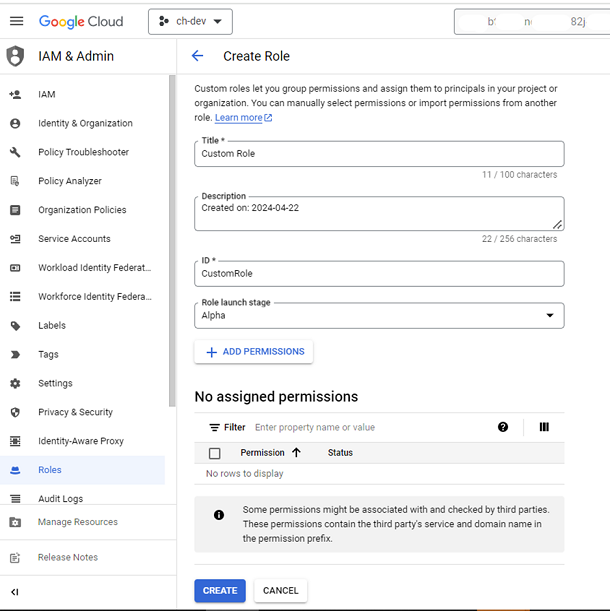
- Click CREATE ROLE.
- The Create Role page is displayed.
- Enter a Name, Title, Description, and Role launch stage for the role.
- Click Add Permissions.
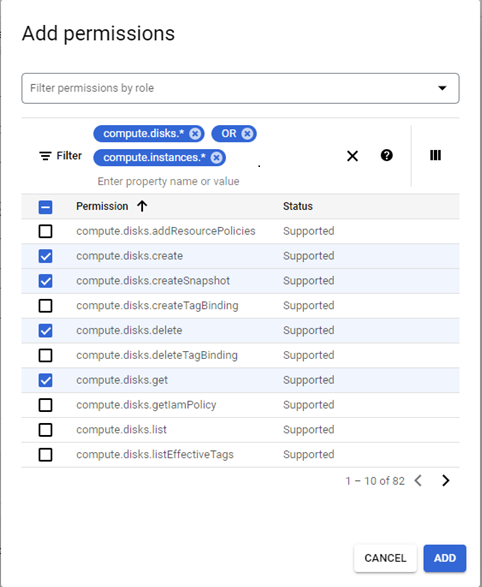
- Select the 69 permissions listed below to include in the role and click Add Permissions.
- Use filters to list compute or storage related permissions required here. Filters can be added like compute.disks.* press enter key which will list all permissions under compute.disks. We can also add OR between filters like, compute.disks.* press enter key and input OR press enter key and start inputting another filter like compute.instances.* and press enter key. In this way all required permissions can be deleted and ADD key can be pressed.
- Click CREATE.
- From the left navigation menu, select IAM and Admin followed by Service Accounts.
- Click CREATE SERVICE ACCOUNT.
- Enter a Name, ID, and Description, then click CREATE AND CONTINUE.
- Under “Grant this service account access to project” select the role that you created in steps 5-7.
- Skip the next step and click DONE.
- The service account for the desired project is listed in the Service Accounts page.
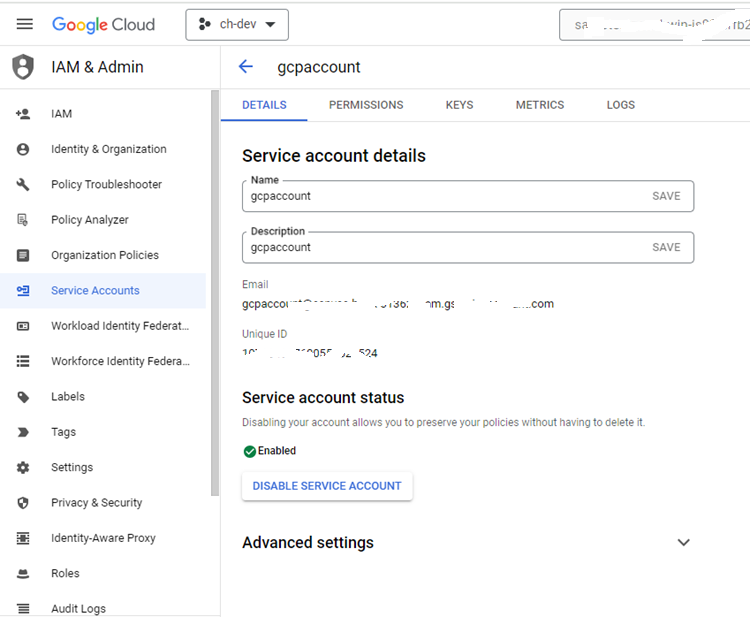
- Now click the Email for the desired service account.
- The Service account details page is displayed.
- Select the KEYS tab.
- Click ADD KEY, followed by CREATE NEW KEY.
- Select JSON as the key type, then click CREATE.
- A JSON key file will be created and downloaded; use this JSON file in UDP (in Add cloud account wizard for GCP).
Note: The role name cannot be changed once it is created.