(Optional) Run the Assured Security - Malware Scan Job Manually
In Arcserve UDP, you can perform all jobs including the Assured Security - Malware Scan job automatically and control the schedule settings. For Assured Security - Malware Scan jobs, besides the scheduled run, Arcserve UDP lets you perform manual test from nodes, plans, and Recovery Point Server (Datastore view). This section provides separate procedures for performing a manual Assured Security - Malware Scan from node, plan, and Recovery Point server > Datastore view.
To perform a manual Assured Security - Malware Scan from a Node, follow these steps:
- On the UDP Console, click the resources tab.
- From the left pane, navigate to Nodes > All Nodes.
- From the Actions drop-down list of a node that you want to scan, select Run Assured Security - Malware Scan Now.
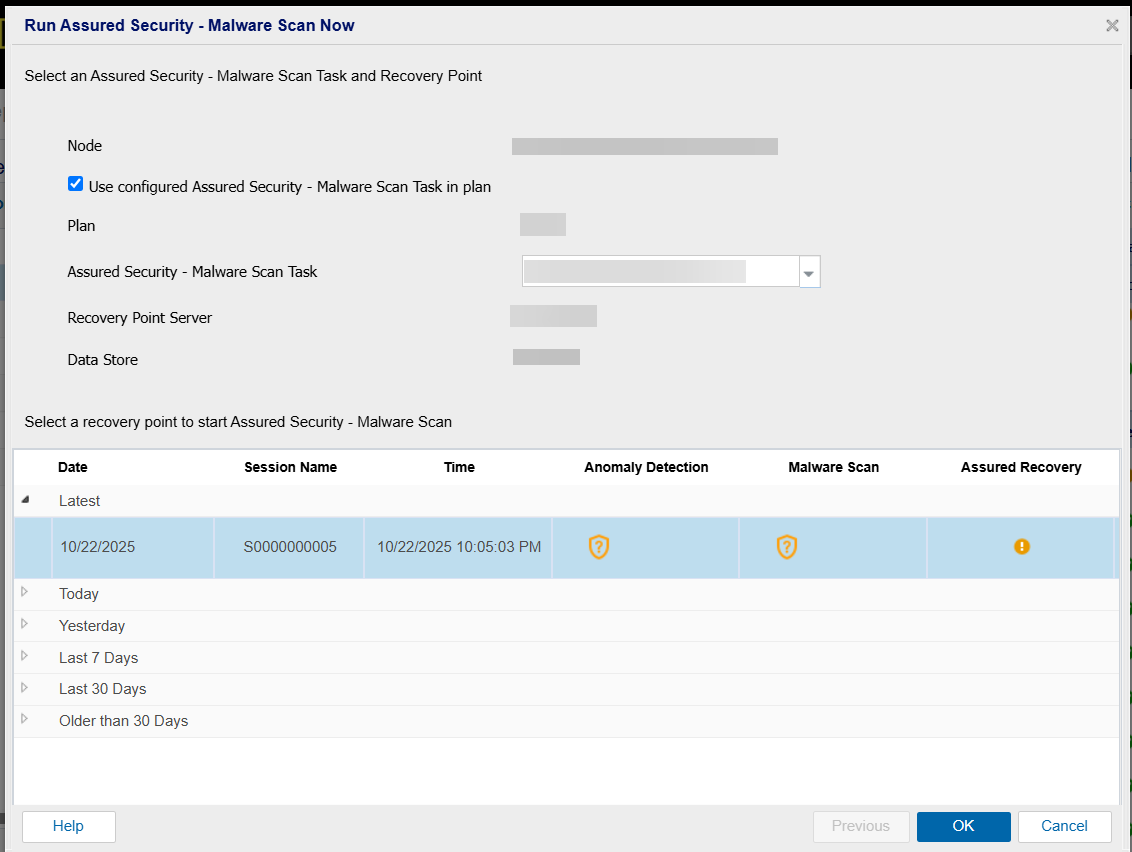
- The Run Assured Security - Malware Scan Now dialog opens.
-
- To start the scan for the node, do one of the following:
- For nodes with Assured Security - Malware Scan plan assigned, do the following:
- Check the Assured Security - Malware Scan details specified.
- Note: By default, the Use configured Assured Security Task in plan check box is selected and displays the configuration provided in the Assured Security - Malware Scan Plan.
- Select the recovery point to start the Assured Security - Malware Scan, and then click OK.
- (Optional) If you do not want to use the same configuration specified in the Assured Security - Malware Scan Plan, uncheck the Use configured Assured Security Task in plan check box, and do the following:
- Select the desired Recovery Point Server and Data Store from the drop-down list and then select the recovery point as needed.
- Click Next.
- Note: If the recovery point you are attempting to scan is encrypted, the Recovery Point Access dialog opens and prompts you to enter or import the encryption or session password.
- Specify the Assured Security - Malware Scan details, and then click OK.
-

- For nodes without the Assured Security - Malware Scan plan assigned, do the following:
- Note: By default, the Use configured Assured Security Task in plan check box is disabled.
-
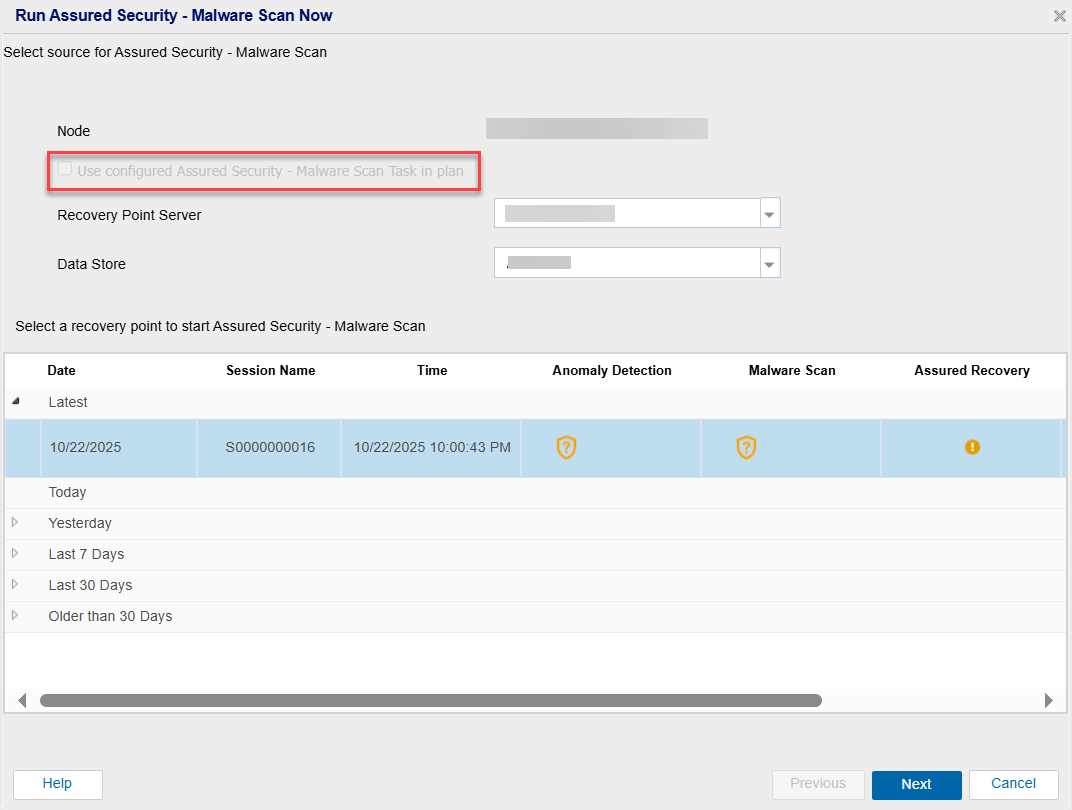
- Select the desired Recovery Point Server and Data Store from the drop-down list and then select the recovery point.
- Click Next.
- Note: If the recovery point you are attempting to scan is encrypted, the Recovery Point Access dialog opens and prompts you to enter or import the encryption or session password.
- Specify the Assured Security - Malware Scan details, and then click OK.
The Assured Security - Malware Scan of node runs.
To perform a manual Assured Security - Malware Scan from a plan, follow these steps:
- On the UDP Console, click the resources tab.
- From the left pane, navigate to Plans > All Plans.
- From the Actions drop-down list of a plan with an Assured secuirty scan task configured, select Run Assured Security - Malware Scan Now.
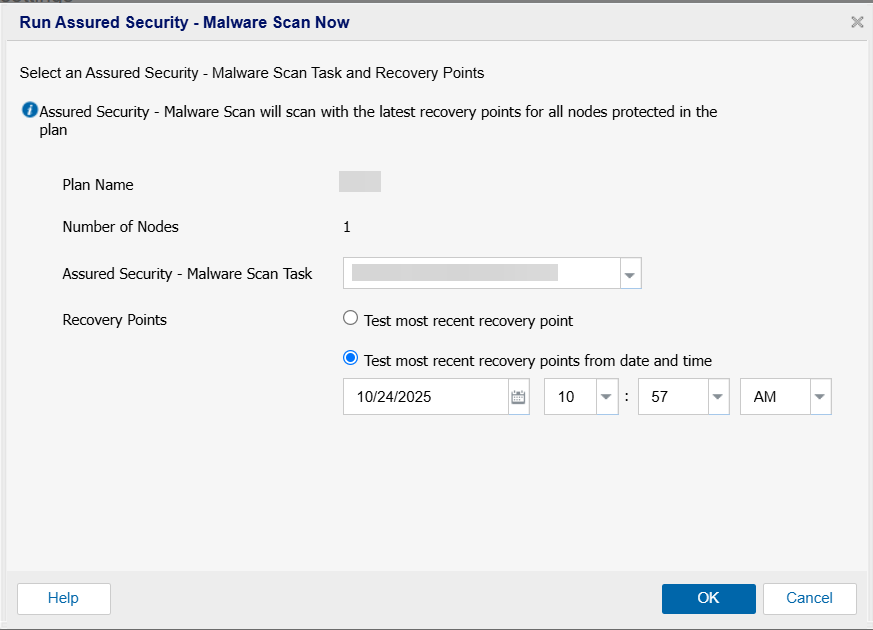
- The Run Assured Security - Malware Scan Now dialog opens.
- Select an Assured Security Task and one of the options for recovery point, and then click OK.
-
- The Assured Security - Malware Scan runs from a plan.
To perform a manual Assured Security - Malware Scan from Recovery Point Server (Datastore view), follow these steps:
- On the UDP Console, click the resources tab.
- From the left pane, navigate to Destinations > Recovery Point Servers.
- The Destinations: Recovery Point Servers page appears.
- From the Actions drop-down list of a recovery point that you want to run a scan and select Run Assured Security - Malware Scan Now.
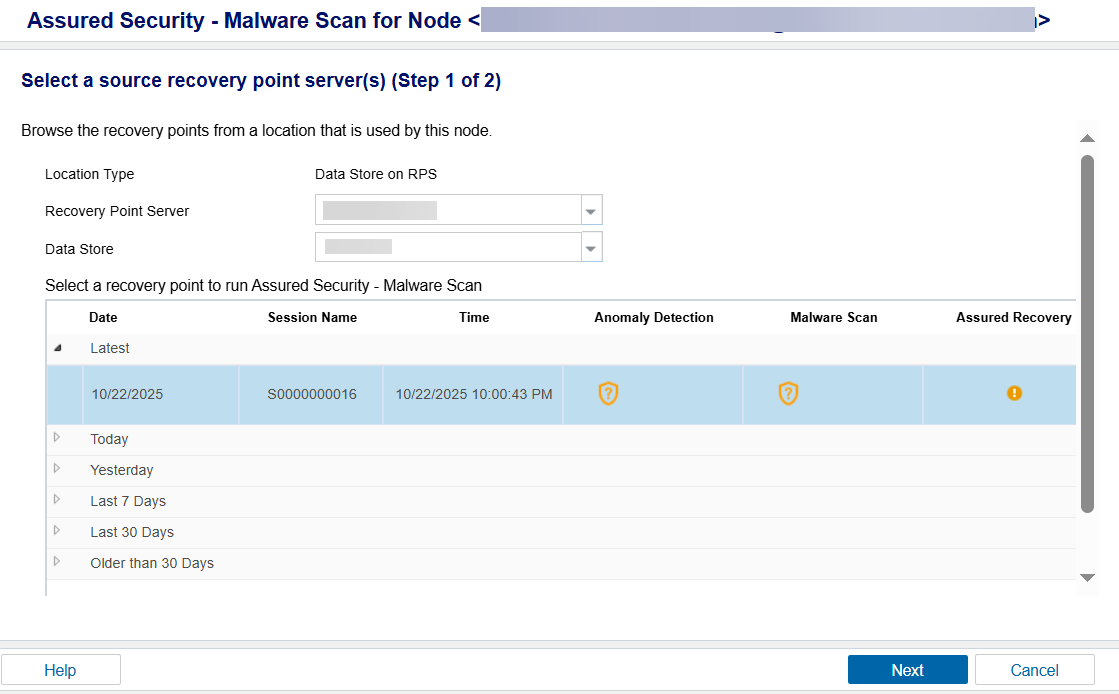
- The Assured Security - Malware Scan for Node page appears.
- Select the recovery point and then click Next.
-
- Note: If the recovery point you are attempting to scan is encrypted, the Recovery Point Access dialog opens and prompts you to enter or import the encryption or session password.
- The Assured Security - Malware Scan Details page appears.
- Specify the Assured Security - Malware Scan details, and then click Finish.
-

- The Assured Security - Malware Scan of Recovery Point Server runs.
To perform a manual Assured Security - Malware Scan from Shared Folders, follow these steps:
- On the UDP Console, click the resources tab.
- From the left pane, navigate to Destinations > Shared Folders.
- The Destinations: Shared Folders page appears.
- Select the desired shared folders path and then click OK on the Recovery Point Browser dialog.
- The Local Site> Destinations: <Path> screen appears.
- From the Actions drop-down list of a recovery point that you want to run a scan and select Run Assured Security - Malware Scan Now.
- The Assured Security - Malware Scan for Node page appears.
- Select the recovery point and then click Next.
-
- Note: If the recovery point you are attempting to scan is encrypted, the Recovery Point Access dialog opens and prompts you to enter or import the encryption or session password.
- The Assured Security - Malware Scan Details page appears.
- Specify the Assured Security - Malware Scan details, and then click Finish.
-
- The Assured Security - Malware Scan of Shared Folders runs.