Specify the Source
The Source page lets you specify the OneDrive source nodes that you want to protect. You can select more than one OneDrive source nodes in a plan. If you have not added any nodes to the Console, you can add OneDrive source nodes from the Source page.
Note: You can save a plan without adding any source nodes, but the plan is not deployed unless you add any nodes.
Follow these steps:
- Click the Source tab.
- Select the Backup Proxy from the drop-down list.
- Add OneDrive node using one of the following methods:
- Method 1
- Click Add and then click Select Source to Protect in Arcserve UDP.
- The Add Nodes to Plan dialog is displayed.
- Select a node, and then click Connect.
- Note: You can also search for the OneDrive nodes that you want to protect in Search.
- Select the Protect all the OneDrive Accounts check box to protect all the OneDrive accounts across all the pages. To select few accounts, click the arrow placed on the right side of check box, and then specify the accounts.
- The OneDrive accounts that you selected are added.
- Method 2
- Click Add, and then click Add OneDrive Source.
- Notes:
- Use this option to discover and specify distribution groups for OneDrive.
- Unlike other nodes, you cannot add the OneDrive node from All Nodes page. You can add a OneDrive node only in a plan or when you modify a plan.
- To add OneDrive node by plan, specify the node name, user ID, and password. You cannot change the nodename after creating the OneDrive node. Multiple OneDrive nodes can use the same user account (service account) of OneDrive.
- Note: We recommend selecting user accounts of Azure Active Directory Administrators.
- To apply authentication, do one of the following:
- For modern authentication, you can run a backup using security certificate.
-
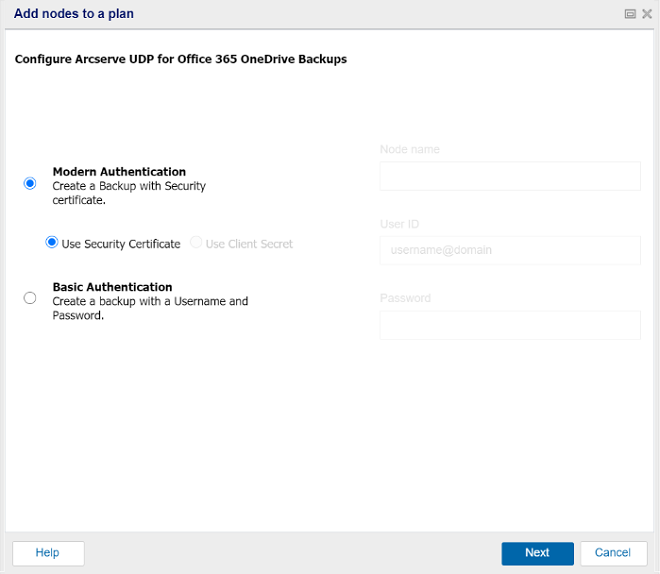
- Use security certificate
- Note: By default, the backup plan selects Use security certificate for modern authentication.
- Follow these steps:
- To authenticate the UDP application with security certificates, see Downloading the Certificate from UDP and Uploading it to Azure.
- Enter the following details:
- Node Name
- App ID
- User Name
-
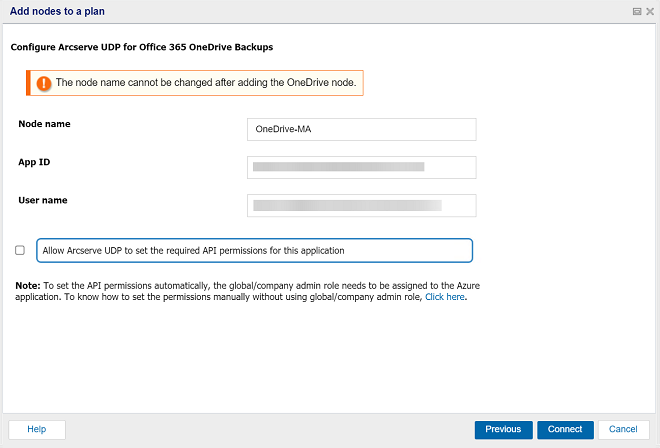
- Note: The OneDrive node names cannot change after creating a node.
- To apply the API permissions automatically, select the Allow Arcserve UDP to set the required API permissions for this application check box.
- Note: For applying the permissions manually without using the Global/company admin role, see Configuring the API Permissions Manually Without Using the Global/Company Admin Role.
- Click Connect.
- For Basic Authentication, to proceed with the backup, follow these steps:
- Select Basic Authentication, type Node name, Username and Password, and then click Connect.
- The Arcserve UDP URL opens in a browser and requests permission for all Arcserve UDP read-write data from the OneDrive portal.
- In the browser, use the Microsoft Azure administrator credentials to sign in.
- The Azure portal opens.
- From the Microsoft Azure portal, perform the following steps to configure the UDP App:
- i. Click API permissions.
- ii. On the right pane, click the Grant permissions for button.
- iii. Click Yes to agree to Grant permissions.
- iv. After granting permission, in Arcserve UDP, navigate to Add a Plan > Add Nodes to a Plan, and then click the Next button.
- Note: If you close the grant permission URL and want to reopen it, click the Here button in the UDP Add Node to Plan screen.
- To protect OneDrive accounts, do one of the following:
- To protect all OneDrive accounts and groups, select the Protect all the OneDrive Accounts check box.
- Note: This option is automatically selected by default when the Select OneDrive Account screen appears.
- For User Account, follow these steps:
- Select the User Account check box.
- A list of user accounts appears.
- (Optional) To search an account from the list, in the Search by account name field, type the account name.
-
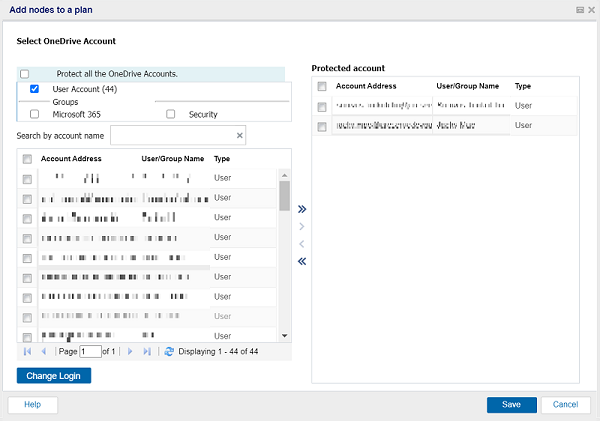
- From the list of user accounts, select the accounts that you want to protect.
- Click the right arrow (>) to move the selected accounts to the Protected account list.
- For Groups, follow these steps:
- Select the Microsoft 365 or Security check box.
- Based on selection, a list of groups appears.
-
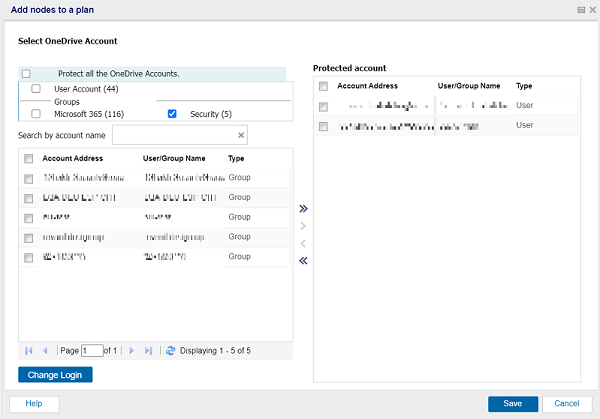
- (Optional) To search an account from the list, in the Search by account name field, type the account name.
- From the list of groups, select the groups that you want to protect.
- Click the right arrow (>) to move the selected groups to the Protected account list.
- Click Save.
- The selected OneDrive accounts are added.
Arcserve UDP lists all the account under current tenant.