Specify the Source
The Source page lets you specify the source nodes that you want to protect. You can select more than one node in a plan. If you have not added any nodes to the Console, you can add nodes when you create or modify a plan from the Source page. You can also save a plan without adding any source nodes. The plan gets deployed only after you add source nodes.
Follow these steps:
- Click the Source tab.
- If Backup Proxy is already added, select the backup proxy from the Backup Proxy drop-down list.
- The proxy server is a node where you install Arcserve UDP Agent (Windows).
- If the backup proxy is not added, perform the following steps:
- Click Add.
- The Adding UNC or NFS Backup Proxy Server dialog opens.
-
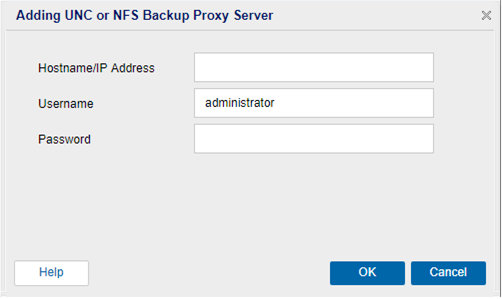
- Specify the proxy server details, and then click OK.
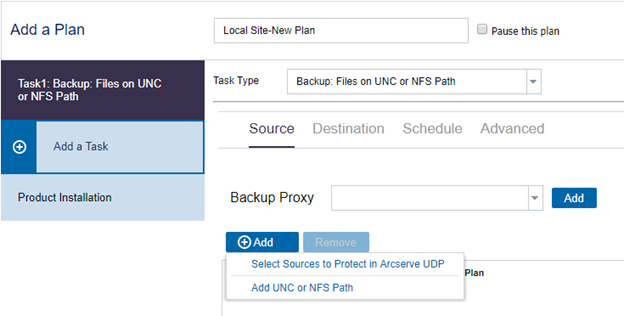
- To add the UNC or NFS Path node, click + Add, and then select one of the following:
- Select Sources to Protect in Arcserve UDP
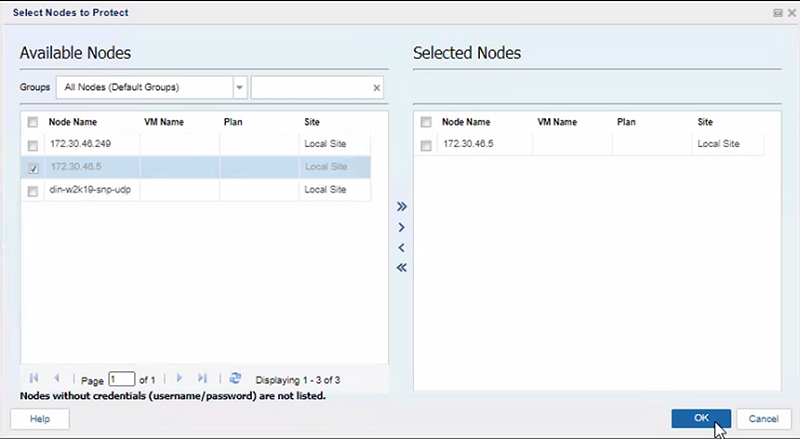
- Opens the Select Nodes to Protect dialog and you can select the nodes from the displayed list. Select this option if you have already added the nodes to the Console.
- Add UNC or NFS Path
- Opens the Add Nodes to Arcserve UDP Console dialog. Select this option if you have not added the nodes and want to manually add the nodes to protect.
- If you select the Select Sources to Protect in Arcserve UDP option, perform the following steps:
- (Optional) Select a filter from the Groups drop-down list to filter nodes. You can enter keywords to further filter your nodes.
- The nodes are displayed on the Available Nodes side.
- Select the nodes from the Available Nodes side, and then click the Add all nodes (>>) or Add selected nodes (>) icon.
- The selected nodes are displayed on the Selected Nodes side.
- Click OK to close the dialog.
- If you select the Add UNC or NFS Path option, perform the following steps on the Add a UNC or NFS Path page:
-
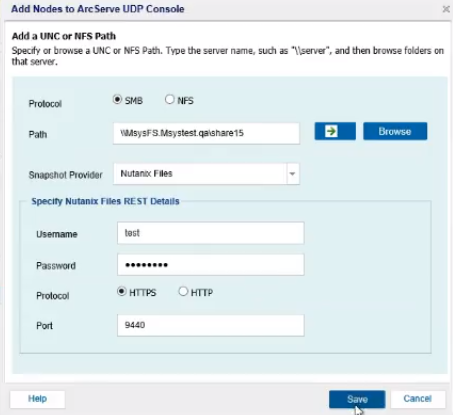
- Select SMB or NFS as a protocol.
- If you select SMB, do the following:
- Enter the UNC Path in the following format:
- \\Hostname\share
- Notes:
- While providing Nutanix File share as a source for backup with Nutanix files as a snapshot provider, backups can be performed only at share level but not at sub-folder level.
- To get the UNC path, do the following:
- Select the newly created share in the center pane.
- Under the SHARE/EXPORT DETAILS column, from the Summary pane, navigate to Mount Path and then copy the mount path.
- If the UNC path is valid, a right arrow and the Browse option gets enabled.
- Click the right arrow (>) to validate the UNC Path.
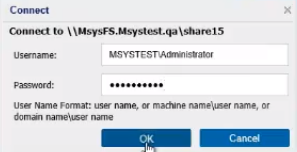
- The Connect dialog appears.
- Enter the username and password as needed, and then click OK.
-
- The Add Nodes to Arcserve UDP Console dialog displays the verified UNC Path.
- If you select NFS, do the following:
- Enter the UNC Path in the following format:
- \\Hostname\share
- Select Encoding from the available options - ANSI, GB2312-80, KSC5601, BIG5, SHIFT-JIS, EUC-KR, EUC-TW, EUC-JP.
- The default value is ANSI.
- Note: During the backup of an NFS Shared Folder, all such files/folders whose name has an unsupported language encoding are skipped or their name appears as junk.
- From the Snapshot Provider drop-down list, select Nutanix Files.
- For the Specify Nutanix Files REST Details box, specify the following credentials:
- Username
- Refers to the user name created by the REST API user using the Nutanix prism.
- Password
- Refers to password for the username.
- Protocol
- Specifies the protocol that you want to use to communicate with the destination server. The available options are HTTP and HTTPS.
- Note: For a more secure communication, select the HTTPS protocol.
- Port
- Refers to the port number. The default port value is 9440 to access the REST API calls and Prism.
- To opt for Exclusions, select the Exclude Folder Names / File Names.
- Note: Supports using wildcard characters (? and *) with exclusions.
- Example: b?ll excludes ball, bell, and bill. wh* excludes what, white, and why, but not awhile or watch.
-

- Click Save.
- Note: If the connection to the Nutanix File Server fails, the Error dialog/a notification window displays. Click OK to close the Error dialog.

The source is specified.