Working with SSD Flash Expansion Kit in Arcserve Appliance 9072-9504 DR Models
Arcserve SSD Flash Expansion Kit lets you expand the data capacity by creating secondary datastore and performing DR related operations (IVM /VSB/Continuous Availability) in the Arcserve Appliance 9072-9504DR models.
Follow these steps:
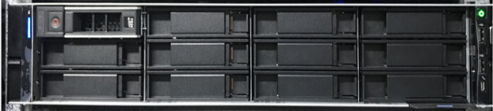
- Perform the following steps to insert SSDs in the empty disk slots:
- From the Arcserve UDP Console, verify and make sure that there are no jobs are running on the Appliance Server. If in case any jobs are running, pause the corresponding plans.
- Insert SSDs in the empty disk slot.
-
- Perform the following steps to configure Raid-5 from iDRAC:
- Log into iDRAC, and then navigate to Configuration > Storage Configuration > Physical Disk Configuration.
- Under the Physical Disk Configuration section, from the Actions drop-down list of each new SSD DISK, select the Convert to RAID option.
- A dialog appears to display the following warning message:
- RAC0516: Converting physical disk drives to RAID-compatible will overwrite any OS-created RAID arrays.
- Make sure that there are no OS-configured RAID arrays, and then click OK.
- Click OK.
- As the media type is SSD, the Convert to Raid status appears under the Pending Actions column.
-
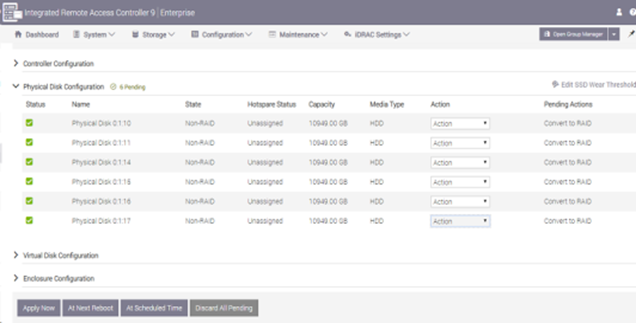
- Click one of the following options to complete the pending actions:
- Navigate to Maintenance, Job Queue.
- The list of jobs running to convert the disks to Raid appears. When converting to RAID job is completed, the status displays as 100%.
-
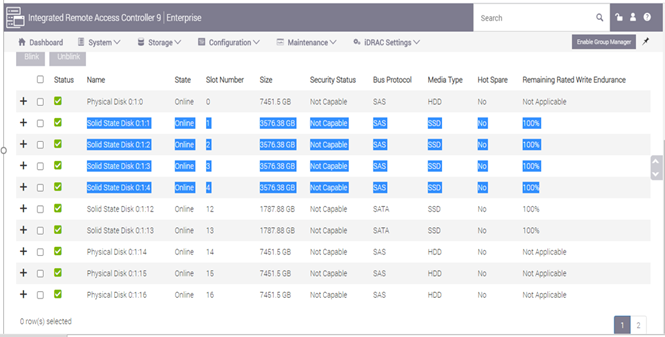
- Perform the following steps to create virtual disk:
- Navigate to Configuration > Storage Configuration > Virtual Disk Configuration.
- Under Virtual Disk Configuration section, click Create Virtual Disk.
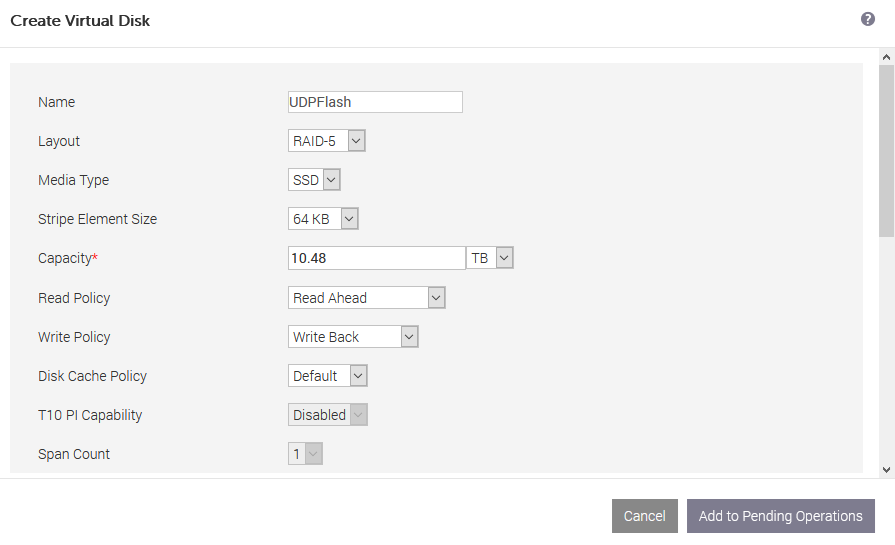
- In the Create Virtual Disk window, do the following and retain defaults for the remaining:
- Layout - From the drop-down list, select RAID-5.
- Media Type - From the drop-down list, select SSD.
- Under Select Physical Disks section, scroll down and select all the SSD disks that are converted to RAID.
- Click Add to Pending Operations.
-
- Navigate to Configuration > Storage Configuration.
- To create the virtual disk operation immediately, click Apply Now.
-

- Navigate to Maintenance > Job Queue.
- The list of jobs running to create virtual disk appears. When virtual disk job is created, the status changes to 100%.
- Navigate to Computer Management and Disk Management.
- Double click the new virtual disk that you added.
- The Initialize Disk window appears.
- Select the GPT (GUID Partition Table) option and click OK.
- From the Disk Management window, select the virtual disk and apply the following properties:
- Assign a Drive Letter
- Specify NTFS as File System
- Format the disk
-
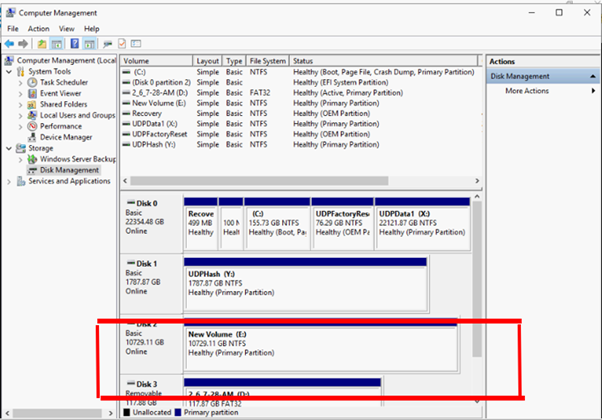
- The virtual disk is created.
Apply Now
Starts the convert to Raid action immediately.
At Next Reboot
Starts the convert to Raid action at the time of next reboot.
At Scheduled Time
Starts the convert to Raid action at the scheduled time.
Discard All Pending
Discards the convert to Raid action for all the disks.