Working with SSD Flash Expansion Kit in Arcserve X Series Appliance
Arcserve SSD Flash Expansion Kit lets you expand the data capacity by creating a secondary datastore and performing DR-related operations (IVM /VSB/Continuous Availability) in the Arcserve Appliance X-Series.
Follow these steps:
- Perform the following steps to insert SSDs in the empty disk slots:
- From the Arcserve UDP Console, verify and make sure that no jobs are running on the Appliance Server. If in case any jobs are running, pause the corresponding plans.
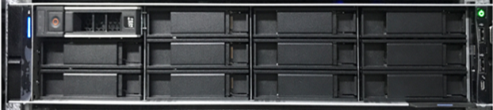
- Insert SSDs in the empty disk slot.
-
- Perform the following steps to configure Raid-5 from the BIOS Boot Manager option:
- To launch the Virtual Console dashboard, log in to iDRAC, and then click Start the Virtual Console.
- In the Virtual Console page, click Boot, and then select the BIOS Boot Manager option.
- On the confirmation window, click Yes to restart the BIOS Boot Manager.
- Click Power, and then select Reset system (warm boot).
- The appliance boots and relaunches the Boot Manager setup page.
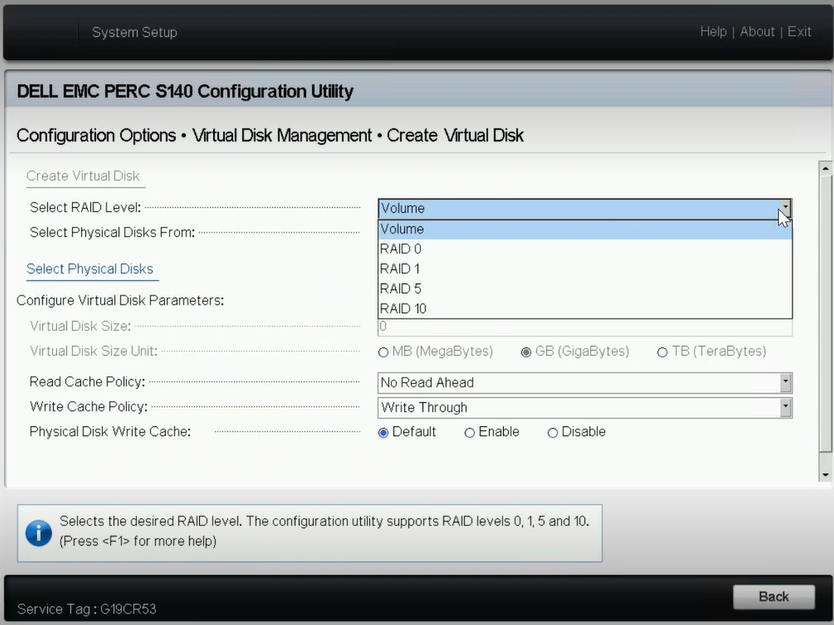
- In the Boot Manager Main Menu, click Launch System Setup, and then navigate to Device Settings > Dell EMC PERC S140 Controller > Virtual Disk Management > Create Virtual Disk.
- From the Select RAID Level drop-down list, select RAID 5.
- Note: The RAID 5 Virtual Disk is used for expansion kit and includes newly attached disks of 3.63 TB for each physical disk.
-
- Select the Select Physical Disks option.
-

- The Select Physical Disk Operation window opens.
- For the Select Interface Type option, click NVMe.
- A list of physical disks is displayed.
- From the list of physical disks, select the disks as needed, and then click Apply Changes.
-
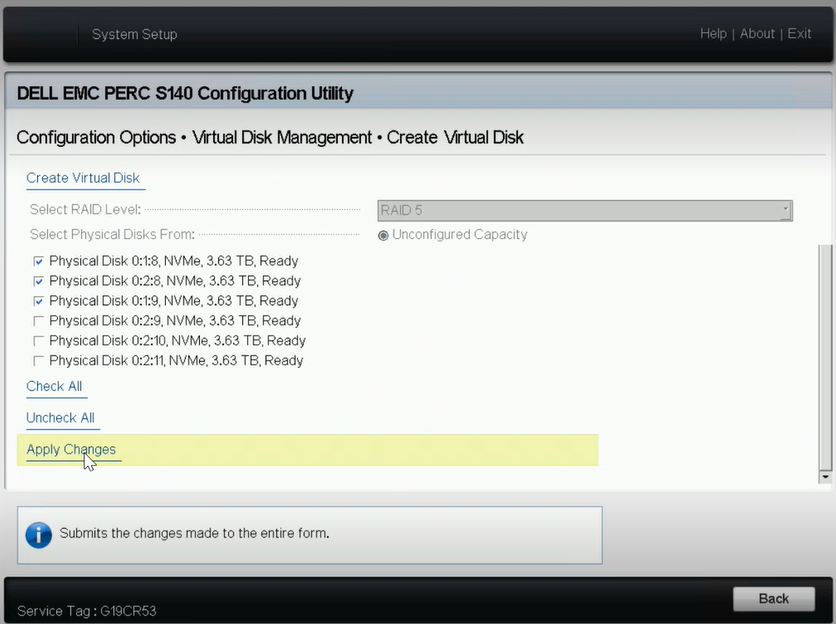
- Notes: Select a minimum of three disks and a maximum of 16 disks.
- After the changes are applied, click the Create Virtual Disk option again to complete the process of creating the virtual disk.
- Navigate to Configuration Options > Physical Disk Management > Select Physical Disk Operations.
- For Select Interface Type, click NVMe.
- From the Select Physical Disk drop-down list, select the option as needed, and then click Convert to RAID Capable Disk.
- Note: You can apply the Convert to RAID Capable Disk option to all the physical disks one by one.
-

- When the following warning message is displayed, do the following:
- RAC0516: Converting physical disk drives to RAID-compatible will overwrite any OS-created RAID arrays.
- Verify that there are no OS-configured RAID arrays, and then click OK.
- Click OK.
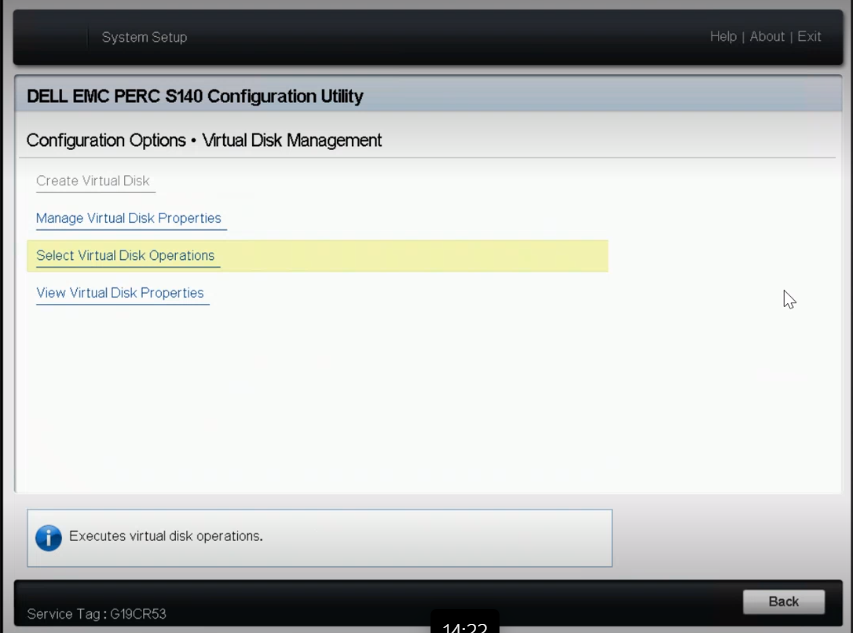
- Navigate to Configuration Options > Virtual Disk Management, and then do the following:
-
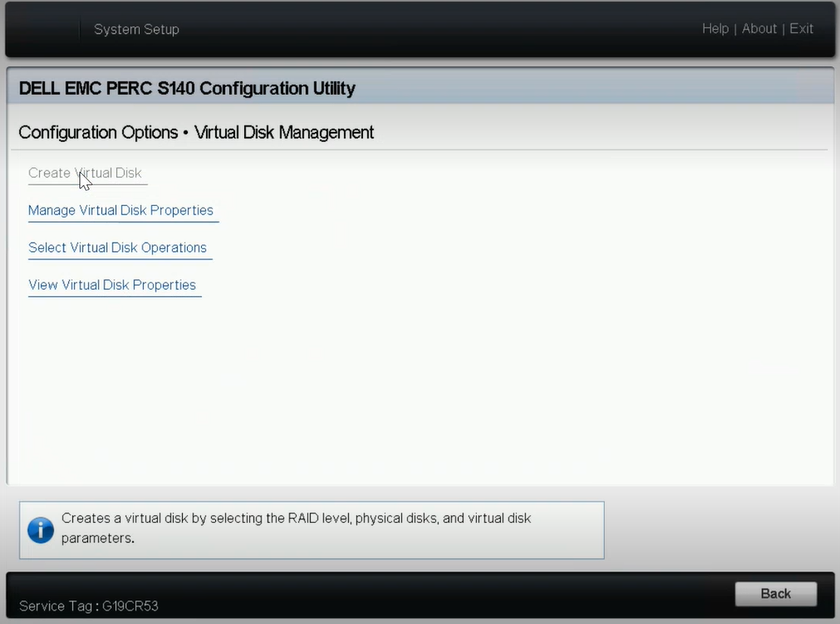
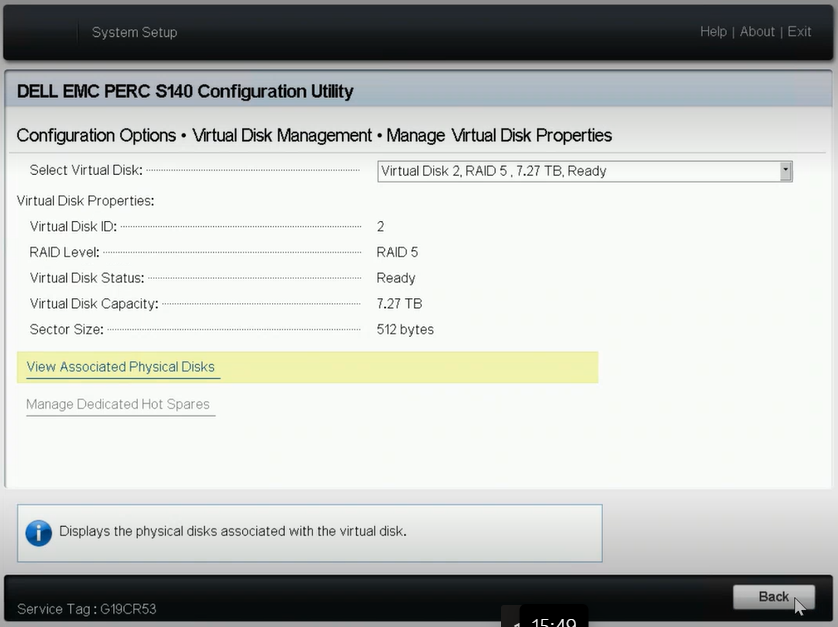
- To manage your virtual disks, click Manage Virtual Disk Properties.
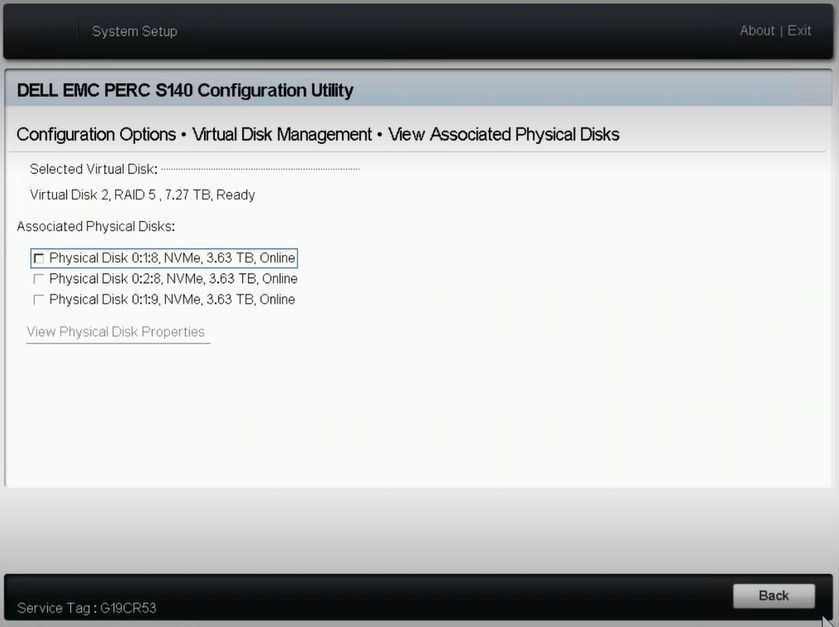
- From the Select Virtual Disks drop-down list, select any RAID 5 disk, and then click View Associated Physical Disks.
-
- The associated disks are displayed.
-
- To select the virtual disk operations, click Select Virtual Disk Operations.
-
- To view the virtual disk properties in the Boot Manager, click View Virtual Disk Properties.
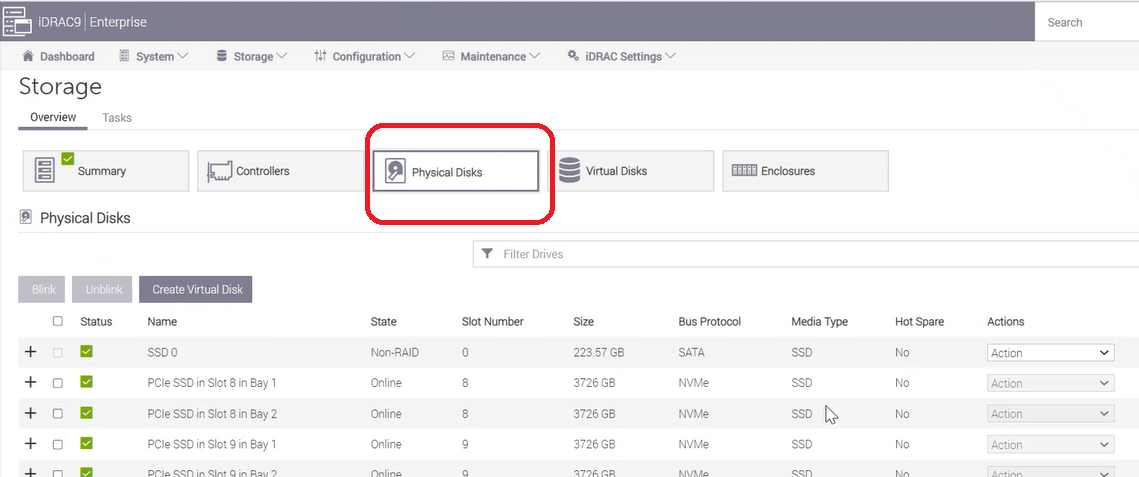
- To view the disk information in iDRAC, log into iDRAC, and then click Storage > Overview.
-
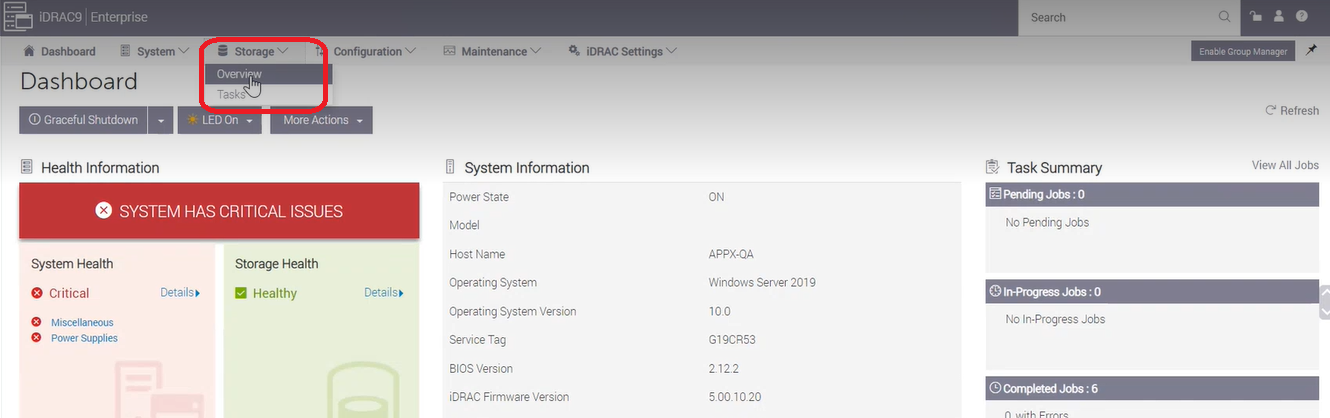
- In the Overview section, click Physical Disks to view the list of physical disks that you have created.
-
- To initialize and format the newly added Virtual Disk, do the following:
- Navigate to Computer Management and Disk Management.
- Double click the new virtual disk that you added.
- The Initialize Disk window appears.
- Select the GPT (GUID Partition Table) option and click OK.
- From the Disk Management window, select the virtual disk and apply the following properties:
- Assign a Drive Letter
- Specify NTFS as File System
- Format the disk
-
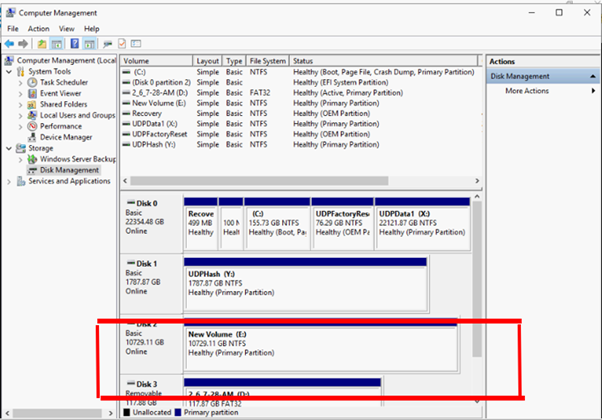
- The virtual disk is created.