How to Deploy Arcserve UDP using Nutanix Mine Deployment Wizard
This section provides information about how to deploy Arcserve UDP using Nutanix Mine deployment wizard.
Follow these steps:
- Power-on the Bootstrap VM that you have created and wait until the VM gets the IP address.
- Open any browser, and then type the IP address of Bootstrap VM in the address bar/URL bar in the following format:
- https://<Bootstrap VM IP address>
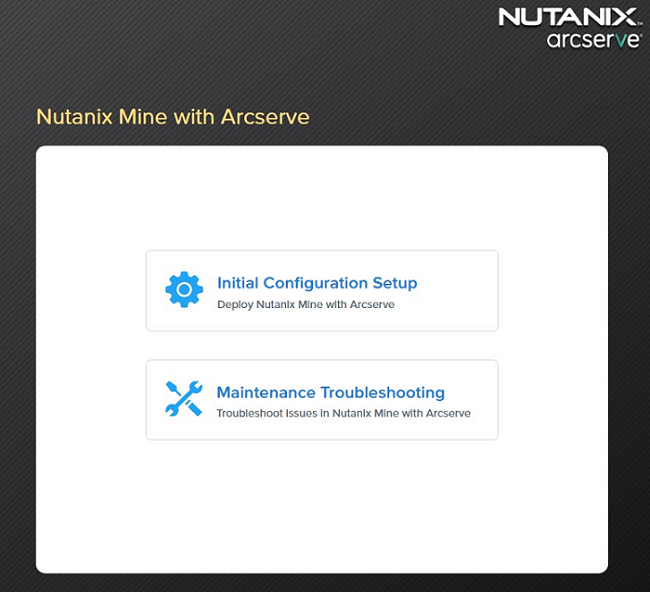
- The home screen of Bootstrap VM opens.
- On the Nutanix Mine with Arcserve deployment wizard, click Initial Configuration Setup.
-
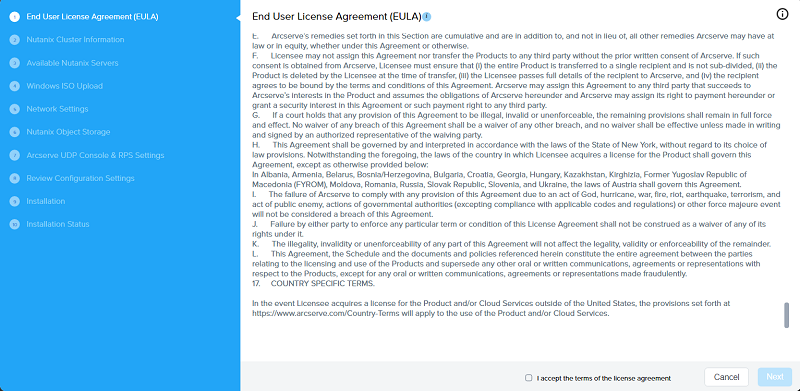
- The Nutanix Mine setup screen appears and displays the workflow.
- On the End User License Agreement (EULA) page, read the license agreement carefully, select the I accept the terms of the license agreement check box, and then click Next.
-
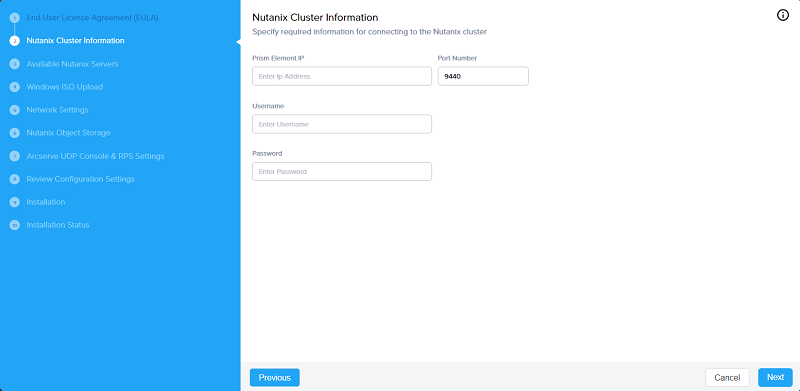
- On the Nutanix Cluster Information page, to connect to a Nutanix cluster, specify the following details, and then click Next:
- Prism Element IP: Enter the IP address of the Nutanix Prism Element.
- Port Number: Enter the port number. The default port value is 9440.
- Username: Type the user name of the cluster administrator.
- Note: We recommend creating a separate local account for the Nutanix Mine deployment wizard. Active directory is not recommended as it can prevent access to the wizard in case of any issue.
- Password: Type the password of the cluster administrator.
-
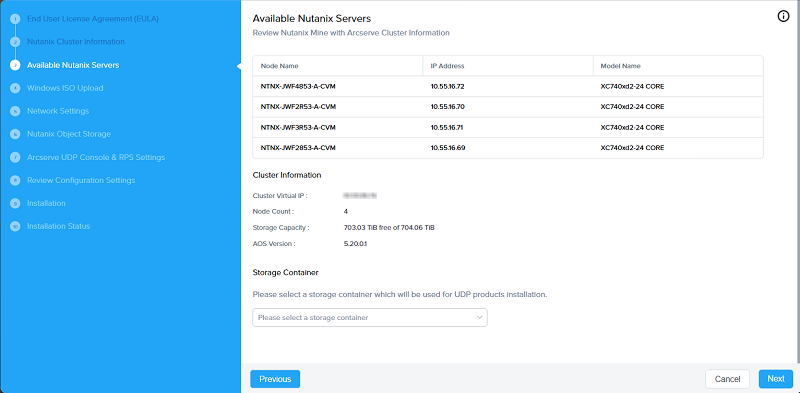
- On the Available Nutanix Servers page, review the Nutanix cluster information. Additionally, under Storage Container, select a default storage container from the drop-down list, and then click Next.
-
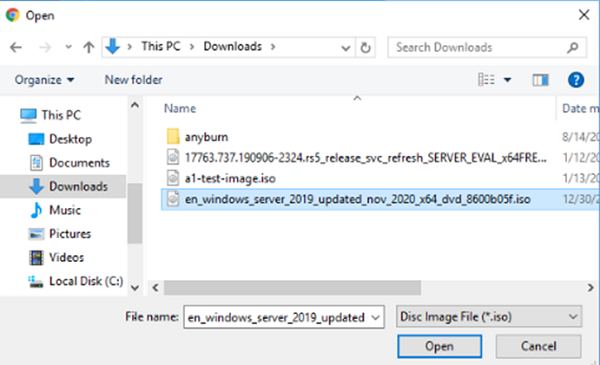
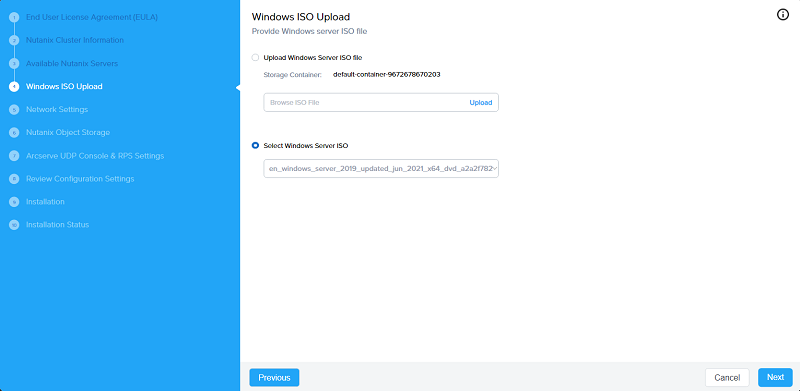
- On the Windows ISO Upload page, to upload the Windows server ISO file, do one of the following, and then click Next:
- If you want to upload the ISO file from your workstation, do the following:
- Select the Upload Windows Server ISO File and then click Upload.
- Navigate to the location where the ISO file is stored, select the ISO file, and then click Open.
-
- Wait until the upload progress reaches to 100%.
- If you have already downloaded the ISO file and copied it into the Image Configuration, click Select Windows Server ISO, and then select the Window server ISO file from the drop-down list.
- Note: For deployment on Nutanix clusters, Arcserve UDP supports only Windows Server 2019 operating system.
-
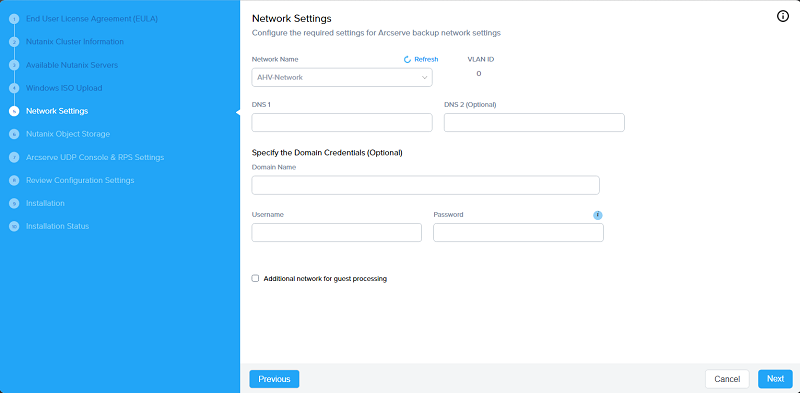
- On the Network Settings page, specify the following, and then click Next:
- Network Name: From the drop-down list, select the network name or type a new name for the network as needed.
- Note: To add a new network, go to Nutanix dashboard.
- VLAN ID: Enter the VLAN ID for the network.
- Note: If you specify the VLAN value other than 0, make sure to configure the network switches accordingly.
- DNS 1: Enter the IP address of the DNS server.
- DNS 2 (Optional): Enter the IP address of the second DNS server if needed.
- Specify the Domain Credentials (Optional): Specifies the credentials for a domain. If you want to add UDP Console + RPS, and additional RPS systems into the domain, specify the following domain credentials:
- Domain Name: Enter the domain name.
- Username: Specifies the user name that has access rights to log into the domain.
- Type the user name in the following format:
- domain\name
- Password: Type the corresponding password for the Username.
- Additional network for guest processing: To create an additional network for guest processing, select the Additional network for guest processing check box.
- Note: If you want the VMs to be backed up on a different network other than the Arcserve infrastructure, select the Additional network for guest processing check box. Creating an additional network is optional.
-
- Note: To reset the network settings, click Refresh.
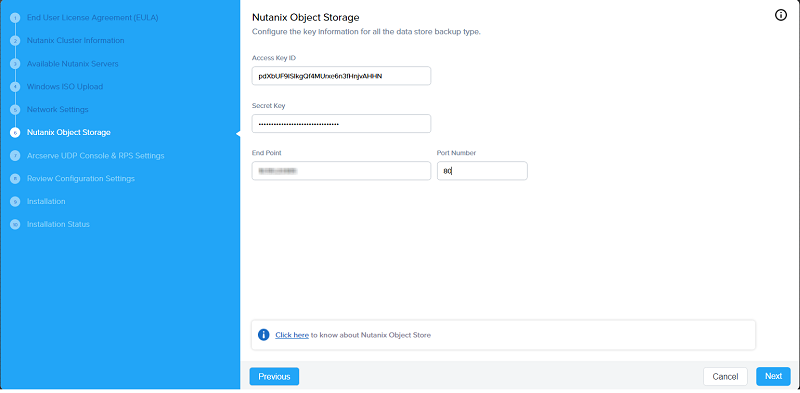
- On the Nutanix Object Storage page, do the following, and then click Next:
- Access Key ID: Enter the access key ID.
- Secret Key: Enter the secret key.
- End Point: Enter the End Point IP address.
- Port Number: Enter the port number. The default port value is 80.
-
- On the Arcserve UDP Console & RPS Settings page, do the following, and then click Next:
-
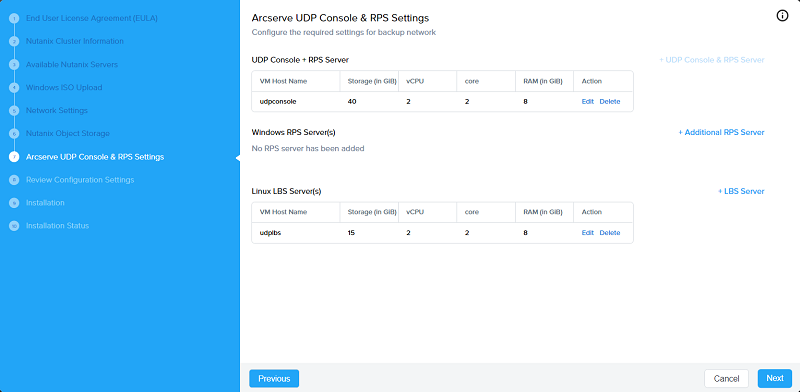
- Click Edit.
- The Add UDP Console & RPS Server screen appears.
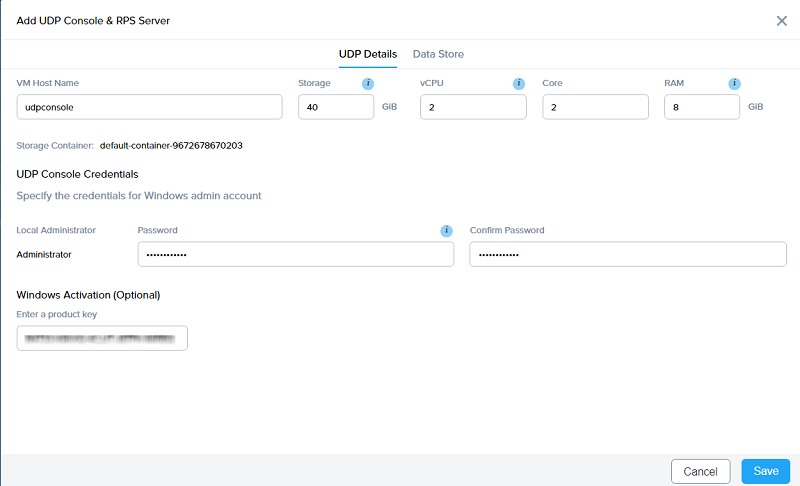
- Under UDP Details tab, change the following settings as needed:
- VM Host Name: Enter a valid host name of the VM that can be resolved by DHCP.
- Storage: Enter the virtual disk capacity for the VM.
- vCPU: Enter the number of virtual CPUs to allocate to the UDP Console.
- Core: Enter the number of cores assigned to each virtual CPU.
- RAM: Enter the amount of RAM to allocate to the UDP Console VM.
- UDP Console Credentials: Specifies the UDP Console credentials for the Windows admin account. Enter the local administrator password and then retype the password to confirm.
- Windows Activation (Optional): To activate Windows, provide the Windows activation key.
- Note: If the activation key is not provided, you can activate Windows in a timely manner from the UDP Console Windows OS.
-
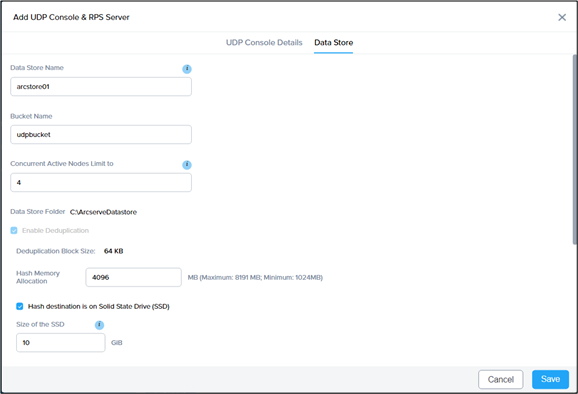
- Under Data Store tab, change the following settings as needed:
- Data Store Name: Enter the data store name.
- Bucket Name: Enter the bucket name.
- Concurrent Active Nodes Limit to: Enter the number of concurrent active nodes that you want to limit. The default value is 4.
- Note: By default, the Enable Deduplication option is enabled.
- Deduplication Block Size: Enter the deduplication block size. The default value is 64 KB.
- Hash Memory Allocation: Specifies the amount of physical memory that you allocate to keep hashes. Enter the memory size in the range of 1024 MB to 8191 MB.
- Hash destination is on Solid State Drive (SSD): To create the deduplication datastores such as Data Destination, Index Destination, and Hash Destination on the SSD storage drive, select the Hash destination is on Solid State Drive (SSD) check box. The Size of the SSD field gets populated. Enter the size of SSD in GiB.
- Enable Compression: Select the Enable Compression check box to enable data the compression settings.
- Enable Encryption: Select the Enable Encryption check box to enable the data encryption settings.
-
- Click Save.
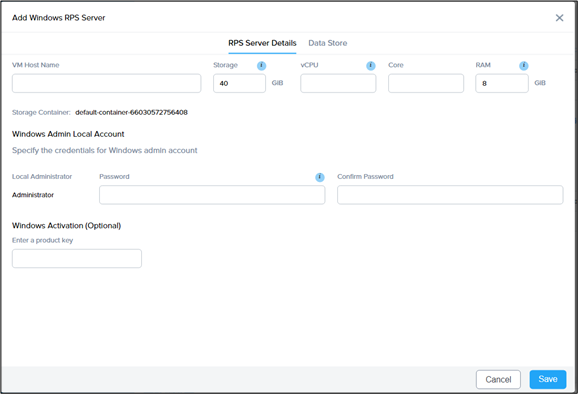
- Click + Additional RPS Server.
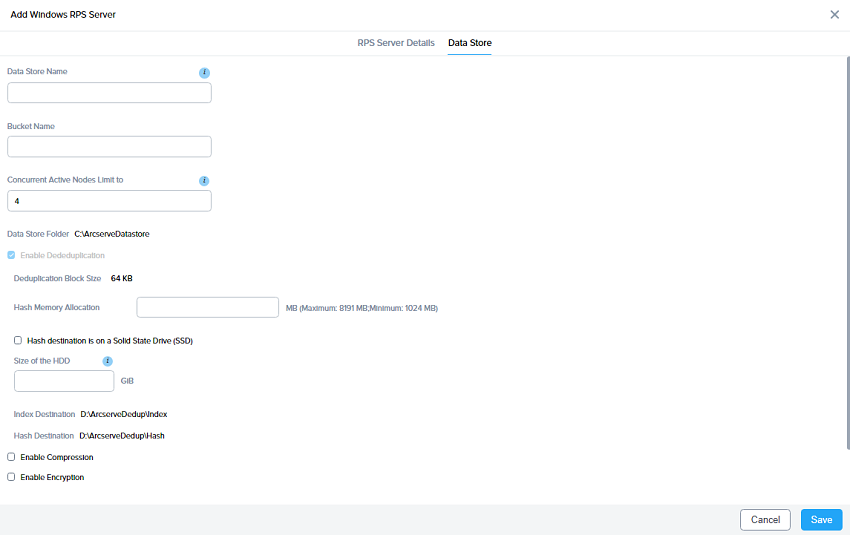
- The Add Windows RPS Server screen appears.
- Under RPS Server Details tab, specify the following:
- VM Host Name: Enter a valid host name of the VM that can be resolved by DHCP.
- Storage: Enter the virtual disk capacity for the VM.
- vCPU: Enter the number of virtual CPUs to allocate to the Windows RPS server.
- Core: Enter the number of cores assigned to each virtual CPU.
- RAM: Enter the amount of RAM to allocate to the Windows RPS server.
- Windows Admin Local Account: Specifies the credentials for Windows admin local account. Enter the local administrator password, and then retype the password to confirm.
- Windows Activation (Optional): To activate Windows, provide the Windows activation key.
- Note: If the activation key is not provided, you can activate Windows in a timely manner from UDP RPS Windows OS.
-
- Under Data Store tab, specify the following:
- Data Store Name: Enter the data store name.
- Bucket Name: Enter the bucket name.
- Concurrent Active Nodes Limit to: Enter the number of concurrent active nodes that you want to limit. The default value is 4.
- Note: By default, the Enable Deduplication option is enabled.
- Deduplication Block Size: Enter the deduplication block size. The default value is 64 KB.
- Hash Memory Allocation: Specifies the amount of physical memory that you allocate to keep hashes. Enter the memory size in the range of 1024 MB to 8191 MB.
- Hash destination is on Solid State Drive (SSD): To create the deduplication datastores such as Data Destination, Index Destination, and Hash Destination on the SSD storage drive, select the Hash destination is on Solid State Drive (SSD) check box. The Size of the SSD field gets populated. Enter the size of SSD in GiB.
- Enable Compression: Select the Enable Compression check box to enable the data compression settings.
- Enable Encryption: Select the Enable Encryption check box to enable the data encryption settings.
-
- Click Save.
- Click + LBS Server.
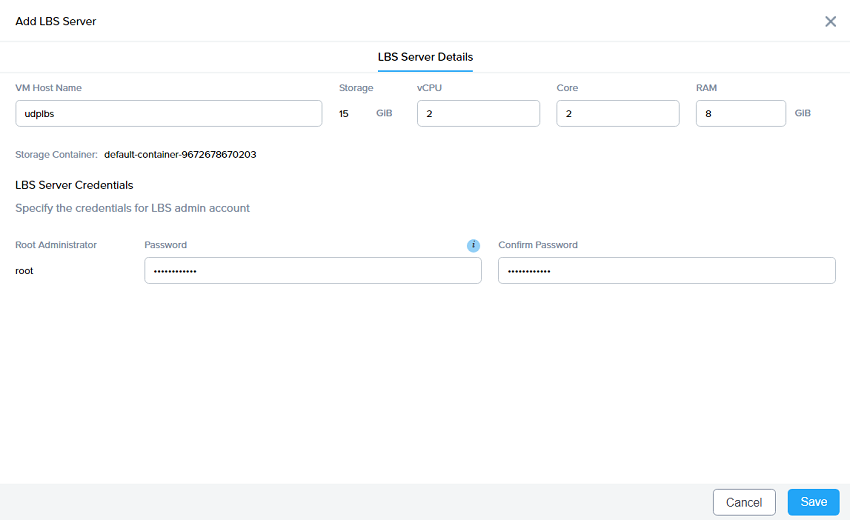
- The Add LBS Server screen appears.
- On the Add LBS Server screen, specify the following:
- VM Host Name: Enter a valid host name of the VM that can be resolved by DHCP.
- Storage: Specifies the storage capacity for the LBS server. The default storage capacity is 15 GiB.
- Note: For UDP LBS, 15 GiB is allocated by default.
- vCPU: Enter the number of virtual CPUs for the LBS server.
- Core: Enter the number of cores assigned to each virtual CPU.
- RAM: Enter the amount of RAM to allocate to the LBS server.
- LBS Server Credentials: Specifies the credentials for LBS admin account. Enter the root administrator password and then retype the password to confirm.
-
- Click Save.
- Notes:
- By default, the UDP Console is added and the + UDP Console & RPS Server option is disabled.
- You cannot add multiple UDP Consoles, but you can add multiple RPS and LBS servers as needed.
- You can edit and delete UDP Console, RPS, and LBS servers if required. If you click the Delete option, you are asked whether you are sure to remove the corresponding server. Click Delete to confirm.
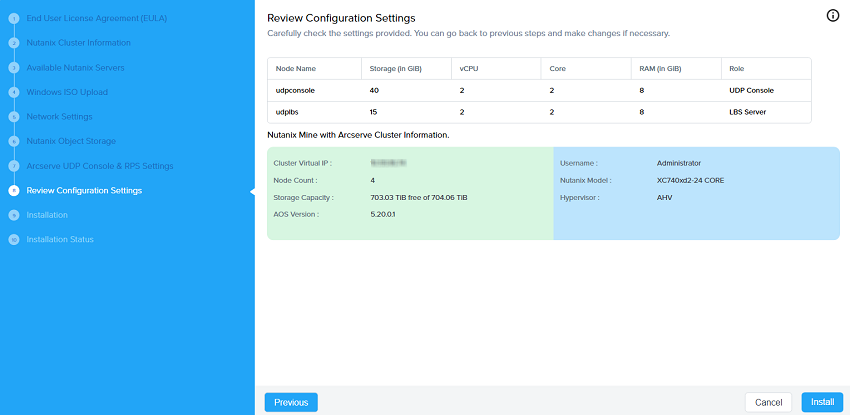
- On the Review Configuration Settings page, review the information, and do one of the following:
- If the information is correct, click Install.
- If the information is incorrect, to make changes to the settings of the previous pages as needed, click Previous. Return to the Review Configuration Settings page again, and then click Install.
-
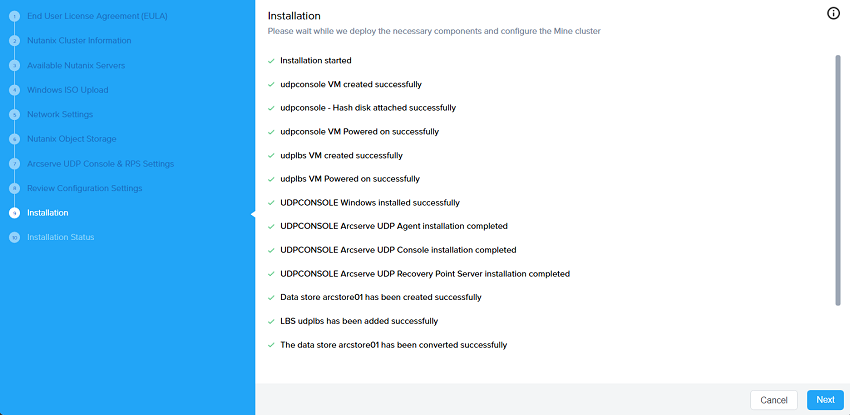
- The installation begins.
- On the Installation page, the status bar appears and displays the status messages as the installation progresses.
-
- On the Installation Status page, the following message appears:
- Installation process has been completed successfully!
-
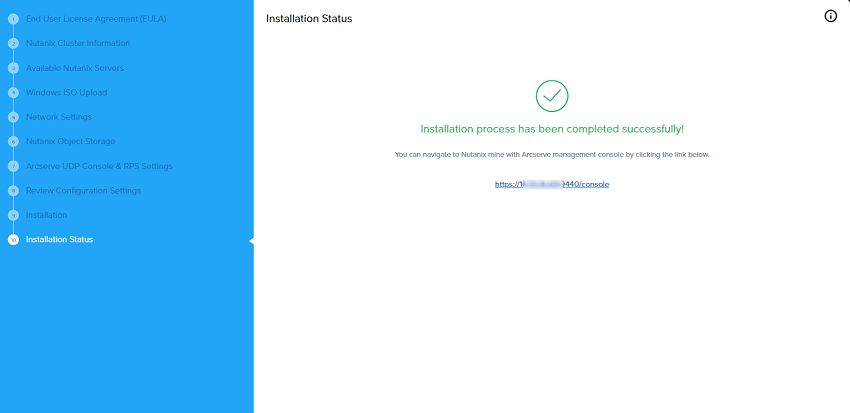
- After the installation is complete, to view the Arcserve Home dashboard, which now shows Arcserve information, click the link given on the Installation Status page.
- Arcserve UDP is deployed successfully onto the Nutanix cluster.
- Note: To re-register the reverse proxy, see Maintenance and Troubleshooting.
To modify UDP Console and RPS Server, follow these steps:
To add Windows RPS server, follow these steps:
To add LBS server, follow these steps: