Virtual Standby (VSB) Related
- On vSphere 8.0, when Virtual Standby creates the Guest OS information for the Windows 11 VMs, it appears as Windows 10.
- Modifications to Virtual Private Cloud in Virtual Standby Task do not reflect in Amazon EC2.
- After performing a Virtual Standby task, if you modify the Virtual Private Cloud (VPC) in Networks Settings of Virtual Standby Task to use a different Amazon VPC for the subsequent tasks, the modifications are not updated in the Amazon EC2.
- Solution
- Amazon EC2 does not allow modifying the VPC from UDP Console after running a Virtual Standby task at least once. As a workaround, now Arcserve UDP lets you terminate old instance and create a new instance with the existing data from previous sessions.
- Follow these steps:
- Configure a backup plan with VSB to EC2 as the secondary task.
- Perform some successful VSB to AWS tasks.
- Modify the VPC setting in the VSB task [network settings].
- Updated VPC settings is reflected on the instance after the next successful VSB task.
- Notes:
- The old instance created in EC2 is ignored and the new instance with updated VPC is created in EC2 to reflect the network changes.
- New network setting is applied to old snapshots also.
- Unable to delete the VSB task configuration when monitor node cannot be connected and the VSB task is removed from plan.
- After deleting the VSB task and saving the plan, the plan is deployed successfully. But, the job scripts are not deleted from the source node and the activity log displays: Failed to send heartbeat to monitor xxx.
- Solution
- Manually delete the job scripts of source node from the folder C:\Program Files\Arcserve\Unified Data Protection\Engine\Configuration\AFJobQueue and restart agent service.
- Failed to send activity logs to console from monitor in VSB to cloud (Azure/EC2) plan when the monitor was managed by two different consoles.
- Failed to view some of the related VSB activity logs from the current console.
- Solution
- When the monitor is managed by two Consoles, the logs are collected by the console that accesses first. You can view the log in other Console.
- Failed to display the list of recovery points in Standby VM page for VSB to Nutanix plan with Agent-based backup to Share folder as the backup destination.
- If you create an Agent-based backup to share folder as the backup destination, then recovery points fails to display in Standby VM page after completion of the VSB job.
- Solution
- If required, start the Standby VM directly from Nutanix.
- In VMware ESX Server environments that are configured in a Storage Area Network (SAN), the application copies only the first, full backup session to the ESX Server system using SAN. For all subsequent full and incremental backups, the application copies the converted backup sessions using LAN. The application behaves in this manner due to a VMware limitation. For more information, see the VMware website.
- When starting the VSB instance from the console, despite successful booth fails to connect RDP.
- Symptom
- The VSB instance fails to start after successful boot. System logs does not provide details.
- Solution
- In AWS China Region, the EC2 drivers are not downloaded. You need to download the drivers manually.
- Follow these steps:
- Click link to download the drivers.
- Extract the zip file.
- Place all the files in the folder: C:\Program Files\Arcserve\Unified Data Protection\Engine\CloudDrivers\AmazonEC2.
- Run a new backup to create a new VSB bootable snapshot.
- Due to a VMware limitation, Virtual Standby cannot create virtual machines on ESXi Server systems using a free license. To create virtual machines, you need to buy a license.
- Due to a known VMware limitation, errors in the Activity Log appear in English when the Location is set to a non-English locale.
- If you install the system volume on the first disk, verify that the system volume and boot volume of the source machine are on the same disk.
- Note: This limitation is only for VSB to cloud.
Symptom
Symptom
Symptom
Symptom
- If you have backup sessions on a data store and click resume Virtual Standby, the Virtual Standby job does not start.
- Symptom
- To resolve this issue, perform a manual replication first. Right-click the node and click Replicate now. After completing the replication, resume the Virtual Standby job.
- The Virtual Standby job to Hyper-V failed after upgrading Arcserve UDP RPS or Arcserve UDP Agent on the source node to Arcserve UDP v6.5.
- Symptom
- The Arcserve UDP Agent (Windows) is backed up to Arcserve UDP RPS data store and the RPS is upgraded to Arcserve UDP v6.5. Also, Arcserve UDP Agent (Windows) is backed up to a shared folder and the Agent is upgraded to Arcserve UDP v6.5. The Virtual Standby VSB job to Hyper-V fails and one of the following error messages is displayed:
- Cannot find dispatch method for {http://webservice.arcflash.com}IsVmFileExist.
- Cannot find dispatch method for {https://webservice.arcflash.com}IsVmFileExist.
- Solution
- Upgrade the Arcserve UDP Agent to Arcserve UDP v6.5 on the Hyper-V Server.
- The disks start in an offline status when powered on. This behavior occurs because SAN policies were introduced to Windows 2008 and later versions of operating system. The operating system protects shared disks that have access to more than one server. When the server detects the disk, Windows places the disk in an offline state. After the disk is placed in an online state, the disk remains in an online state.
- Another cause for this behavior relates powering on virtual machines that contain read only volumes. To correct this condition, place the volumes on the disk in a writable state.
- The application does not support importing vCenter Servers using VMware Linked Mode. To protect all vCenter Server instances in Linked Mode groups, add each vCenter Server instance individually.
- Virtual Standby does not support converting recovery points to Hyper-V format when the system volume or the boot volume on the source computer resides on dynamic disks.
- Virtual Standby does not support creating Virtual Standby tasks that let you define the quantity of dynamic RAM used by the virtual machines protected on Windows 2008 R2 SP1 and Windows 2012 Hyper-V Server systems.
- When you perform a Virtual to Physical (V2P) recovery using the current snapshot, the following error message appears:
- Failed to get Recovery Point information.
- Symptom
- This behavior occurs when you perform a V2P recovery using the latest snapshot, and a conversion job for the node did not complete after the Virtual Standby task was deployed again to the node.
- Solution
- Follow these steps:
- Submit an Arcserve UDP Agent backup job to capture the current state of the node.
- Perform a Bare Metal Recovery of the node.
- Power off the Virtual Standby virtual machine.
- Submit a Virtual Standby conversion job.
- Current recovery point snapshot for the node is created.
- The V2P user interface may not display the latest snapshot.
- Symptom
- The issue occurs when you perform a V2P recovery after completing a V2P recovery from the latest snapshot.
- Solution
- Perform the V2P recovery using Arcserve UDP Agent Bare Metal Recovery.
- The Virtual Standby machine that converts the Arcserve UDP Agent backup sessions cannot detect the partitions and volumes of the corresponding 4 KB sector disks in some conditions. For example, when the backup source machine (where the Arcserve UDP Agent is installed) contains native 4 KB sector disks and the Arcserve UDP Agent backed up the volumes on the 4 KB sector disks. You can expect this behavior when the source disks contain 4 KB sectors and the Virtual Standby machine supports 512 byte sector disks. After conversion, the guest operating system on the Virtual Standby machine fails to locate the disk metadata due to the changes in sector size.
- Note: This limitation applies only to Virtual Standby jobs running on Hyper-V Servers.
- For a Host-based virtual machine session, if the network adapters are attached to the VM and later the adapters were detached, more network adapters are listed in Virtual Standby than the current list in the VM.
- After changing the password of Virtual Standby monitor and updating the node for Virtual Standby monitor in the Arcserve UDP Console UI, the deployment can fail for the plan using that monitor Server.
- Symptom
- Deploying the plan failed and the following error message displays:
- Unable to apply 'Virtual Standby settings' to node 'xxx'. (Failed to connect from xxx to the monitor: xxx. Invalid user credentials).
- Solution
- Edit the Virtual Standby task in the plan, enter the correct password for the monitor, and save the plan.
- Virtual Standby job fails if RPS and Proxy Server, both are in Cloud.
- In the Virtual Standby status, the source node status is displayed as heartbeat timeout.
- If the source node does not have the .Net Framework installed or booted up using EFI during the plan deployment, the Virtual Standby job fails.
- Virtual Standby to Microsoft Azure Cloud job fails.
- Symptom
- The Virtual Standby job fails to create snapshot for the new recovery point.
- Symptom
- If you modify the source node hostname and perform the backup job, the Virtual Standby job failed to create snapshot for the new recovery point and displayed the following error message:
- The Virtual Standby VM is up-to-date with the most recent recovery points. Virtual Standby did not detect any new backup sessions at the backup destination to create another recovery point snapshot.
- Solution
- Perform a new full backup job and deploy the plan again.
- Unable to power On the virtual standby VM in Microsoft Azure.
- Symptom
- Unable to power On the virtual standby VM in Microsoft Azure and the activity log displays the following error message:
- Parameter networkSecurityGroupName is required and cannot be null.
- Solution
- As a workaround, perform the following steps:
- Deploy the plan again.
- Note:Arcserve UDP Monitor and Arcserve UDP RPS must have the same Arcserve UDP version.
- Power On the virtual standby VM.
- Agent Web Service on the source node or Agentless backup proxy might run into abnormal state after running a few Virtual Standby job if the backup destination is a share folder.
- Symptom
- Agent Web Service on the source node or Agentless backup proxy does not respond and OutOfMemory errors are found in the Webservice.log file.
- Solution
- This error occurs when the source node or Agentless backup proxy is configured in a plan that has a Virtual Standby task and the backup destination of the backup task is a share folder. In such a case, the source node or Agentless backup proxy performs in a Virtual Standby converter role. The Agent Web Service then needs more memory to run JVM. Increase the JvmMx value for Agent Web Service.
- Follow these steps:
- To open the Registry, open the command line interface and run the following command:
- regedit
- Navigate to "\SOFTWARE\WOW6432Node\Apache Software Foundation\Procrun 2.0\CASAD2DWebSvc\Parameters\Java".
- Modify the key as given below:
- Key Name: JvmMx
- Value: <enter the value in minutes>. For example, increase the value to 512 or above.
- Exit regedit.
- Restart the UDP Agent service to allow the settings to take effect.
- The Terminal EC2 Resources option does not show when the nodes are configured with Virtual Standby to EC2 task.
- Symptom
- When nodes are configured with a plan that has Virtual Standby to EC2 task in UDP 7.0 U1, UDP 7.0 or UDP 6.5 U4, and if you upgrade the console to UDP 7.0 U2, the Terminate EC2 Resources option does not show for those specific nodes.
- Solution
- Click modify option for the related plan and save it.
- Virtual StandBy for Windows Server 2008 R2 and Windows Server 2012 with Enhanced Network Adapter(ENA) doesn't start the Network service when you turn on the machine, and you need to run a batch script to have network reachability.
- Symptom
- When you turn on the Virtual StandBy machine for Windows Server 2008 R2 and Windows Server 2012, it shows 1/2 checks in the AWS Management Console when it is configured with Elastic Network Adapter(ENA) supported instance type.
- For more information, see the Elastic Network Adapter(ENA) supported instance types at https://docs.aws.amazon.com/AWSEC2/latest/WindowsGuide/enhanced-networking-ena.html
- Solution
- Follow these steps:
- From the UDP Console, turn on the stand by machine.
- Install and configure AWS CLI in one of the Windows machines.
- Run the FixWindowsInstanceNetworksChecks.bat, you can download it from the following link.
- To run the batch file, use the following command:
- instance_type: The instance type specified in the configuration plan.
- instance_id: ID of the VSB instance that you can retrieve from the AWS Management console or from the Virtual StandBy activity job logs.
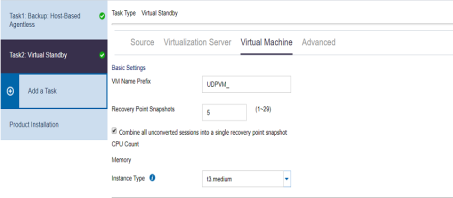
- In the Virtual Machine tab, check the data in the Instance type to verify the configuration plan:
-
- From the activity logs, derive the instance type:
-

- Command to run:
- After you finish the execution of the script, you can connect to the Windows Server 2008 R2 or Windows Server 2012 Instance.
When a node is backed up to an RPS data store, replicated to another RPS data store, and then you create a Virtual Standby machine with the source of replication you can resume Virtual Standby directly to the older sessions after the plan deployment for the Virtual Standby job. But, after you submit the job, the Virtual Standby job does not start.
Solution
Symptom
If you configure the Virtual Standby to EC2 task when the RPS and Proxy Server are in Cloud, then the following issues may occur:
Solution
As a workaround, you can use local RPS and Cloud Proxy Server.
If you extend the system disk size of the source machine in Microsoft Azure Cloud and perform the Virtual Standby job, the following error message is displayed:
Failed to convert sessions for VM [x.x.x.x] to cloud. An internal error has occurred. Please Contact Arcserve support.
Solution
From the Azure portal, navigate to Storage Account from the left pane and delete the previously generated page blobs for the source machine and then resume the Virtual Standby job.
FixWindowsInstanceNetworksChecks.bat instance_id instance_type
Example:
This example shows how to verify the instance:
FixWindowsInstanceNetworksChecks.bat i-0384bbbf2e7ce7e2c t3.medium