How to Configure OAuth 2.0 Authentication for Gmail
This section provides information about how to configure OAuth 2.0 authentication for Gmail.
Note: You need to create a project in Gmail to support SMTP authentication using OAuth 2.0.
Follow these steps:
- Sign into the Google Cloud Console.
- To create a project, click Select a project.
-

- On the Select a project dialog, click NEW PROJECT.
-

- On the New Project page, type the project name, and then click CREATE.
-

- Note: If you want to edit project ID, click EDIT. You cannot change the project ID later.
- After the project is created successfully, select the project from the Select a project drop-down list or from the Notifications icon on the top-right corner.
-

- Go to the navigation menu on the top-left corner, and then navigate to APIs & Services > Credentials.
-
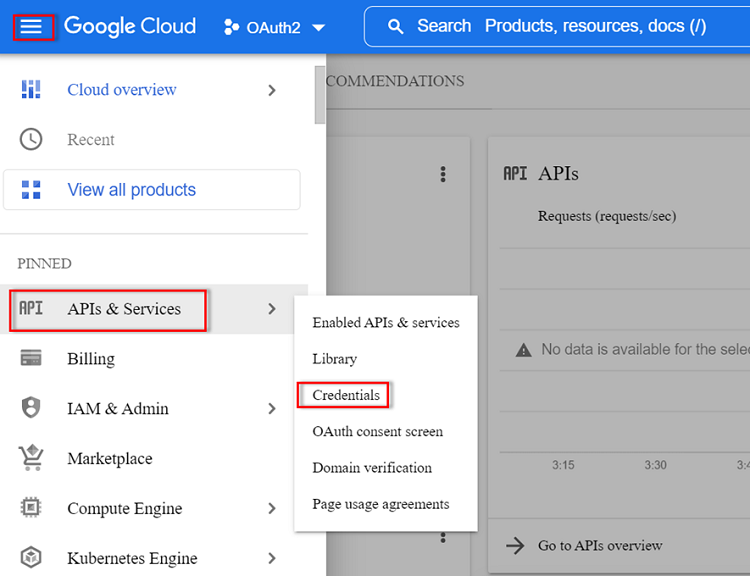
- On the Credentials page, click CREATE CREDENTIALS, and then select OAuth client ID.
-
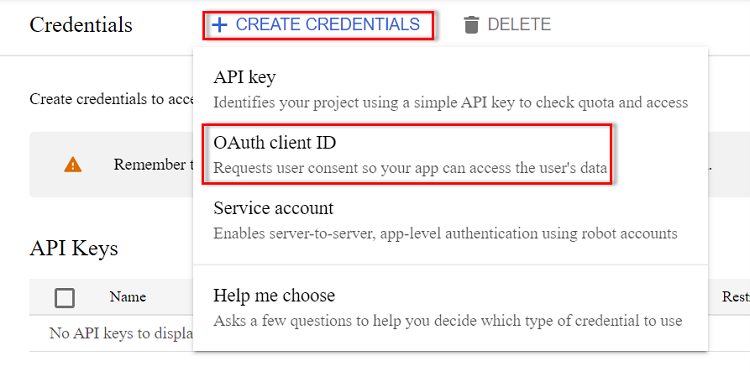
- On the Create OAuth client ID page, click CONFIGURE CONSENT SCREEN.
-

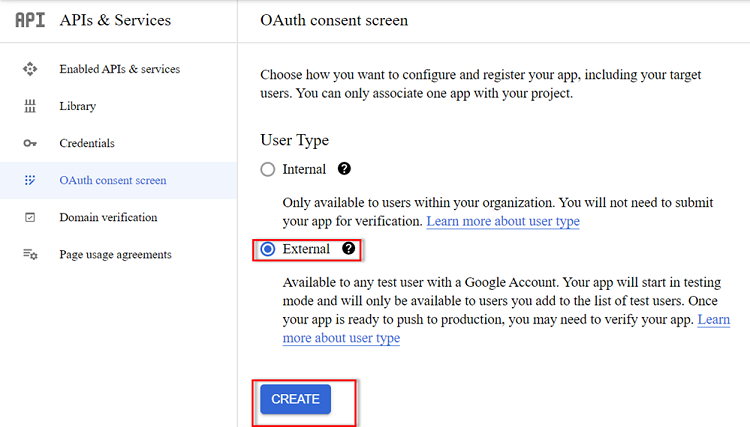
- On the OAuth consent screen, select External, and then click CREATE.
-
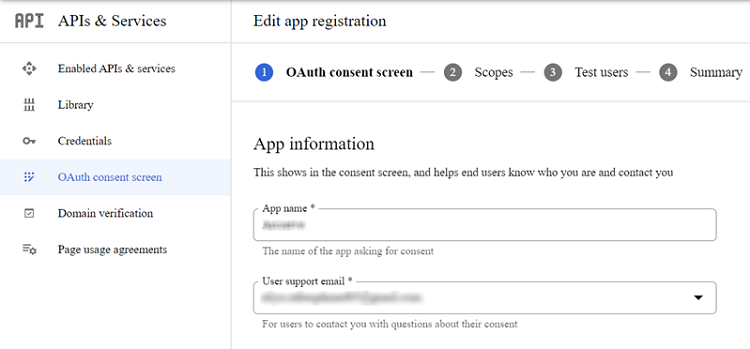
- The Edit app registration page appears.
- On the OAuth consent screen tab, do the following, and then click SAVE AND CONTINUE:
- Under App Information, type a name for the application.
- From the User support email drop-down list, select the email address.
-
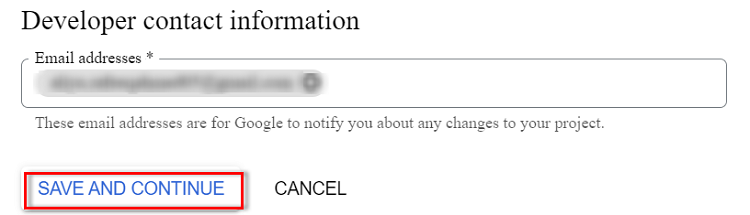
- Under Developer contact information, provide the email address (s) as needed.
- Note: In case of any changes to your project, Google sends a notification to the email address (s) that you have provided.
-
- On the Scopes tab, click SAVE AND CONTINUE.
- On the Test users tab, do the following, and then click SAVE AND CONTINUE:
- Click ADD USERS.
- On the Add users dialog, click the empty field, and then select the email address (s) as needed.
-
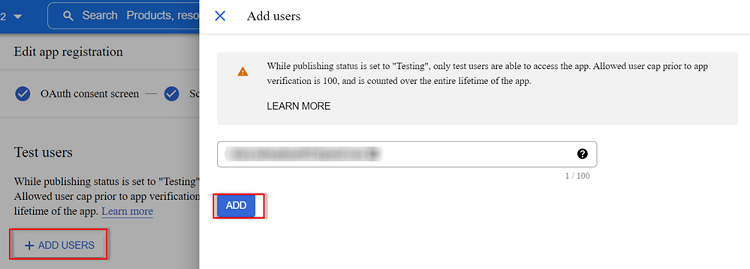
- The added email address appears in the User information column under Filter table.
- On the Summary tab, verify the details, and then do one of the following:
- If the details are correct, click BACK TO DASHBOARD.
- If the details are incorrect in any of the tabs, click EDIT of the corresponding tab, update details as needed, return to the Summary tab, and then click BACK TO DASHBOARD.
- Navigate to APIs & Services > Credentials > CREATE CREDENTIALS, and then select OAuth client ID.
- On the Create OAuth client ID page, do the following, and then click CREATE:
- From the Application type drop-down list, select Web application.
- For Name, type a name for your OAuth 2.0 client.
- For Authorized redirect URIs, specify the following redirect URIs:
- https://localhost:8015/management/oauth2callback/
- https://localhost:8014/WebServiceImpl/oauth2callback/
- Note: Configure the redirect URIs based on the domain name and port used for logging in.
- After the OAuth client is created successfully, the OAuth client created dialog appears and displays the client ID and client secret for your project.
-
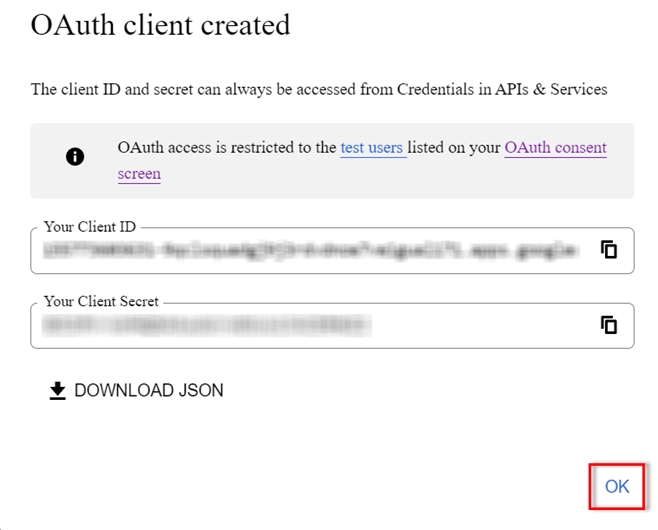
- Notes:
- After creating the client ID and client secret, download the client_secret.json file and store it in a safe location.
- To access the client ID and client secret later, navigate to APIs & Services > Credentials.
- Click OK to close the dialog.
- From the left pane, select Enabled APIs & services, and then click ENABLE APIS & SERVICES.
-
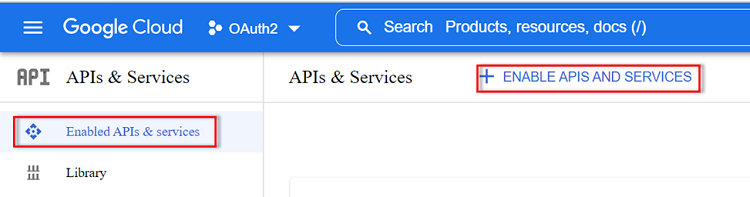
- The Welcome to the API Library page appears.
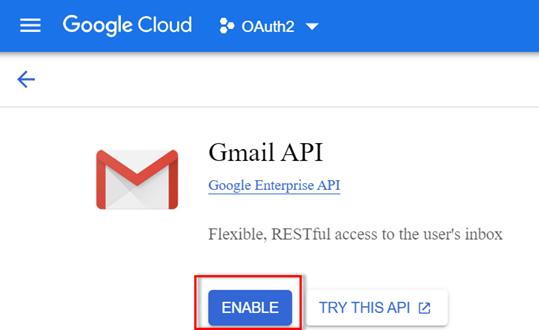
- Search for Gmail API in the search bar, and then click Gmail API.
- On the Gmail API page, click Enable.
-
- After configuring the project as mentioned in the above steps, go to UDP application, and then navigate to settings > Email and Alert Configuration. To configure email alerts, see How to Configure Email and Alert.
The OAuth 2.0 authentication is configured successfully for Gmail.