Specify the Source
The Source page lets you specify the SharePoint Online source nodes that you want to protect. You can select more than one SharePoint Online source nodes in a plan.
Note: You can save a plan without adding any source nodes, but the plan is not deployed unless you add a node.
Follow these steps:
- Click the Source tab.
- Select the Backup Proxy from the drop-down list.
- Add SharePoint Online node using one of the following methods:
- Method 1:
- Click Add, and then click Select Source to Protect in Arcserve UDP.
- The Add Nodes to Plan dialog is displayed.
- Note: Use this option only if you have already added SharePoint node.
- Select a node, and then click Connect.
- Note: To find the SharePoint Online nodes that you want to protect, use Search.
- Method 2:
- Click Add, and then click Add SharePoint Online Source.
- The Add nodes to a plan dialog appears.
- Note:
- Use this option to discover and specify online items for SharePoint Online Source.
- Unlike other nodes, you cannot add the SharePoint Online node from the All Nodes page. You can add a SharePoint Online node only in a plan while creating or modifying a plan.
- To apply authentication, do one of the following:
- For modern authentication, you can run a backup using security certificate.
- Use security certificate
- Note: By default, the backup plan selects Use security certificate for modern authentication.
- Follow these steps:
- To authenticate the UDP application with security certificates, see Downloading the Certificate from UDP and Uploading it to Azure.
- Enter the following details:
- Node Name
- App ID
- User Name
-
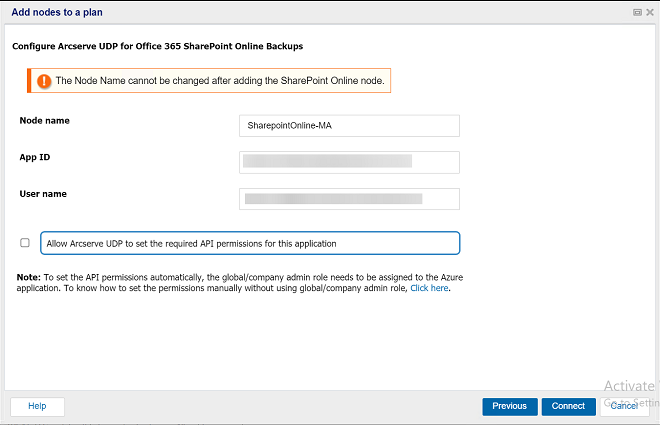
- To apply the API permissions automatically, select the Allow Arcserve UDP to set the required API permissions for this application check box.
- Note: For applying the permissions manually without using the Global/company admin role, see Configuring the API Permissions Manually Without Using the Global/Company Admin Role.
- Click Connect.
- Notes:
- SharePoint Online Source node names cannot change after creating the node.
- You can use a single account to protect multiple SharePoint Online nodes.
- Fill in the app password if Multi-Factor Authentication is enabled and the tenant is set to use Basic Authentication.
- For Basic Authentication, to proceed with the backup, provide the following information, and then click Connect:
- Node name
- Site Collection URL
- User ID
- Password
- To protect SharePoint Online items, do the following:
- From the Site Type drop-down list, select the type of site you want to protect such as SharePoint Sites or Personal Sites.
- For Protect All Sites/Subsites, perform the following:
- Notes:
- This option is automatically selected by default when the Select SharePoint Online Content screen appears.
- To protect all items in the selected site type, select the Protect All Sites/Subsites check box.
- To protect specific items in the selected site type, clear the Protect All Sites/Subsites check box, and then select the specific items that you want to protect.
- While configuring the existing SharePoint Online plan, if you have selected sites manually for protection and now want to select the Protect All Sites/Subsites check box, follow these steps:
- Modify the existing SharePoint Online plan.
- Clear the SharePoint sites that are manually selected for protection.
- Select the Protect All Sites/Subsites check box, and then save the plan.
- To exclude specific items from being protected, select the Exclude selected sites check box, and then select specific items in the selected site type.
-
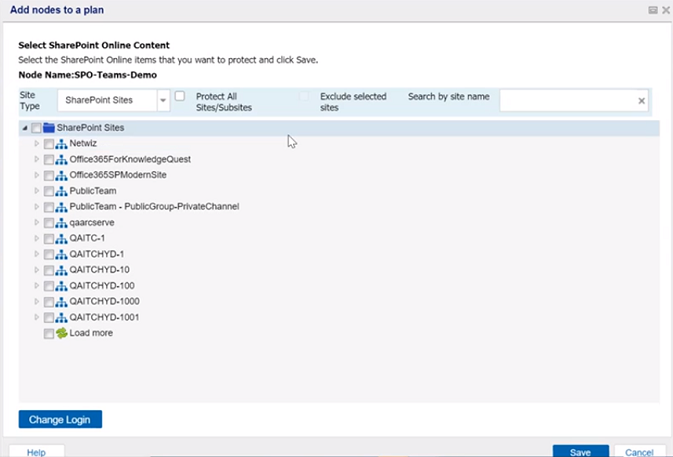
- Click Save.
The SharePoint Online sources that you want to protect are added to the plan.