How to Create the NFS Share on Windows Server
After installing the NFS server on Windows Server, create the NFS share using the File and Storage Services console.
Follow these steps:
- On the Server Manager Console, navigate to File and Storage Services > Shares.
- Go to the TASKS drop-down list, or right-click in the empty area, and then click New Share.
-

- The New Share Wizard opens.
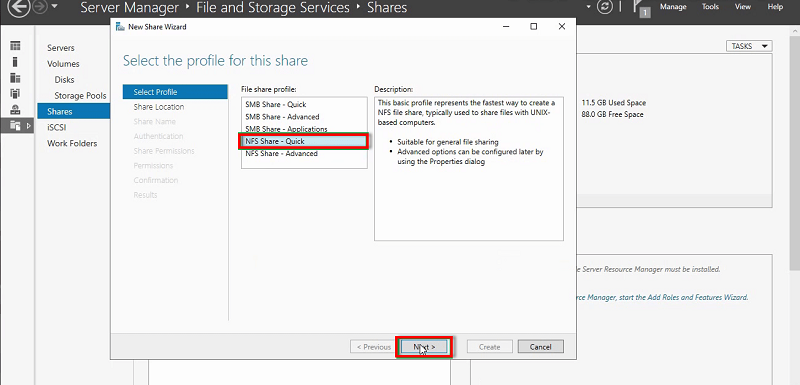
- On the Select the profile for this share page, select the NFS Share - Quick option, and then click Next.
-
- On the Select the server and path for this share page, select the Type a custom path option, type the path or browse to select the path for the specific folder you want to set as a shared folder, and then click Next.
-

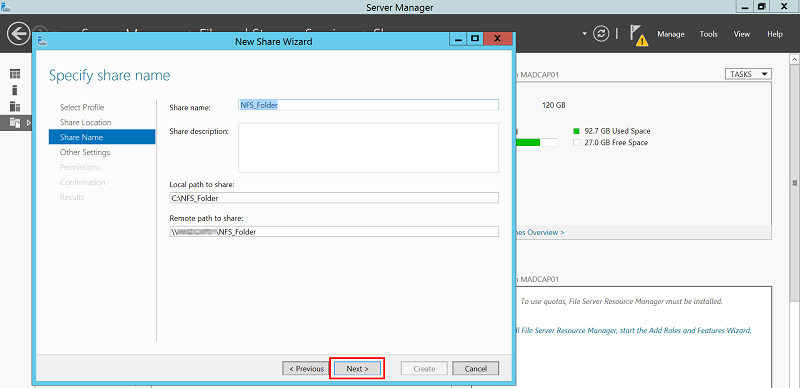
- On the Specify share name page, verify the share name, local path, and remote path for NFS share, and then click Next.
-
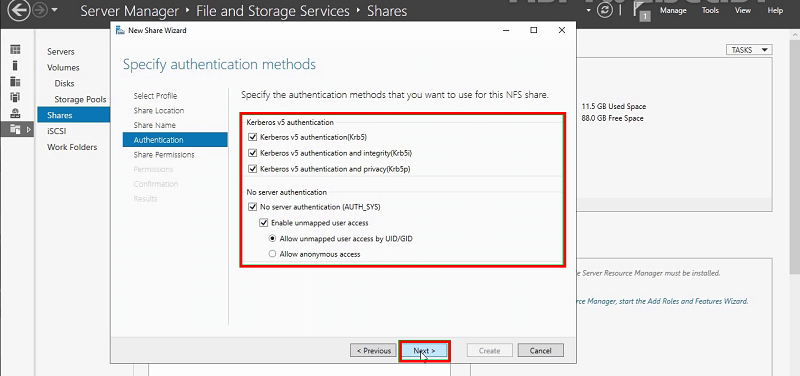
- On the Specify authentication methods page, select the authentication methods as needed, and then click Next.
-
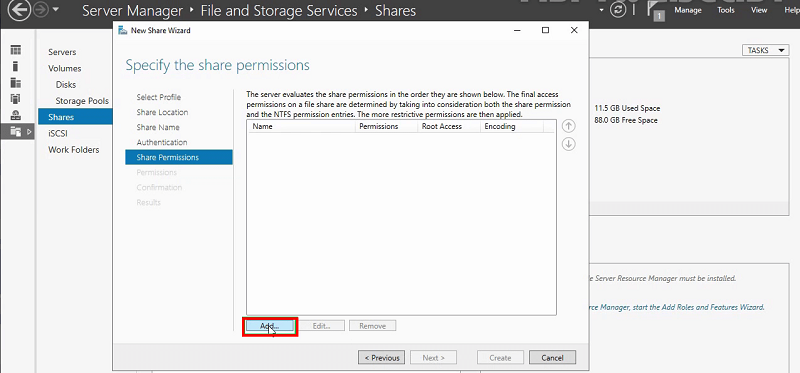
- On the Specify the share permissions page, to set up the NFS share permissions, click Add.
-
- The Add Permissions dialog appears.
- On the Add Permissions dialog, do the following, and then click Add:
- Select one of the following:
- Host: Specify the IP address of a host (single machine).
- Netgroup: Select a netgroup from the drop-down list.
- Client group: Select a client group from the drop-down list.
- All Machines: If you want to give permissions to all the machines to access the NFS share, select All Machines.
- Select the share permission from the Share permissions drop-down list as needed.
-
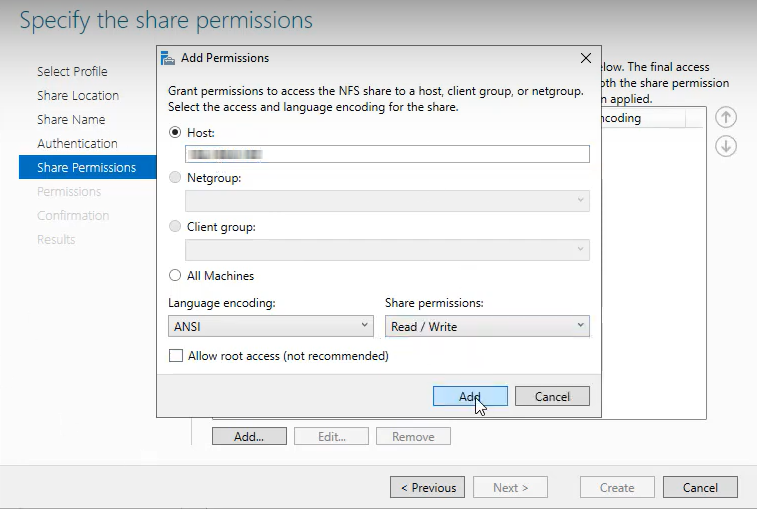
- Note: To add multiple hosts, repeat the above steps.
- Click Next.
-

- On the Specify permissions to control access page, accept the default permissions, and then click Next. If you want to change permissions, click Customize permissions.
-

- On the Confirm selections page, review the selections, and then click Create.
-

- After the NFS share is created successfully, click Close.
-
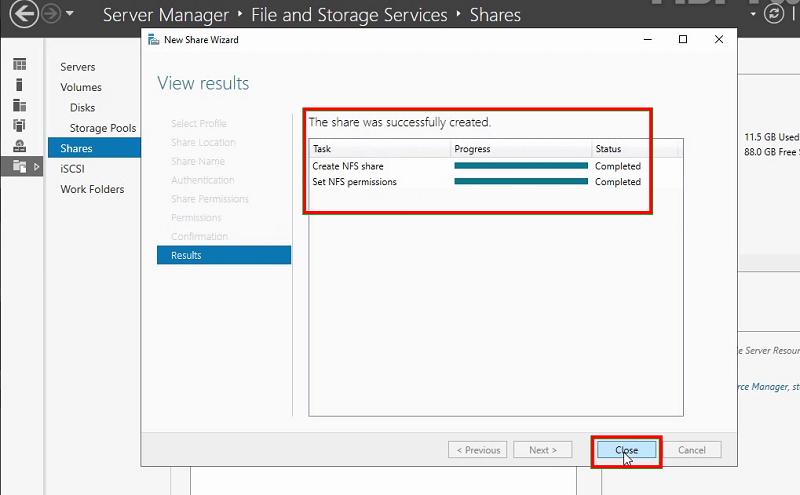
- Verify the added NFS share under the shares list.
-
