Select OneDrive Items to Restore
You can restore OneDrive data from a recovery point. When you select a recovery date, and then specify the time, all the associated recovery points for that duration are displayed. You can then browse and select the backup content (including applications) to restore.
Follow these steps:
- Log into Arcserve UDP.
- Click the resources tab.
- Select All Nodes in the left pane.
All the added nodes are displayed in the center pane.
- In the center pane, select the OneDrive node and click Actions.
- Click Restore from the Actions drop-down menu.
Note: You are automatically logged in to the agent node and the Node dialog opens.
You can view the Browse Recovery Points details in the Backup Location. The name of selected Recovery Point Server is displayed. If desired, click Change and modify Recovery Point Server setting from the Source pop-up.
- Note: When you add a Copy to Tape Task to the plan and now want to restore the Copy to Tape backup recovery point, select the recovery point from the Copy to Tape backup. For more information, see Browse Copy to Tape Recovery Point for Restore.
- Select the calendar date for the backup image to restore and click Next.
- All the dates containing recovery points for the specified backup source are highlighted in green.
- The corresponding recovery points for that date are displayed, with the time of the backup, the type of backup that was performed (Full or Incremental), and the name of the backup.
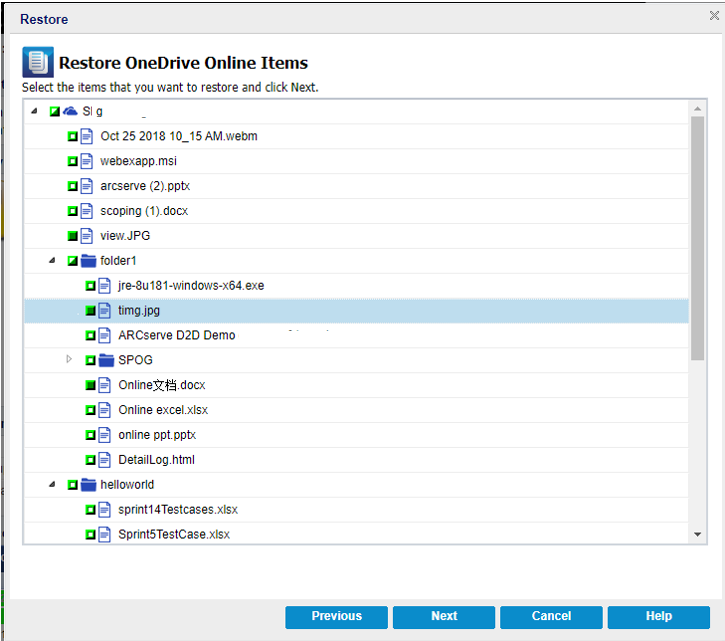
- From the Restore OneDrive Node Items pane, select the check boxes of related items or folders that you want to restore from Folders, and click Next.
-
- Notes:
- You can select the entire content or partial content of the OneDrive object to restore. To select partial content, expand the object, and click the check box of that content.
- You can select multiple OneDrive objects to restore.
- The Restore Options dialog opens.
The OneDrive Node items to restore are selected. Now, you can define the restore options.