Upload Recovery Point to Cloud
Using this feature, you can upload Recovery Points from backup destinations like RPS\Local\Remote share to Cloud.
Important! You need a node that has a backup plan and a qualified backup session available to Copy to Cloud.
Follow these steps:
- Click the resources tab.
- The Nodes: All Nodes page is displayed.
- Perform one of the following actions:
- Right-click the node name.
- Select the node name, and from the center pane click the Actions drop-down list.
- Click Upload Recovery Point to Cloud.
- The Upload Recovery Point to Cloud dialog opens.
- You can upload the recovery point to Cloud in two steps.
-
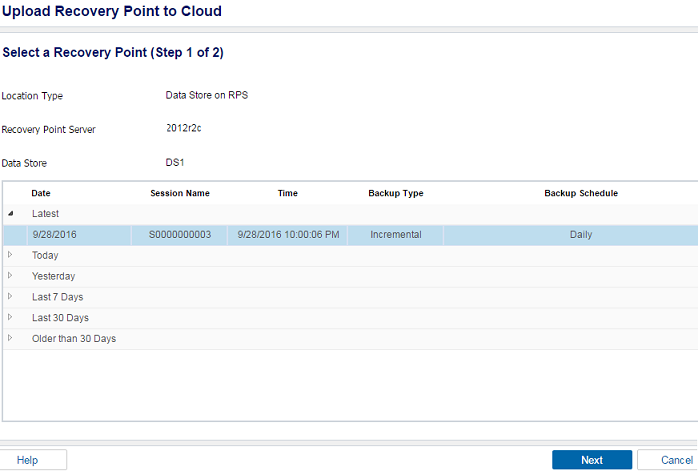
- In Step 1, select a Recovery Point and click Next.
- The next screen of upload appears.
-
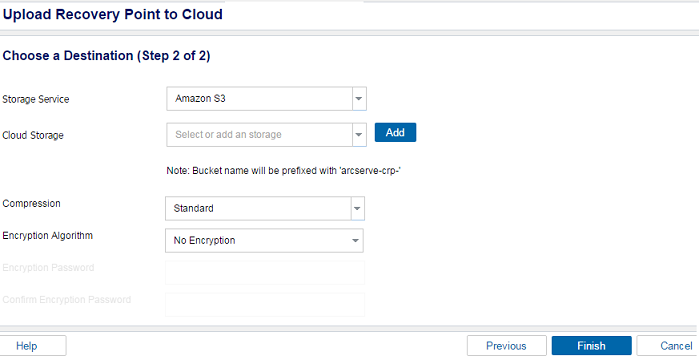
- In Step 2, provide the following details, and click Finish.
- Select Storage Service from the drop-down list.
- Select Cloud Storage from the drop-down list.
- Note: If a cloud account is not added before, click Add to add a cloud account.
- Select type of Compression from the drop-down list.
- Select type of Encryption Algorithm.
- Enter Encryption Password twice.
- Note: A Bucket/Container is created with arcserve-{random-generated-id}-<BucketName> naming convention. However, each Upload recovery point to cloud job creates a new bucket/container with unique {random-generated-id} ID. For exact bucket/container name, refer to the job activity log.
- The recovery point is uploaded to Cloud.