Configure the Standby VM Network
You can power on the Standby VM with customized network settings. You can configure the following network settings on the standby VM:
- Specify the virtual network and NIC (Network Interface Card), and TCP/IP settings for each network adapter from the Network Adapter Settings tab.
- Update the DNS servers to redirect clients from the source computer to the virtual standby virtual machines based on the TCP/IP settings from the DNS Update Settings tab.
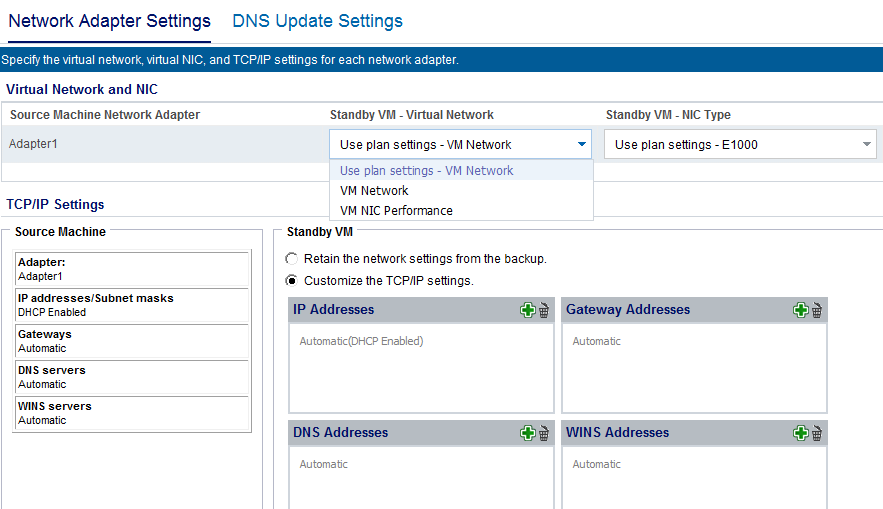
The following diagram displays the Network Adapter Settings tab of Standby VM Network Configuration:
Follow these steps:
- From the resources tab, navigate to the Virtual Standby node group.
- The Virtual Standby nodes are displayed on the center pane.
- On the center pane, select the node and click Standby VM Network Configuration.
- The Standby VM Network Configuration - <node name> page opens.
- On the Network Adapter Settings tab, select the virtual network from the Standby VM - Virtual Network list.
- Select the NIC type from the Standby VM - NIC Type list.
- Select Customize the TCP/IP settings.
- Click the Add address button and add IP Addresses, Gateway Addresses, DNS Addresses, and WINS Addresses.
- Note: If you add DNS Addresses, then configure the DNS servers in the DNS Update Settings tab.
- Click Save.
- The Standby VM Network Configuration - <node name> page closes.
The Standby VM network is configured.