Prepare a Cloud Account in Microsoft Azure
This section provides information about how to create a cloud account in Microsoft Azure.
Follow these steps:
- Perform the following steps to register the Microsoft Entra ID application that Arcserve UDP uses to communicate with Microsoft Azure:
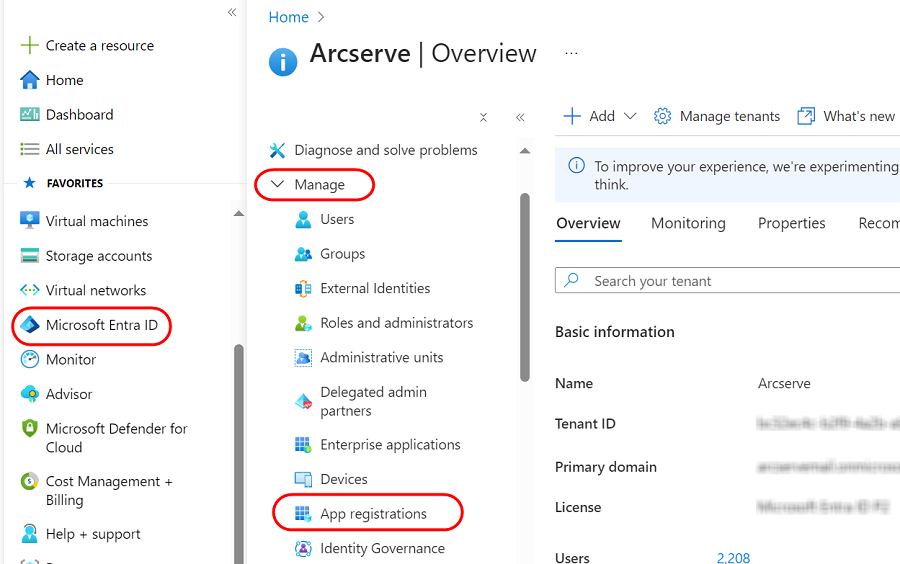
- Log into the Microsoft Azure portal.
- From the left pane, navigate to Microsoft Entra ID > Manage > App registrations.
-
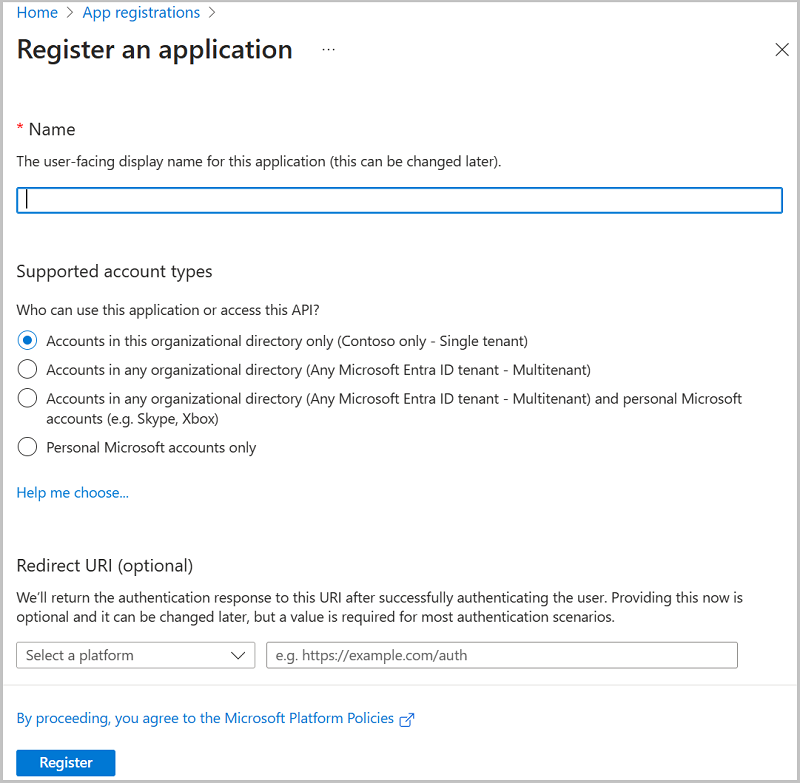
- On the Arcserve- App registrations page, click New registration.
-

- On the Register an application page, do the following, and then click Register:
- Name - Enter a name for the application.
- Supported account types - Select a supported account type, which determines who can use the application.
- Redirect URI (optional) - Select Web or Public client/native (mobile & desktop) for the type of application you are creating, and then enter the redirect URI for your application.
-
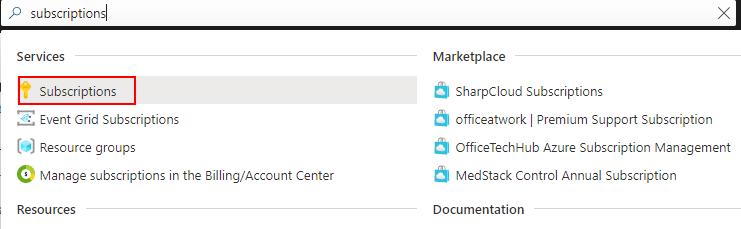
- On the search bar, type subscriptions, and then from the list, click Subscriptions.
-
- On the Subscriptions pages, select the subscription for your application.
-
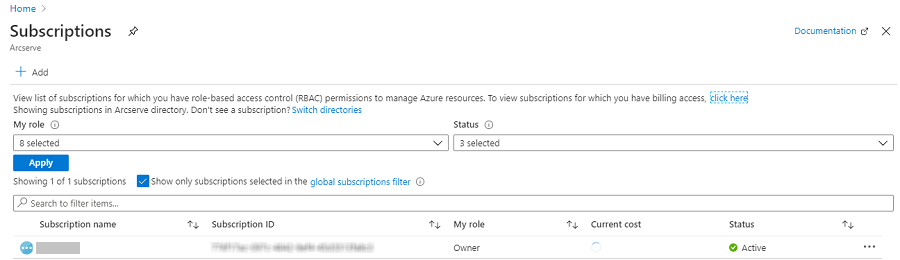
- Note: If the subscription list does not display the required subscription, select global subscriptions filter. Make sure the subscription you want is selected for the portal.
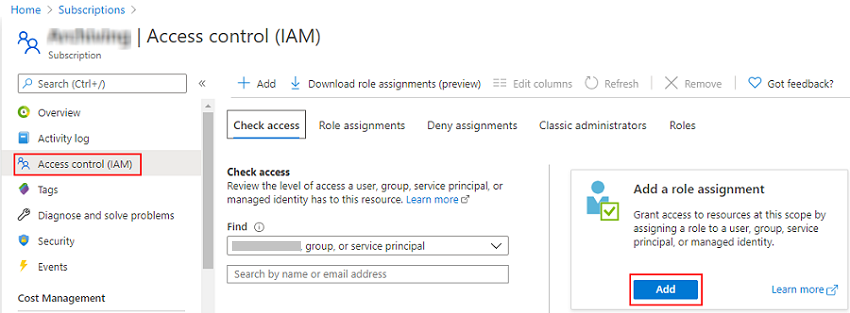
- On your subscription page, go to Access control (IAM), click Add, and then select Add role assignment.
-
- On the Add role assignment page, do the following, and then click Review + assign:
- On the Role tab, select the role that you want to assign to the application, and then click Next.
-

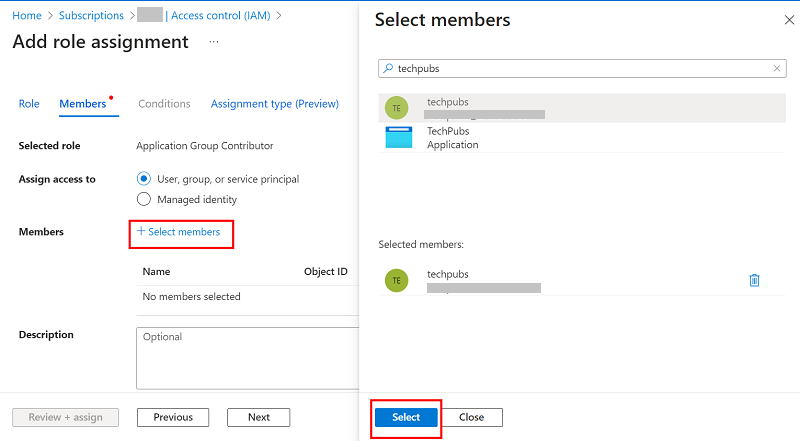
- On the Members tab, do the following, and then click Next:
- Click Select members.
- The Select members dialog appears.
- Search for the application that you have registered in the search bar, select the application, and then click Select.
- (Optional) For Description, type a description as needed.
-
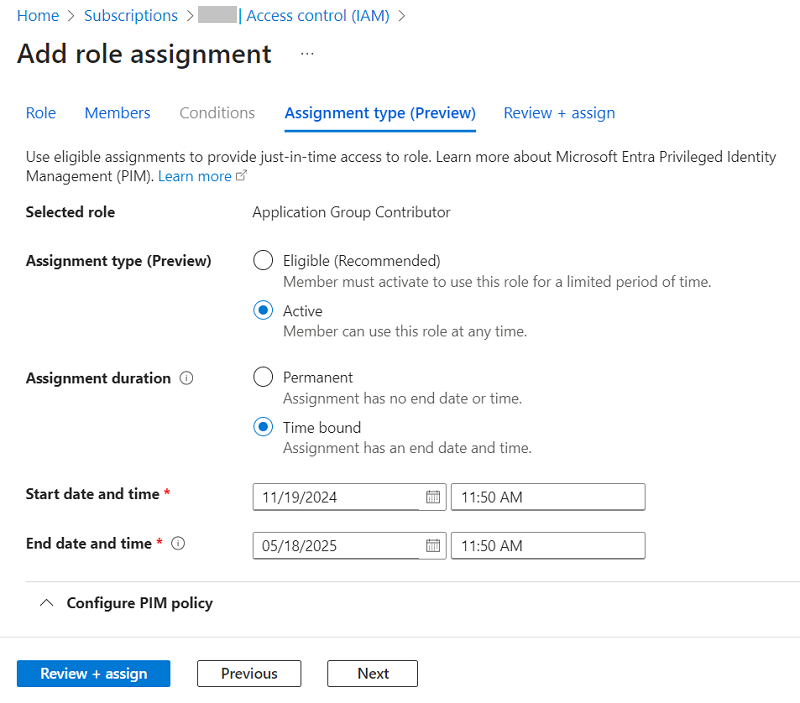
- On the Assignment type (Preview) tab, do the following, and then click Next:
- Select one of the following as assignment type.
- Eligible: If you select this option, you need to perform one or more actions to use the role, such as perform a multifactor authentication check, provide a business justification, or request approval from the designated approvers.
- Active: If you select this option, you do not need to perform any action to use the role.
- For Assignment duration, select one of the following:
- Permanent: If you select this option, user is always allowed to activate or use role.
- Time bound: If you select this option, user is allowed to activate or use role only during a specified time. Set the Start date and time and End date and time to allow user to activate or use role.
-
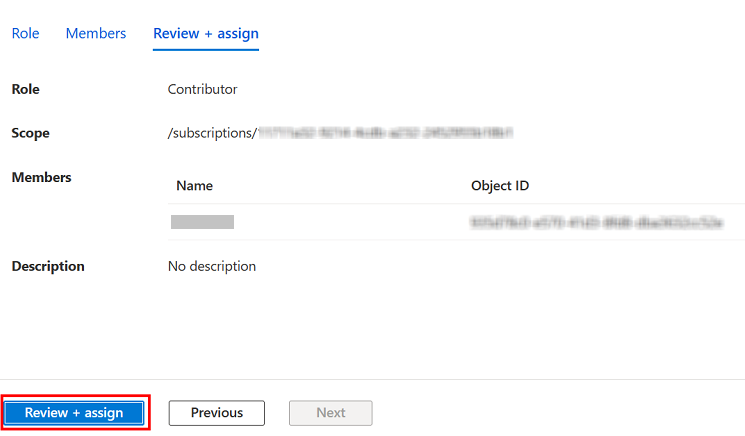
- On the Review + assign tab, verify the information that you have provided, and then click Review + assign.
-
- To get the Subscription ID, follow these steps:
- From the left navigation pane of Azure portal, click Subscriptions.
-
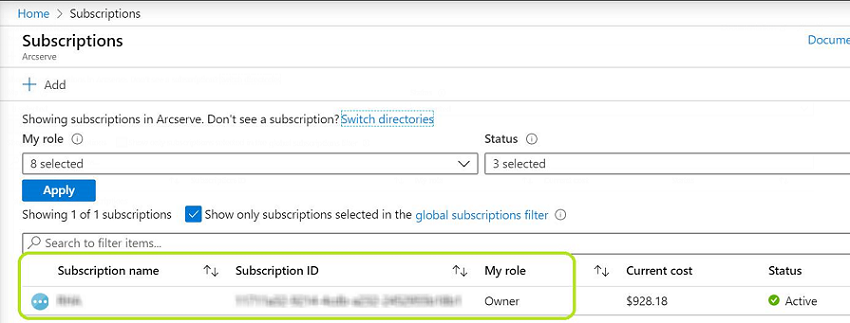
- Copy and save the subscription ID, which is used while adding the Microsoft Azure Cloud account in Arcserve UDP.
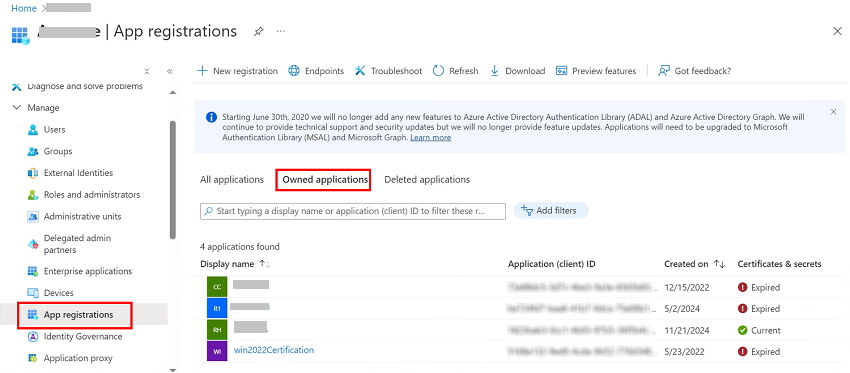
- To get the Tenant ID and Application ID, follow these steps:
- Navigate to Microsoft Entra ID > App registrations > Owned applications, and then select your application.
-
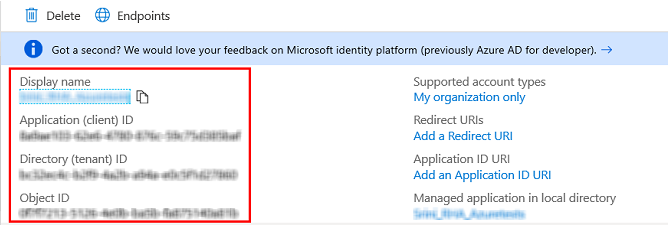
- Copy and save the Application (client) ID and Directory (tenant) ID to a safe location.
-
- To get the Client secret, follow these steps:
- On the App registrations page, select the application, navigate to Certificates & secrets on the left pane under Manage, and then click New client secret to add a client secret.
-
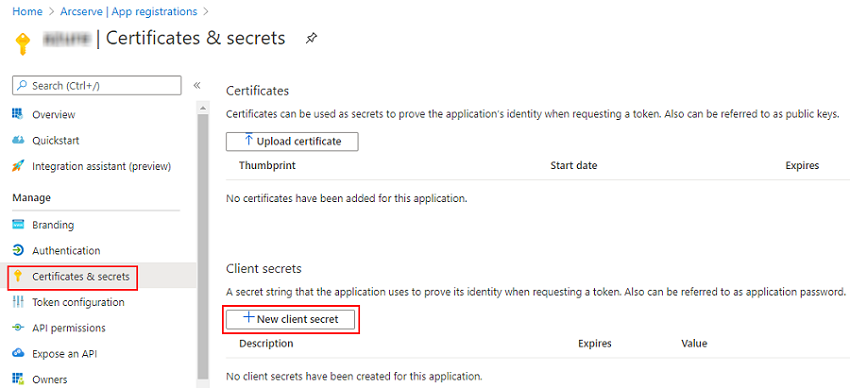
- On the Add a client secret page, enter a description, select an expiry interval from the drop-down list as needed, and then click Add.
-
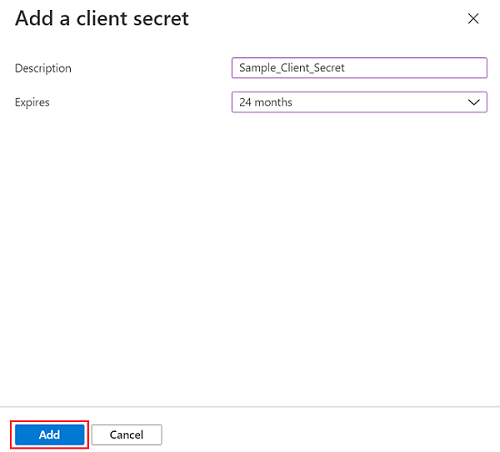
- Note: We recommend that you select the 24 months option as the expiry interval to avoid generating the client secret repeatedly.
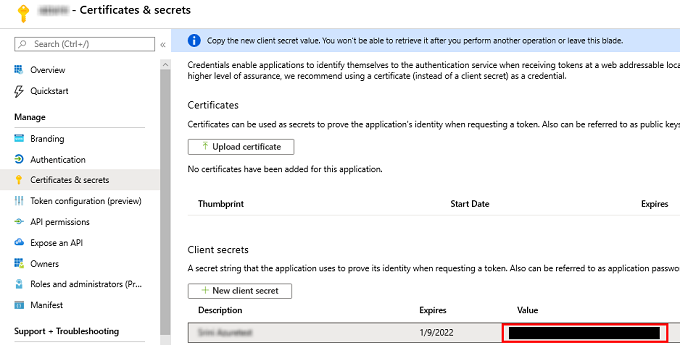
- The client secret value is displayed.
-
The Microsoft Entra ID application is registered, and a role has been assigned to it successfully.
Now, you can perform the next steps using the registered application to get the required IDs and Key.
The list of your subscriptions is displayed along with the subscription ID.
Important! Copy and save the client secret value as you cannot retrieve it later. If you forget to save the value, delete the existing client secret, and create a new client secret as mentioned in step 4.
The cloud account is successfully created in Microsoft Azure.