Restore a Site
Follow these steps:
- Recover site content from an unattached content database.
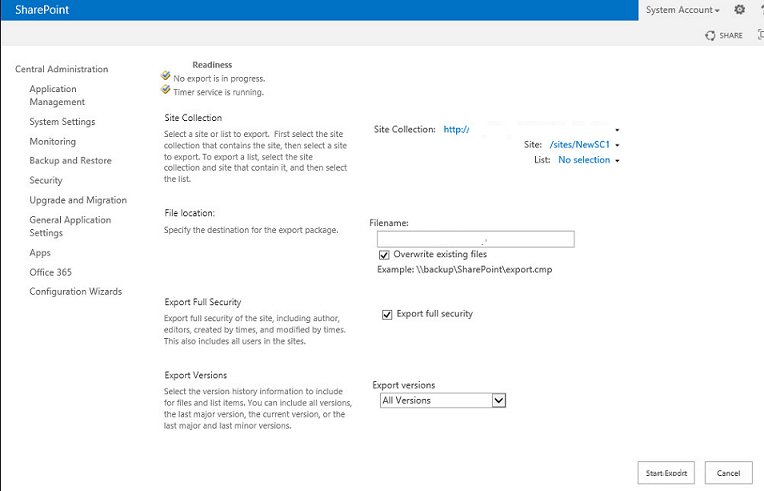
- Select the export site or the list option, and click the Next button.
- Select the site and provide the file location for the export package.
- Select the options for security and versions (by default All Versions).
- Click the Start Export button to begin the export, then the site is exported to a file.
- $database = Get-SPContentDatabase -ConnectAsUnattachedDatabase -DatabaseName xxxx -DatabaseServer xxxx
- ConnectAsUnattachedDatabase: Specifies that only unattached databases in the farm are returned.
- DatabaseName: Specifies the name of the content database.
- DatabaseServer: Specifies the name of the host server for the content database specified in the DatabaseName parameter.
- For more details, see the article from Microsoft.
- Setting object to export
- $ExportObject = New-Object Microsoft.SharePoint.Deployment.SPExportObject
- $ExportObject.Type = [Microsoft.SharePoint.Deployment.SPDeploymentObjectType]::Web
- $ExportObject.Url = $SiteUrl
- $SiteUrl: Specifies the URL location to which the site will be backed up.
- Configuring Export Settings
- $ExportSettings = New-Object Microsoft.SharePoint.Deployment.SPExportSettings
- $ExportSettings.UnattachedContentDatabase = $database
- $ExportSettings.SiteUrl = $CAUrl
- $CAUrl: Specifies Central Administration Site Url.
- $ExportSettings.FileLocation = $ExportPath
- $ExportSettings.LogFilePath = $ExportPath
- $ExportPath: Specifies the path to save the backup file (for example, C:\backup).
- $ExportSettings.BaseFileName = $ExportFile
- $ExportFile: Specifies the filename of the backup file (for example, site.cmp).
- $ExportSettings.IncludeVersions = [Microsoft.SharePoint.Deployment.SPIncludeVersions]::All
- $ExportSettings.ExportMethod = [Microsoft.SharePoint.Deployment.SPExportMethodType]::ExportAll
- $ExportSettings.IncludeVersions = [Microsoft.SharePoint.Deployment.SPIncludeVersions]::All
- $ExportSettings.ExportObjects.Add($ExportObject)
- $ExportSettings.Validate()
- $ExportJob = New-Object Microsoft.SharePoint.Deployment.SPExport($ExportSettings)
- Back up the site to a file.
- $ExportJob.Run()
- For more details, see the article from Microsoft.
- Click SharePoint Management Shell to launch the console.
- Use PowerShell commands to restore the site to the origin location or the new location.
- Identity: Specifies the URL or GUID of the Web to import into. for example, http://www.contoso.com.
- Path: Specifies the name of the import file. for example, C:\backup\site.cmp’
- IncludeUserSecurity: Preserves the user security settings except for SPLists that have broken inheritance and item level permissions set.
- UpdateVersions: Indicates how to resolve situations where a file version to be imported to a site already exists in that site. You can select one of the following options:
- For more details, see the article from Microsoft.
Use Central Administration

Example: The name of site to be restored is TestSite1 and the URL is /TestSite1/.
Use PowerShell commands
Import-SPWeb -Identity xxxx -Path xxxx -IncludeUserSecurity:$true -UpdateVersions:xxxx
Add: Adds the file as a new version.
Overwrite: Overwrites the current file and all of its versions (delete then insert).
Ignore: Ignores the file if it exists on the destination. The new file is not added.
The default value is Add.