Define the Restore Options
After you specify a recovery point and content to restore, define the copy options for the selected recovery point.
Follow these steps:
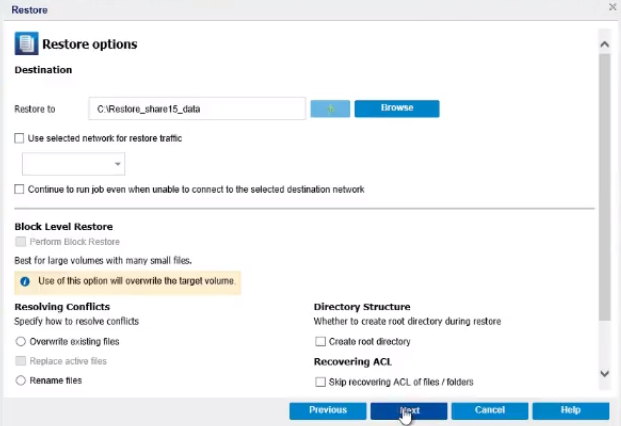
- On the Restore Options dialog, select the restore destination.
- Available destination option is:
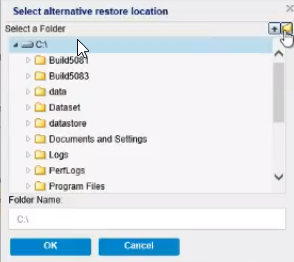
- To provide the destination, click Browse.
- The Select alternative restore location dialog appears.
- Select the existing folder or create a new folder as needed, and then click OK.
-
- To verify the connection to the specified location, click the green arrow button. If necessary, enter the Username and Password to gain access to that location.
- To enable the communication between the selected network and the Recovery Point Server, select the Use selected network for restore traffic check box, and then select the network from the drop-down list.
- Note: If the selected backup network is not accessible and to continue the backup job with the available network or with the default network, click the Continue to run job even when unable to connect to the selected backup network check box.
- Specify the Resolving Conflicts option that Arcserve UDP performs if conflicts are encountered during the restore process.
- The available options are:
- To create a root directory during restore, specify the Directory Structure.
- If you select to restore the "A.txt" and "B.txt" files individually, the destination for the restored files will be "D:\Restore\A.txt" and "D:\Restore\B.txt" (the root directory above the specified file level will not be recreated).
- If you select to restore from the "SubFolder2" level, the destination for the restored files will be "D:\Restore\SubFolder2\A.txt" and "D:\Restore\SubFolder2\B.txt" (the root directory above the specified folder level will not be recreated).
- If you select to restore just the "A.txt" file, the destination for the restored file will be "D:\Restore\ Folder1\SubFolder2\A.txt" (the entire root directory without the volume name will be recreated).
- If you select to restore both the "A.txt" and "C.txt" files, the destination for the restored files will be "D:\Restore\C\Folder1\SubFolder2\A.txt" and "D:\Restore\E\Folder3\SubFolder4\C.txt" (the entire root directory with the volume name will be recreated).
- Specify if you want the Recovering ACL to skip recovering ACL of files/folders.
- If the option Skips recovering ACL of files/foders is selected, only source files/folders are restored. The attribute of files/folders are not restored so that everyone can access.
- Default: Restores source files/folders with the attribute - Access Conrol List.
- If necessary, specify the Backup Encryption Password, when the data you are trying to restore is encrypted.
- A password is not required if you are attempting to restore from the same Arcserve UDP Agent (Windows) computer from where the encrypted backup was performed. However, if you are attempting to restore from a different Arcserve UDP Agent (Windows) computer, a password is required.
-
- Note: If a clock icon appears with a lock symbol, it indicates that the recovery point contains encrypted information and may require a password for restore.
- Click Next.
- The Restore Summary dialog opens.
Restore to
Restores to the specified location. To restore data to the specified location, do the following:
Note: Restore to NFS share from an NFS Protection plan is not allowed.
Overwrite existing files
Overwrites (replaces) any existing files, which are at the restore destination. All the objects are restored from the backup files regardless of their current presence on your computer.
Replace active files
Replaces any active files upon reboot. If during the restore attempt Arcserve UDP Agent (Windows) discovers that the existing file is currently in use or being accessed, it will not immediately replace that file, but instead to avoid any problems will delay the replacement of the active files until the next time the machine is rebooted. (The restore occurs immediately, but the replacement of any active files is done during the next reboot).
This option is only available if you select the Overwrite existing files option.
Note: If you do not select this option, any active file is skipped from the restore.
Rename files
Creates a new file if the file name already exists. Selecting this option copies the source file to the destination with the same file name but a different extension. Data is then restored to the new file.
Skip existing files
Skips over and not overwrite (replace) any existing files that are located at the restore destination. Only objects that are not currently existing on your machine are restored from the backup files.
Default: Skip existing files.
Create root directory
Specifies that if a root directory structure exists in the captured backup image, Arcserve UDP recreates that same root directory structure on the restore destination path.
With this option not selected, the file or folder is restored directly to the destination folder.
For example, if during the backup you captured the files "C:\Folder1\SubFolder2\A.txt" and "C:\Folder1\SubFolder2\B.txt" and during the restore you specified to the restore destination as "D:\Restore".
With this option selected, the entire root directory path for the files/folders (including the volume name) is recreated to the destination folder. If the files/folders to be restored are from the same volume name, then the destination root directory path does not include that volume name. However, if the files/folders to be restored are from different volume names, then the destination root directory path does include the volume name.
For example, if during the backup you captured the files "C:\Folder1\SubFolder2\A.txt", "C:\Folder1\SubFolder2\B.txt", and also E:\Folder3\SubFolder4\C.txt" and during the restore you specified to the restore destination as "D:\Restore".
The restore options are defined to restore from a recovery point.