Add an Exchange Online Node
Note: Unlike other nodes, you cannot add the Exchange Online node from All Nodes page. An Exchange Online node is added only in a plan or while modifying a plan.
For information about how to create a plan, see How to Create an Exchange Online Plan.
Follow these steps:
- Enter the user name of Exchange Online backup account that meets the prerequisites in Username or user account for the exchange online node.
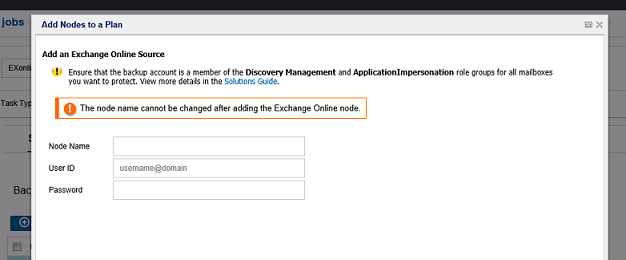
- Enter password and click Connect.
- Select Exchange Online accounts to protect and click the right arrow (>) to move them to the protected list.
- Click Save.
- You may select the folder(s) you do not want to backup from the Select folders to exclude from Backup option on the Source tab.
- The selected Exchange Online accounts are added.
Multiple Exchange online nodes can use the same user account (service account) of Exchange online. To add Exchange node by plan, specify the node name, user name, and password. Once created, you cannot change the node name of Exchange online node.
Note: Updating / changing the user account may change the number of protected mailboxes. Verify that the new / updated service account have impersonation rights for the mailboxes to be protected.
Note: Select the check box to protect all Office 365 Exchange sources to protect all the Exchange Online accounts across all the pages. To add all the exchange online accounts listed on the page to the protected list, click the right (>) arrow.