Select VM(s) Location
This section provides information about how to perform the second step of selecting a virtual machine location to host the instant VM.
The VM(s) Location screen displays the list of selected nodes with details such as VM Name, VM Type, Hypervisor Type, and Host. For each node in the list, you can select the hypervisor type and location of the virtual machine to host the instant VM.
Follow these steps:
- From the VM(s) Location screen, on each node, perform the following:
-
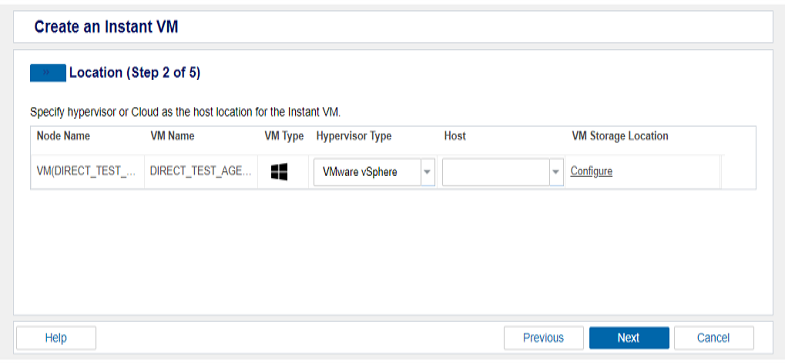
- For Hypervisor Type, from the drop-down list, select the type of the hypervisor.
- Note: Arcserve UDP supports VMware and Hyper-V to host the Instant VM for Windows nodes.
- For Host, from the drop-down list, select the existing hypervisor or add a new hypervisor.
- To add a new hypervisor, follow these steps:
- From the Host drop-down list, click +Add New Hypervisor.
- The Add Hypervisor dialog appears.
-
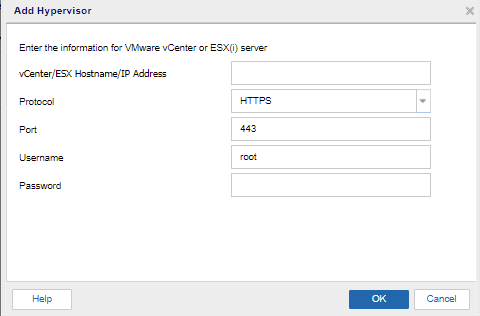
- On the Add Hypervisor dialog, provide the following details as needed:
- vCenter/ESX Hostname/IP Address: Type the host name or vCenter IP address.
- Protocol: Select the protocol such as HTTP or HTTPS.
- Port: Type the port number.
- Username: Type the username.
- Password: Type the password.
- Click OK.
- The new hypervisor is added.
- For VM Storage Location, to configure the selection of VMware storage location, click Configured.
- For Hypervisor Type, from the drop-down list, select the type of the hypervisor.
- Note: Arcserve UDP supports VMware, Hyper-V, Nutanix AHV, Amazon EC2, and Microsoft Azure to host the Instant VM for Linux nodes.
- For Host, from the drop-down list, select the existing hypervisor or add a new hypervisor.
- To add a new hypervisor, follow these steps:
- From the Host drop-down list, click +Add New Hypervisor.
- The Add Hypervisor dialog appears.
-
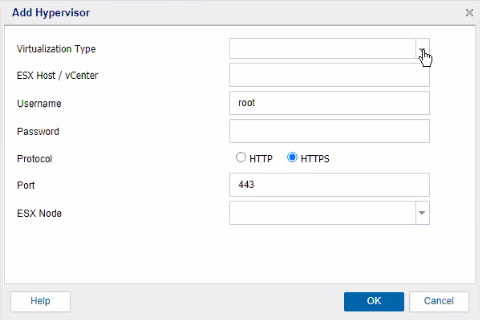
- On the Add Hypervisor dialog, from the Virtualization Type drop-down list, select one of the following:
- ESX Host / vCenter: Type the host name or vCenter IP address.
- Username: Type the username.
- Password: Type the password.
- Protocol: Select the protocol such as HTTP or HTTPS.
- Port: Type the port number.
- ESX node: From the drop-down, select the one of the available nodes.
- Hyper-V Host name: Type the host name for the Hyper-V hypervisor.
- Username: Type the username.
- Password: Type the password.
- Nutanix AHV Cluster Virtual IP address: Type the IP address.
- Username: Type the username.
- Password: Type the password.
- Port: Type the port number.
- Account Name: Type the name of the cloud account. If the cloud account is not added, click Add. For more information, see Add a Cloud Account.
- Region: From the drop-down, select the available region.
- Account Name: Type the name of the cloud account. If the cloud account is not added, click Add. For more information, see Add a Cloud Account.
- Resource group: From the drop-down, select the available resource group.
- Region: From the drop-down, select the available region.
- Click OK.
- The new hypervisor is added.
- For VM Storage Location, to configure the selection of VMware storage location, click Configured.
- Click Next.
- The Recovery server(s) screen appears.
Provide the following details as needed:
Provide the following details as needed:
Provide the following details as needed:
Provide the following details as needed:
Provide the following details as needed:
Complete the next step: Select Recover server(s)