Restore the SQL Database to an Alternate Instance on the Same Server
This section provides information about restoring a FileStream enabled SQL Database to an alternate instance of a FileStream enabled Database in which both instances are on the same SQL server.
Follow these steps:
- On the Restore screen, select the date for recovery from Recovery Point Date, the scheduled time for recovery from Time Range, and the RPS (SQL database) from the table, and then click Next.
-
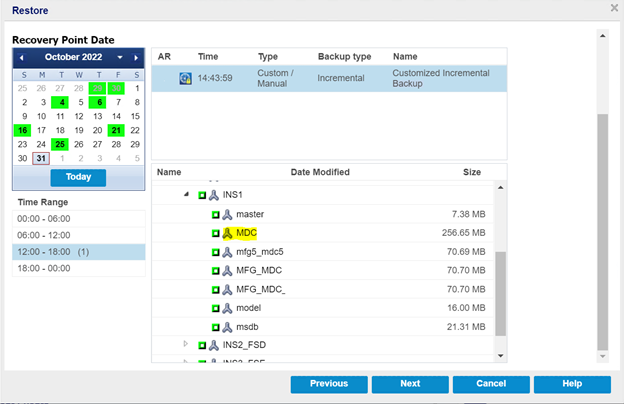
- On the Restore page, select the database that you want to restore, and then click Next.
- From the Restore Options screen, under Destination, select Restore to alternative location, and then click Next.
- Note: If the data you attempt to restore is encrypted, provide the password as needed.
-

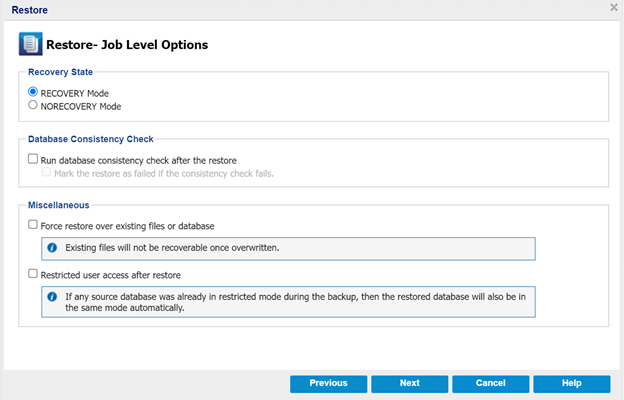
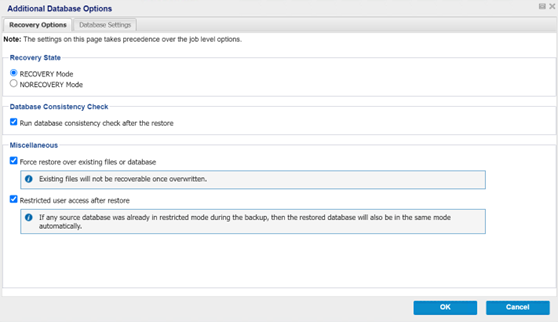
- On the Restore - Job level Options page, do the following, and then click Next:
- Recovery State
- RECOVERY Mode: By default, this option is enabled. It makes the SQL database online to allow data recovery and provides you permission to access the restored database.
- NORECOVERY Mode: The database transitions to a ‘RESTORING’ state to prevent users from accessing the database. To restore the last backup and bring the database online for usage, use the RECOVERY Mode option.
- Database Consistency Check
- To make sure that the database is consistent after a restore, select the Run database consistency check after the restore check box. This option checks the physical and logical integrity of objects in an SQL Server database. The Mark the restore as failed if the consistency check fails option indicates when the restore job fails if the database consistency check fails for the selected database.
- Miscellaneous
- Force restore over existing files or database: This option overwrites the existing database files located at the restore destination. Not selecting this option for an existing database file can make the restore incomplete. You can skip this option when the database file is new.
- Restricted user access after restore: This option restricts access to the database file for a specific group of users such as sysadmin, dbcreator, and/or db_owner. These users have permissions to modify the database.
- Note: If the source database was already in the restricted mode during the backup, the restored database automatically stays in the same mode.
-
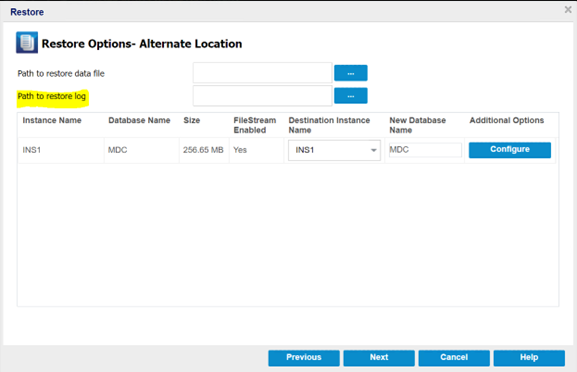
- On the Restore Options- Alternate Location page, do the following:
- Path to restore data file – This option allows you to change the destination location of the MDF, NDF, and FileStream files.
-
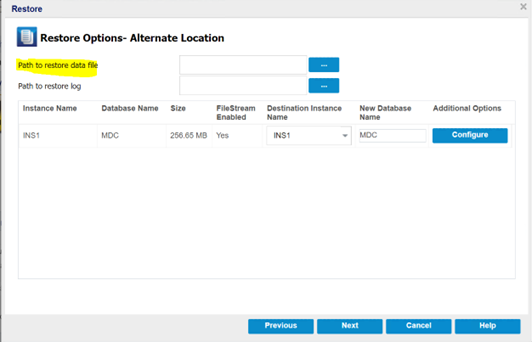
- Path to restore log – This option allows you to change the destination location of the LDF files.
-
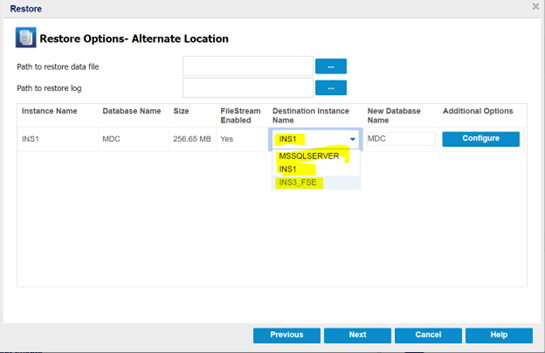
- Click the Destination Instance Name drop-down list to view the size and the FileStream enabled status of the selected database.
-
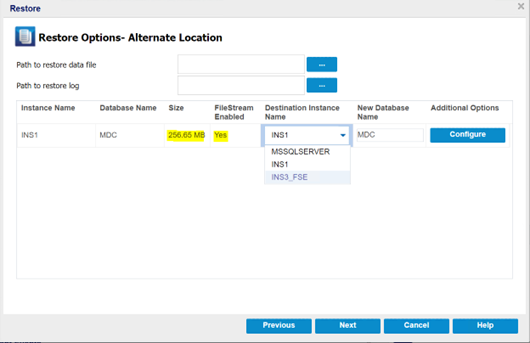
- Note: If a database is FileStream Enabled, the Destination Instance Name field lists only FileStream Enabled servers. However, if the FileStream is not enabled, the Destination Instance Name displays both FileStream enabled and disabled databases.
-
- To rename the database, type the New Database Name as needed.
-
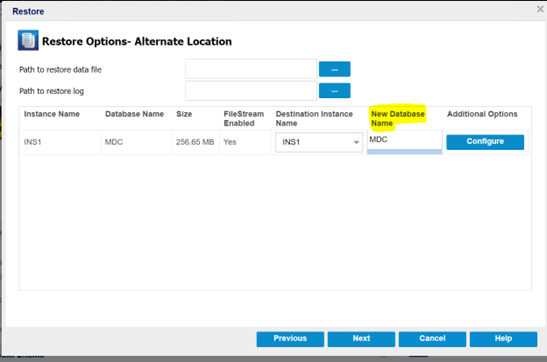
- To configure or change the configuration at a database level, click the Configure button.
-
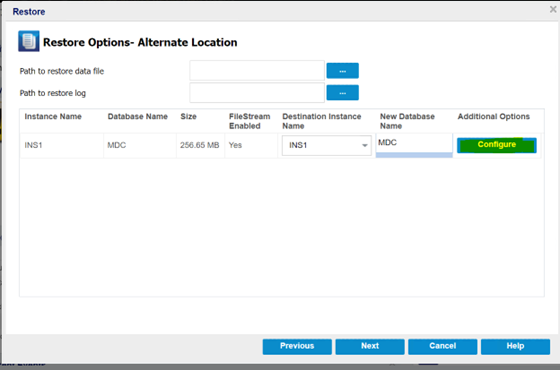
- The Additional Database Options dialog appears.
- In the Recovery Options tab, verify and make any changes to the database options, as needed.
-
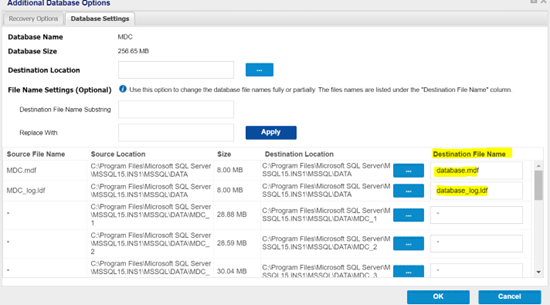
- In the Database Settings tab, do the following:
- To select the Destination Location, click the Browse (…) button.
- Note: When you change the destination location, it also updates the destination for all the database files.
-
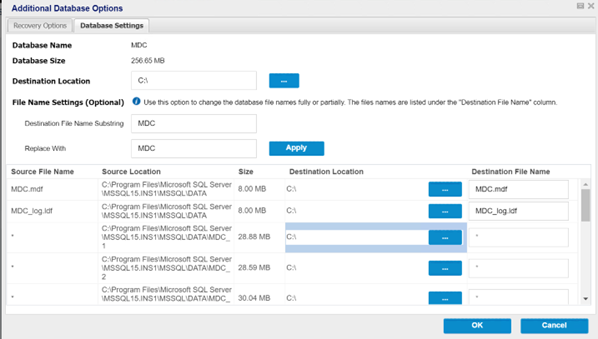
- Under File Name Settings (Optional), you can change the file names partially or fully. To replace the file name, provide the original file name in the Destination File Name Substring field and the new file name in the Replace With field.
-
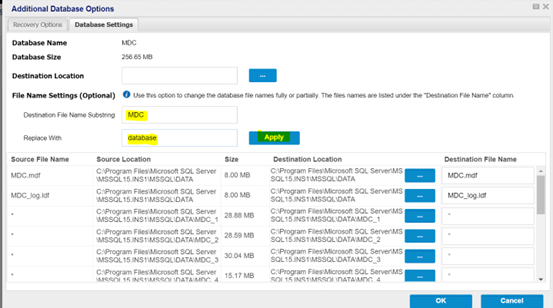
- Click Apply to make the changes.
- Note: The new file names appear under the Destination File Name column.
-
- Click OK to return to the Restore Options- Alternate Location page.
- Click Next.
- The Restore Summary page opens.
- Verify if the settings are correct, and then click Finish to start the restore process.
-

- After the restore finishes, view the restore status in the Activity Log. It also contains information about the renaming of the database and new destination location.
-
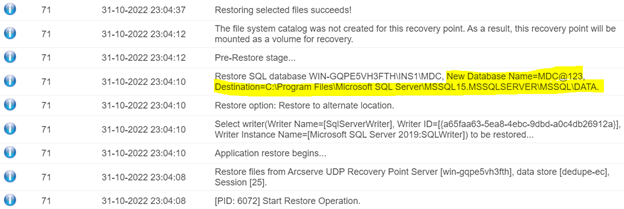
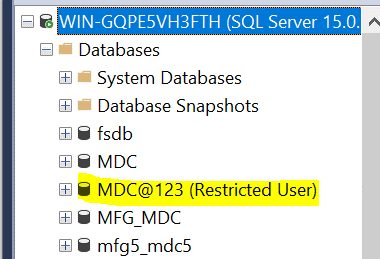
- The instance and the database name changes reflect in the SQL Management Studio.
-