Specify the Recovery Point and Content to Restore
Each time you perform a backup, a recovery point is created. Specify the recovery point information in the Restore dialog so that you can recover the exact data that you want. You can restore specific files or all files depending on your requirement.
Follow these steps:
- Access the Restore dialog in one of the following ways:
- Log into Arcserve UDP console.
- Navigate to resources > Node > All Nodes.
- All the added nodes are displayed in the center pane.
- Right-click the node, and then click Restore.
- You are automatically logged into the agent node console, and the Restore dialog is opened.
- Log into Arcserve UDP Agent (Windows).
- From the home page, click Restore.
- The Restore dialog opens.
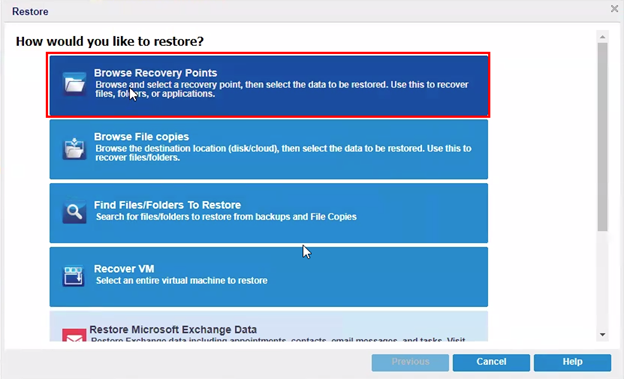
- On the Restore dialog, click the Browse Recovery Points option.
-
- On the Browse Recovery Points page, do the following:
-
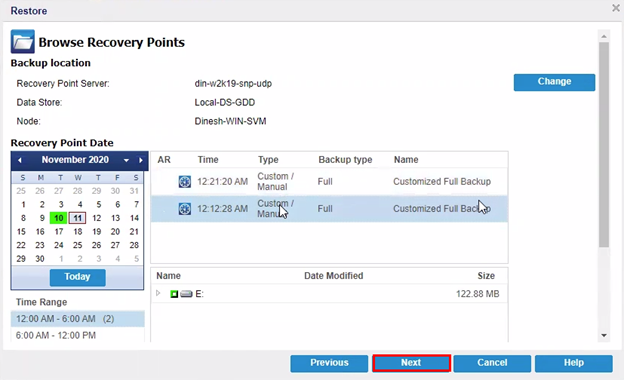
- To update the backup location, click Change.
- The Source dialog opens.
- On the Source dialog, select one of the following backup locations, and then click OK:
- Specify or browse to the location where your backup images are stored, and select the appropriate backup source.
- To verify the connection to the specified location, click the green arrow button. If required, enter the Username and Password credentials to access to that source location.
- The Select backup location dialog opens.
- Select the folder where the recovery points are stored, and then click OK.
- The Select backup location dialog closes, and you can see the backup location on the Source dialog.
- Click OK.
- The recovery points are listed in the Browse Recovery Points dialog.
- Specify the Recovery Point Server setting details, and then click Refresh.
- All the agents are listed in the Data Protection Agent column on the Source dialog.
- Select the agent from the displayed list.
- Click OK.
- The recovery points are listed in the Browse Recovery Points dialog.
- Select the calendar date for the backup image to restore.
- All the dates containing recovery points for the specified backup source are highlighted in green.
- The corresponding recovery points for that date are displayed, with the time of the backup, the type of backup that was performed (Full, Incremental, or Verify), and the name of the backup.
- Select a recovery point to restore.
- The backup content (including any applications) for the selected recovery point displays.
- Note: If a clock icon appears with a lock symbol, it indicates that the recovery point contains encrypted information and may require a password for restore.
- Select the content to restore.
- For a volume-level restore, you can specify to restore the entire volume or selected files/folders within the volume.
- For an application-level restore, you can specify to restore the entire application or selected components, databases, instances, and so on, within the application.
- Click Next.
- The Restore Options dialog opens.
From Arcserve UDP:
From Arcserve UDP Agent (Windows):
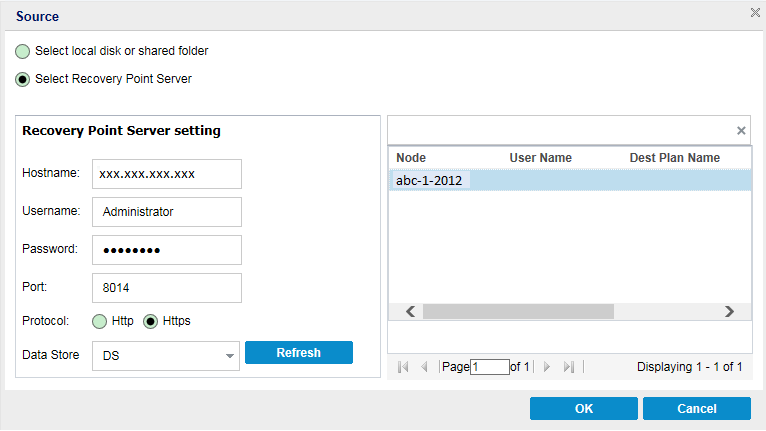
Select local disk or shared folder
Select Recovery Point Server
The recovery point and content to restore is specified.