How to Migrate 32-bit Linux Backup Server to a 64-bit Server
From Version 6 onwards, Arcserve UDP Agent (Linux) will not support a 32-bit server for Linux backup Server. To use Arcserve UDP Agent (Linux) Version 6, migrate the 32-bit Linux server to a 64-bit Linux server.
Follow these steps:
- Reserve the following files and folders in the Arcserve UDP Agent (Linux) installation folder:
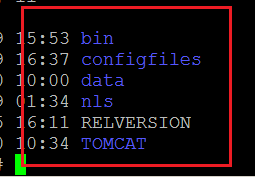
A typical installation folder for Arcserve UDP Agent (Linux) Version 5 was '/opt/CA/d2dserver'/
Note: If the TOMCAT folder is a a large folder, reserve only TOMCAT/conf folder.
- Copy the reserved files and folders to some other location, such as '/opt/d2dserver_32bit/'.
- Package the reserved files and folders at the following location:
tar -czf UDP_LINUX_AGENT.tar.gz /ultraconservative
- Copy the packaged file from the 32-bit Linux OS to the 64-bit Linux OS using scp or ftp.
- Create a folder on the 64-bit OS server using the following command:
mkdir -p /opt/CA/d2dserver
- Extract the packaged file on the 64-bit Linux OS using the following command:
tar -xzf UDP_LINUX_AGENT.tar.gz
- Copy the reserved files and folders to the following location:
/opt/CA/d2dserver
For example: cp -Rp /opt/d2dserver_32bit/* /opt/CA/d2dserver
- Run the Arcserve UDP Agent (Linux) Version 6.0 installation package on the 64-bit Linux server.
- The Linux Backup Server upgrades automatically.
Note: If the host name or IP address is changed, see Configure the System Settings When the Host Name or IP Address is Changed.
Copyright © 2018. All rights reserved.
|
|