Install the Arcserve UDP Agent (Windows) Updates
After you check for a new update and download the update, you can start installing the update.
Note: All updates that are released for Arcserve UDP Agent (Windows) are cumulative. As a result, each update also includes all previously released updates to ensure that your computer is always up-to-date. The Help About dialog displays the update level that is installed on a computer. If necessary, you can use this information for building another server with the same configuration/patch level.
Follow these steps:
- Click the Updates icon.
The Install Updates dialog opens to display information that is related to the available update. The dialog includes information such as description, download status, size, reboot requirement, and a link to the Arcserve server for additional update details.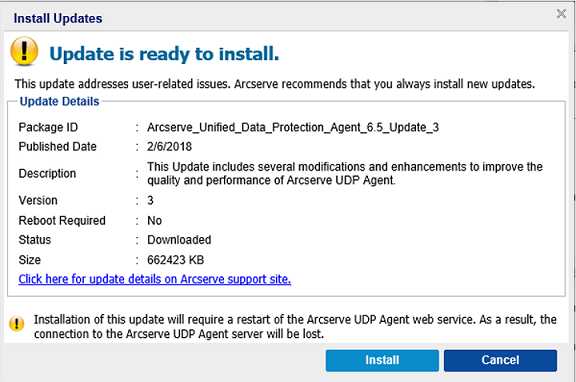
- Review the update details, select OK to reboot machine, and click Install to trigger the installation of the Arcserve UDP Agent (Windows) update.
The new update is installed in your local computer. If the update requires a reboot and you selected the OK to reboot machine option, the computer reboots automatically as part of the install process. Depending on the update status of each computer, you could have different reboot requirements for each computer.
Notes:
- If the update requires a computer reboot and you do not select the OK to reboot machine option, the Install button is disabled. You can then install the update at a more convenient time.
- During installation of the update, Arcserve UDP Agent (Windows) stops the Arcserve UDP Web Service and connection to UI is lost.
- When the update is successfully installed, the Updates icon changes to a green status icon. The green status icon indicates that your computer has been updated and the updates function is enabled.

- Updates can also be installed from the tray icon by clicking the New Update is available balloon message.
- Installation of Arcserve UDP Agent (Windows) updates is complete.
Copyright © 2018. All rights reserved.
|
|