Add Nodes
When you have the IP address or name of a node or set of nodes, you can add them to the Console by specifying their details manually. You can add the following types of nodes:
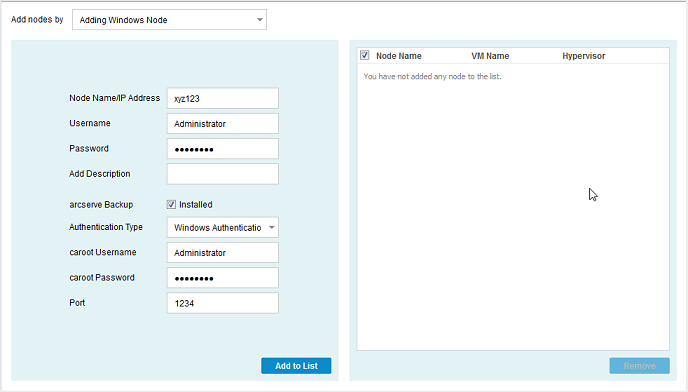
- Windows: Windows source nodes that you want to protect. Arcserve UDP Agent (Windows) is installed on this node.
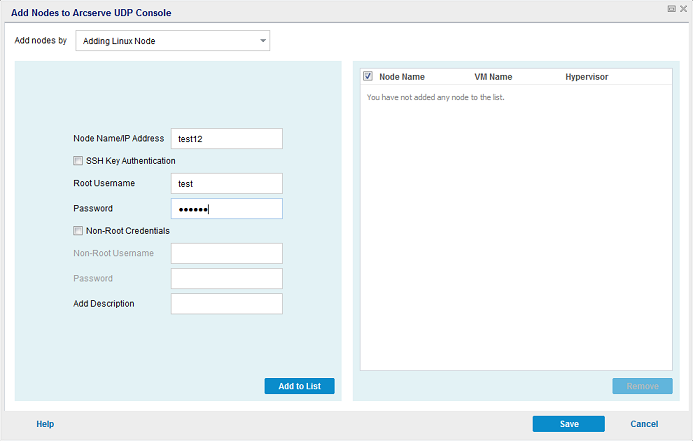
- Linux: Linux source nodes that you want to protect. Arcserve UDP Agent (Linux) is installed on the Linux Backup Server and not on the Linux source nodes.
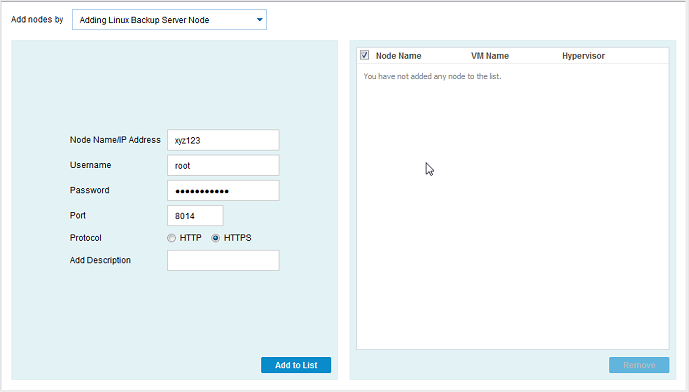
- Linux Backup Server: Linux server that manages Linux source nodes. Arcserve UDP Agent (Linux) is installed on this server.
Follow these steps:
- From the Add nodes by drop-down list, select one of the following options:
- Note: To enable the details for Arcserve Backup, select Installed.
- For Linux, on selecting SSH Key Authentication, you do not need to enter username and password details. For more information about configuring the SSH Key, see Configure the Private Key and Public Key Authentication.
- Before adding a Linux node, you must add a Linux Backup server that manages the Linux nodes.
- For Debian Linux node, non-root credential is not supported. To add the Debian Linux with non-root user, use sudoers. For more information about configuring Sudo, see Configure sudo in Debian in Arcserve UDP Agent (Linux).
- You can log into the Linux Backup Server from the Arcserve UDP Console only when you perform a restore.
- The details of the selected option are displayed.
- Enter the details of the node and click Add to List.
- The node is added to the right pane. To add more nodes, follow the steps again. All the added nodes are listed on the right pane.
- (Optional) To remove the added nodes from the list on the right pane, select the nodes and click Remove.
- Select the nodes to add and click Save.
- The nodes are added and displayed at the Nodes: All Nodes page.
Adding Windows Node
Adding Linux Node
Notes:
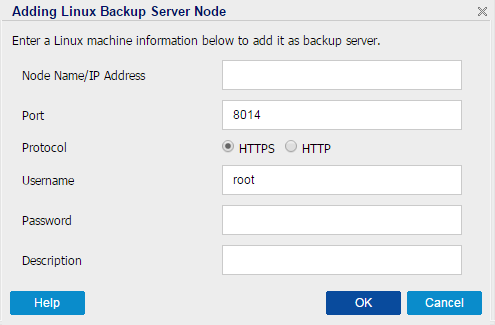
Adding Linux Backup Server Node
The following dialog appears when you add Linux Backup Server node from the Backup: Agent-Based Linux task:
If your Linux Backup server is in the NAT environment, perform the following steps before adding to the Arcserve UDP console:
- Create a file server.cfg on the following Linux backup server folder:
- /opt/Arcserve/d2dserver/configfiles/.
- Add the following line to the server.cfg file:
- nat_enable=true
- Restart Linux Agent using the following command line:
- /opt/Arcserve/d2dserver/bin/d2dserver restart
Note: If this Linux backup server is already added, update the Linux Backup server on the UDP console.