How to Add and Manage Node Groups
Using Arcserve UDP, you can add multiple nodes in to a group. You can add node groups to manage your physical and virtual machine environment.
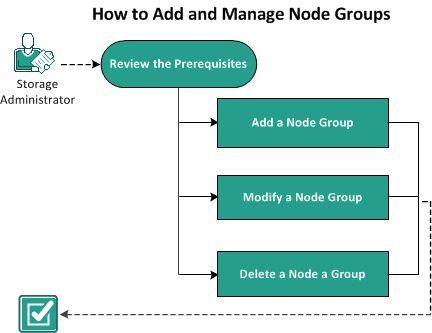
The following diagram illustrates how you can add and manage the node groups:

The Arcserve UDP solution contains following node groups:
- Default Groups:
- All Nodes: Displays all the nodes that are added to the Console.
- Nodes without a Plan: Displays the nodes that do not have any plan assigned.
- Note: You cannot modify or delete the default node groups.
- Groups that appear when you add child groups:
- Plan Groups: Displays the list of plans that you have created. Select each plan under the group to view all the nodes associated with that plan.
- Custom Groups: Displays the list of customized node groups that you have created. For example, the node group that you create by clicking Actions, Node Group, Add from the center pane.
- vCenter/ESX Groups: Displays the nodes that you add using the Importing from vCenter/ESX option.
- Linux Backup Server Groups: Displays the Linux Backup Server nodes.
- Exchange Online Nodes: Displays the Exchange Online nodes.
- UNC Paths: Displays UNC nodes.
- SLA Profile Groups: Displays Service Level Agreement (SLA) related nodes.
- Hyper-V Groups: Displays the nodes that you add using the Importing from Hyper-V option
- Global Dashboard Groups: Displays all the Arcserve Backup branch primary server under the GDB server. The Global Dashboard group is added when you add one Arcserve Backup Global Dashboard server into the Console and perform a Full Arcserve Backup synchronization for the added GDB server.
What To Do Next?