How to Integrate Arcserve UDP 7.0 with Active Directory Using Active Directory Groups
The role-based administration of Arcserve UDP 7.0 allows user-level permission where the Active Directory (AD) feature is not enabled by default. However, the WSO2 Carbon platform in Arcserve UDP 7.0 does not support AD groups that have secondary user store. You can enable the extension for Arcserve UDP 7.0 that configures the AD groups as Arcserve UDP roles and helps assign the permissions automatically for the members in the AD group.
Follow these steps:
- Navigate to the following installation path of Arcserve UDP and open the carbon.xml file:
- …\Program Files\Arcserve\Unified Data Protection\Management\IdentityServer\repository\conf\carbon.xml
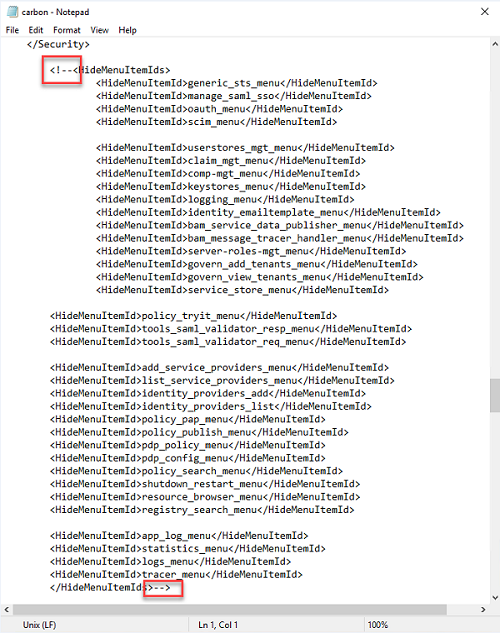
- From the carbon.xml file, disable the contents of HideMenuItemIds using <!-- and --> as displayed in the screenshot below.
-
- Save the carbon.xml file and restart the Arcserve UDP Management service.
- Open the user management console using the following link:
- https://localhost:8015/carbon
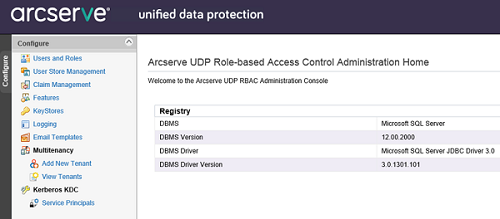
- The Arcserve UDP Role-based Access Control Administration Home page appears.
-
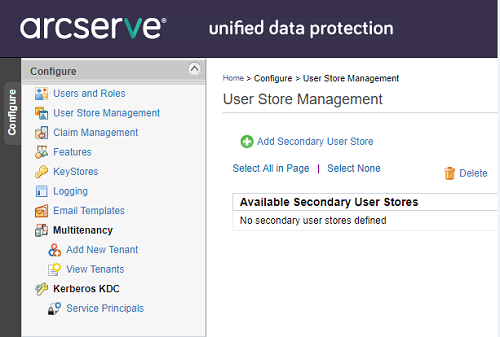
- Click the User Store Management option available on the left pane.
- The User Store Management page appears.
- Click Add Secondary User Store.
-
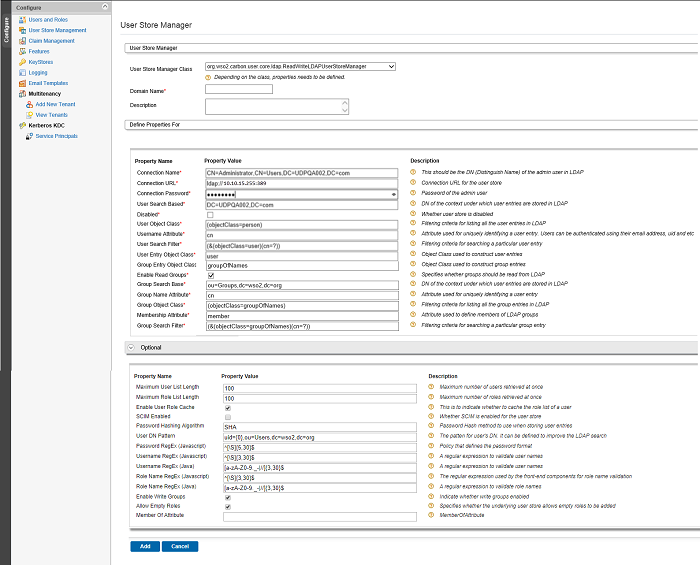
- The User Store Manager page appears.
- Select the required User Store Manager Class option from the drop-down list and enter your domain name in the Domain Name field.
- Enter the details in the fields as required under Define Properties For and Optional groups.
- The screenshot below is an example of the User Store Manager page after entering the details.
-
- Click Add.
- The UDP User Management dialog appears.
- Click OK.
- The User Store Management page appears and displays the added secondary user store.
-
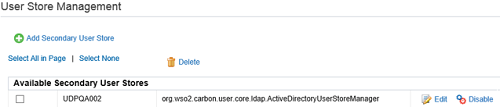
- Note: If the secondary user store is not displayed, refresh the browser.
- (Optional) Click the Users and Roles option from the left pane to view the list of users and roles.
- Note: You need to define roles in the domain using AD.
- Now, perform the following steps to add the UDP role permissions:
- Select an AD user or AD group.
- Assign a role from the available list of roles.
- Click View Role.
- The Role List of User page appears.
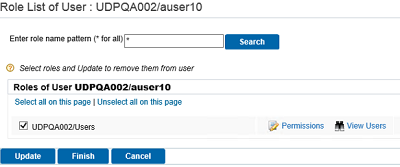
- Click Permissions.
- The list of permissions appear.
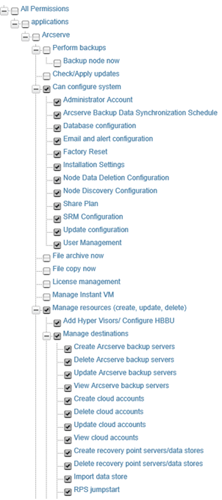
- Select the Permissions as required.
Now, the secondary user can log into the Arcserve UDP Console with the assigned permissions.