Specify the Source
The Source page lets you specify the OneDrive source nodes that you want to protect. You can select more than one OneDrive source nodes in a plan. If you have not added any nodes to the Console, you can add OneDrive source nodes from the Source page.
Note: You can save a plan without adding any source nodes but the plan is not deployed unless you add any nodes.
Follow these steps:
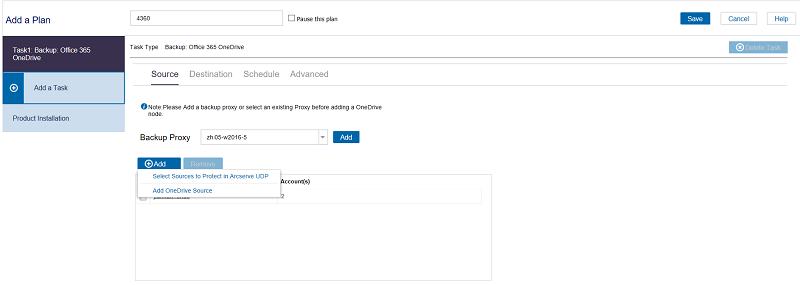
- Click the Source tab.
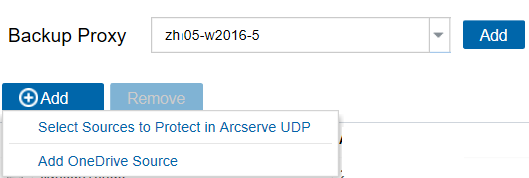
- Add backup proxy using one of the following options:
- Select the Backup Proxy from the drop-down list.
All the OneDrive Node backups and restores are executed from the backup proxy. The RPS servers are listed and added, by default.
- Click the Add button placed in front of Backup Proxy to add a new Backup Proxy to the list.

- Select the Backup Proxy from the drop-down list.
- Add OneDrive node using one of the following options:
- Click Add and then click Select Source to Protect in Arcserve UDP.
- The Add Nodes to Plan dialog is displayed.
- Select a node and click Connect.
- Note: You can also search for the OneDrive nodes that you want to protect in Search.
- Select the Protect all the OneDrive Accounts check box to protect all the OneDrive accounts across all the pages. To select only some accounts, click arrow placed on the right side of check box and specify the accounts.
The OneDrive accounts that you selected are added.
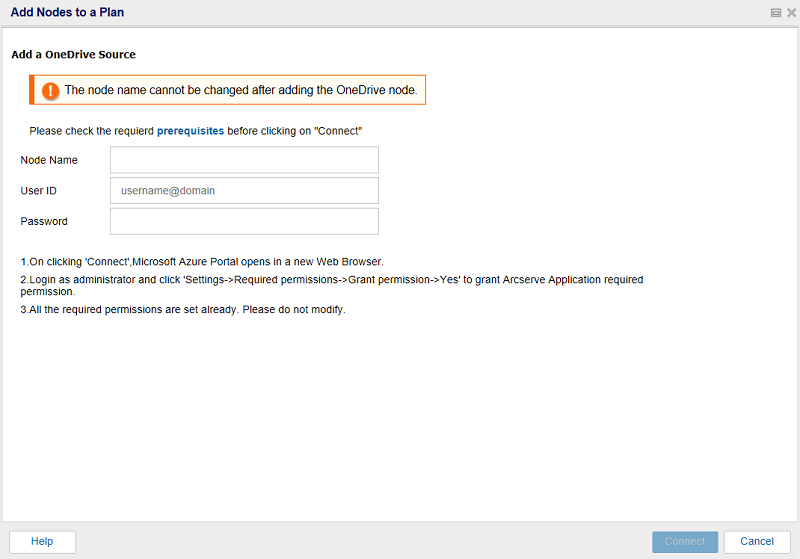
- Click Add and then click Add OneDrive Source in Arcserve UDP.
- Note: Unlike other nodes, you cannot add the OneDrive node from All Nodes page. You can add a OneDrive node only in a plan or when you modify a plan.
- From the Add a OneDrive Source, enter the Node Name and the credential of Azure Active Directory Administrator account.
- Before clicking the Connect button, verify the authentication type used for Office 365 tenant.
- If modern authentication is set on Office 365 tenant, do the following:
- Install patch P00002119. For more information, see Modern Authentication.
- Modern Authentication does not apply to the following:
- Customers using Microsoft 365 (Office 365) for their Arcserve Cloud Hybrid instances or Arcserve Cloud Backup for Office 365, which was created before 18th Oct, 2020 does not allow modern authentication.
- Customers who continue to use basic authentication
- Enter the password, and then click Connect.
- The Azure portal opens.
- Close the Azure portal without making any changes. Skip the instructions on the UDP UI, and then click Next button.
- If basic authentication is set on office 365 tenant, do the following:
- From Arcserve UDP, connect to Microsoft Azure to register UDP as an App in the Microsoft Azure AD.
- After Registration is complete, Arcserve UDP opens a URL in a browser and requests permission for all Arcserve UDP read/write data from the OneDrive portal.
- In the browser, Sign in by using administrator credential of Microsoft Azure.
- From the Microsoft Azure Console, perform the following steps to configure the UDP App:
- Click API permissions.
- On the right pane, click the Grant permissions for button..
- Click Yes to agree to Grant permissions.
- After granting permission, in Arcserve UDP, navigate to Add a Plan > Add Nodes to a Plan, and then click the Next button.
- Select the OneDrive accounts that you want to protect and click the right arrow (>) to move them to the protected list.
- Click Save.
Multiple OneDrive nodes can use the same user account (service account) of OneDrive. To add OneDrive node by plan, now you need to specify the node name, user name, and password. You can specify the node name of OneDrive node name and cannot change after creating the node.
Note: We recommend selecting the user account of Azure Active Directory Administrators.
Note: If you close the grant permission URL and want to reopen it, click the Here button in the UDP Add Node to Plan screen.
Arcserve UDP lists all the account under current tenant.
Note: Select the Protect all the OneDrive Accounts check box to protect all the OneDrive accounts across all the pages.
The OneDrive accounts that you selected are added.
The source is specified. Now, specify the Destination, Schedule, and Advanced details.