Specify the Settings for Mount Recovery Point
Specify the settings for Mount Recovery Point to choose the proper share method.
Follow these steps:
-
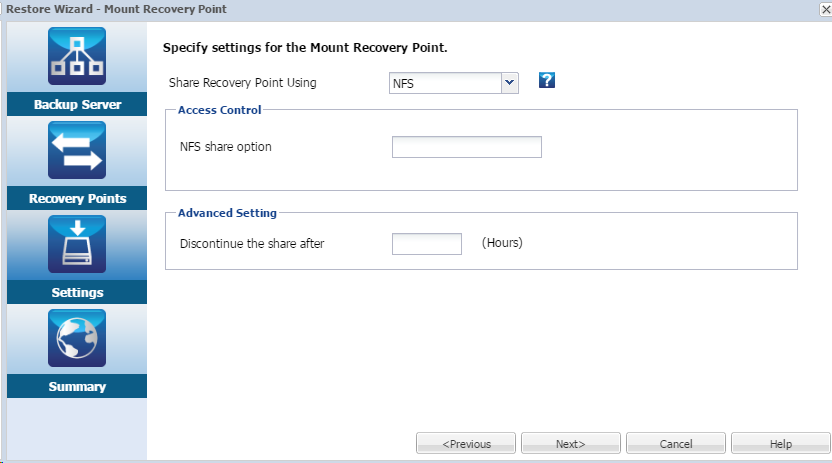
To Mount the Recovery Point through NFS, follow these steps:
-
Select NFS from share method drop-down list.
The files in the recovery point will be shared via NFS. And you can mount the NFS share on any machine which can access the Linux Backup Server.
-
(Optional) Enter NFS share option according to your requirement.
Consult man page for exports, candidate options, and valid format. Leave it empty if you don’t need access control.
-
Enter Hour for time that share will be discontinued after the specified hour(s).
If you enter 0 for this field, the share could be access forever.
-
Click Next.
Summary page for Mount Recovery Point Job opens.
-
-
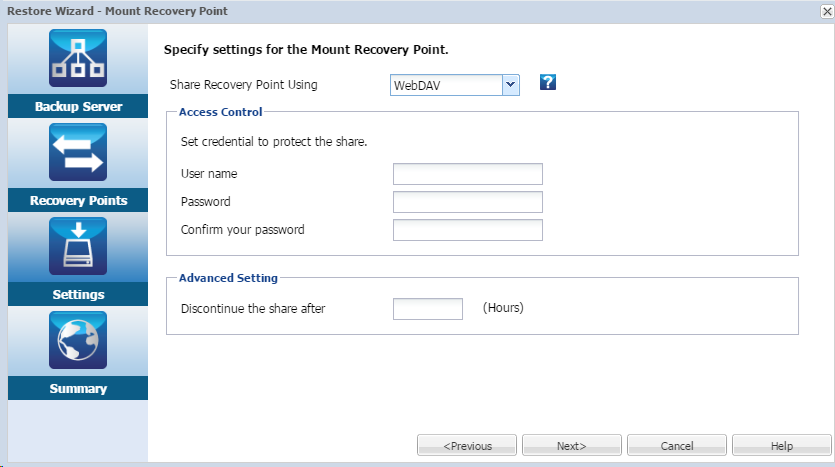
To Mount Recovery Point through WebDAV, follow these steps:
-
Select WebDAV from share method drop-down list.
The files in the recovery point will be shared via WebDAV. And you can mount the WebDAV share using mount.davfs. This is the recommended method when you need access the share across internet.
-
Enter Username, Password, and re-type your password to Confirm your password for Access Control.
Please remember the User name and Password, as they will be required for you access the mounted recovery point.
-
Enter Hour for time that share will be discontinued after the specified hour(s).
If you enter 0 for this field, the share could be access forever.
If the time reaches the specified hour, the mounted recovery point could not be accessed.
-
Click Next.
The Summary page for Mount Recovery Point Job opens.
-