Specify the Recovery Points
Each time that you perform a backup, a recovery point is created. Specify the recovery point information in the Restore Wizard so that you can recover the exact data that you want. You can restore specific files or all files depending on your requirement.
Important! To perform a BMR from a recovery point, the root volume and the boot volume must be present in the recovery point.
Follow these steps:
- Select a session from the Session Location drop-down list and enter the full path of the share.
- For example, consider the Session Location as NFS share, xxx.xxx.xxx.xxx as the IP address of the NFS share, and the folder name is Data. You would enter xxx.xxx.xxx.xxx:/Data as the NFS share location..
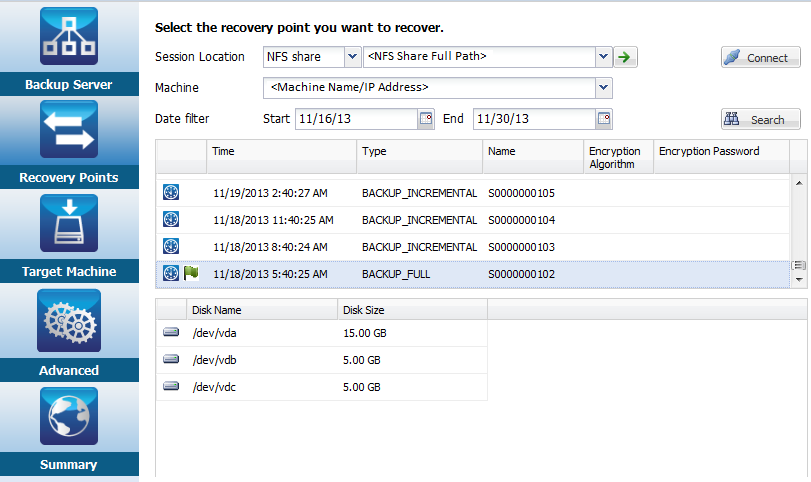
- Click Connect.
All the nodes that have been backed up to this location get listed in the Machine drop-down list.
- Select the node that you want to restore from the Machine drop-down list.
All the recovery points of the selected node get listed.
- Apply the date filter to display the recovery points that are generated between the specified date and click Search.
Default: Recent two weeks.
All the recovery points available between the specified dates are displayed.
- Select the recovery point that you want to restore and click Next.
The BMR Target Instance page opens.
The recovery point is specified.