Specify the Recovery Point and Microsoft SQL Server Database
Use the Browse Recovery Points option to restore from a recovery point. When you select a recovery date, all the associated recovery points for that date are displayed. You can then browse and select the Microsoft SQL Server database to be restored.
Follow these steps:
- Access the restore method selection dialog in one of the following ways:
- From Arcserve UDP Console:
- Log into the Arcserve UDP Console.
- Navigate to resources > Node > All Nodes.
- All the added nodes are displayed in the center pane.
- Right-click the node, and then click Restore.
- You are automatically logged into the agent node console, and the Restore dialog opens.
- From Arcserve UDP Agent (Windows):
- Log into the Arcserve UDP Agent (Windows).
- On the home page, select Restore.
- The Restore dialog opens.
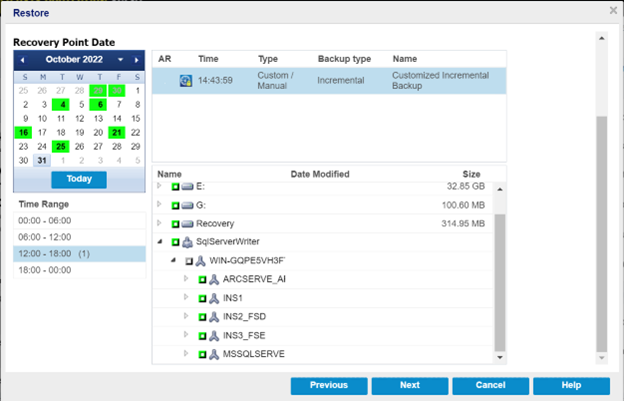
- On the Restore dialog, click the Browse Recovery Points option.
- The Browse Recovery Points page appears.
- Select the date for recovery from Recovery Point Date, the scheduled time for recovery from Time Range, select the Microsoft SQL Server database to be restored.
- The corresponding marker box becomes filled (green) to indicate that the database has been selected for the restore.
- Note: If you do not want the transaction log files to be applied after the restore, you must manually delete it before the restore is performed. For more information about manually deleting the transaction log files, refer to the Microsoft SQL Server documentation.
- Click Next.
- The Restore Options dialog opens.